How to: Build a Rear Luggage Rack
Posted: Thu Mar 15, 2012 6:37 pm
How to: Build Your Own Rear Rack
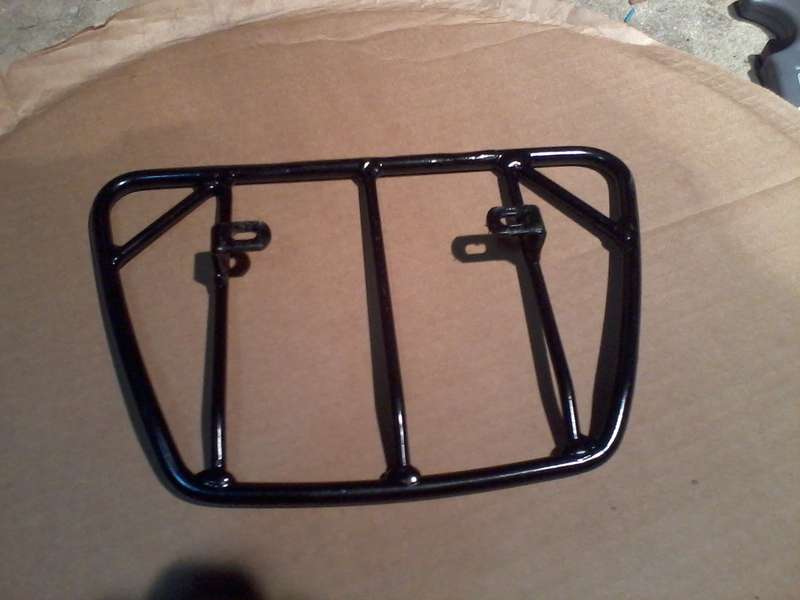
If your not caught up on the forum I just recently purchased a rear rack off of ebay that was supposed to be for an XJ600. It probably was but for the pre-diversion ones. Anyway I made it work and it turned out really nice! Here is what I started with:
Sorry for the small picture its all I got
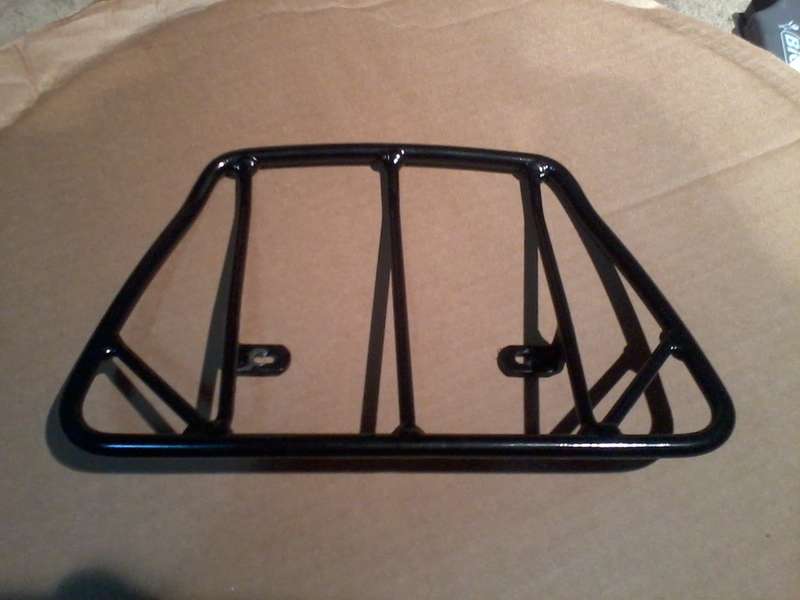
I mocked up the rack the first time and it appears that the center mounting tabs line up with pre-existing threaded holes in the tail part of the frame and the front tabs line up with the mounting holes for the passenger handles. I came to the conclusion that both mounting tabs wont work and that both weren't necessary. So I took the rack into the university shop and cut the front two tabs off. Next I did the paint thing. Primer, black basecoat, two coats of clear. Im not worried about it too much so I didn't do any sanding or prep work. It turned out great:
Ok now that I have a workable part I can start with the mounting. Since my rear fairings interfered with the rack mounting tabs I had to cut reliefs into them. This would have been better done if I would have had a dremel tool. Nevertheless, it turned out ok with only minute defects in the cuts.
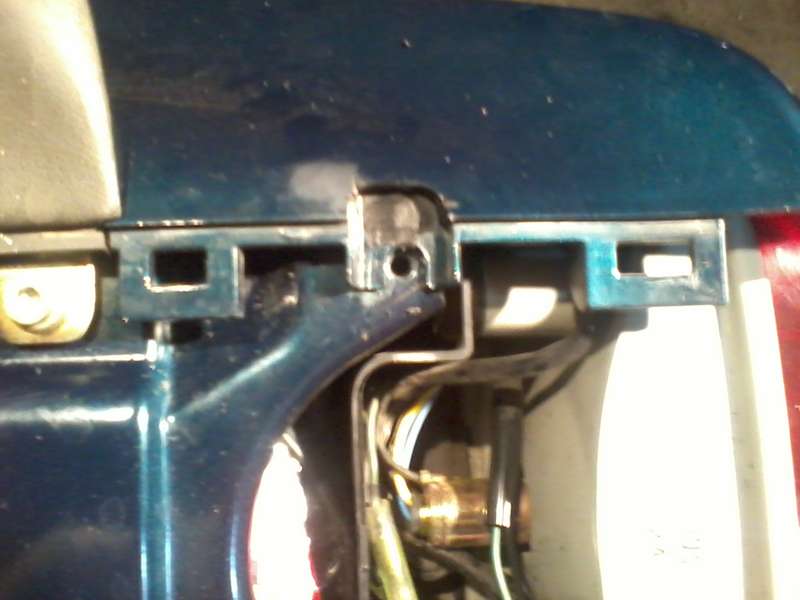
Next I focused attention on mounting and removal and how to incorporate the rack and still be able to mount up the middle portion of the rear fairing. I decided to drill holes in the middle rear fairing. This seems to be the most effective and best looking alternative to mounting the rack. It allows the rack to be taken off easily but removal of the rack requires removal of the middle tail fairing as well. This makes the rack a permanent fixture of the bike, unless you dont mind empty holes in your fairings lol...
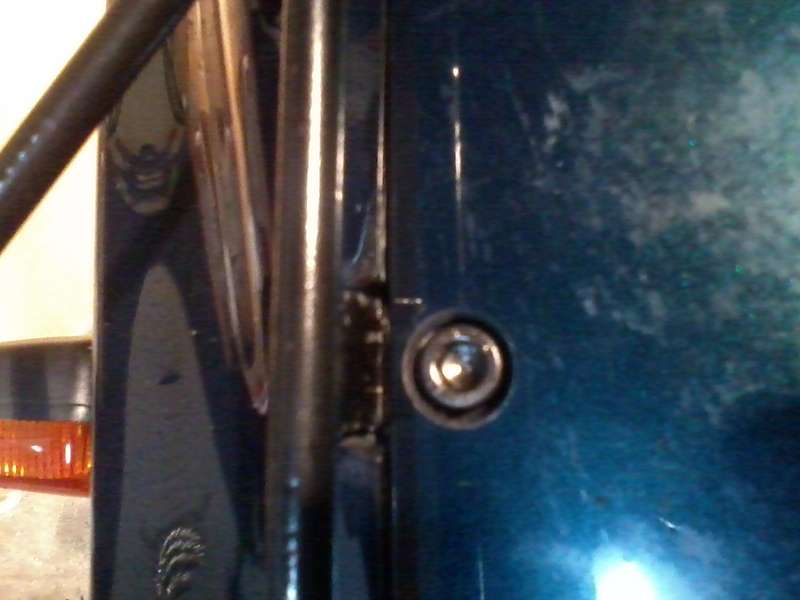
After I did one side without any real precise measuring I flipped the rear tail cover over and seen that there are perforated circles that are exactly where you need to drill out. I wish I would have seen that first but both sides turned out great but the second one was just slightly better since I had a solid guide.
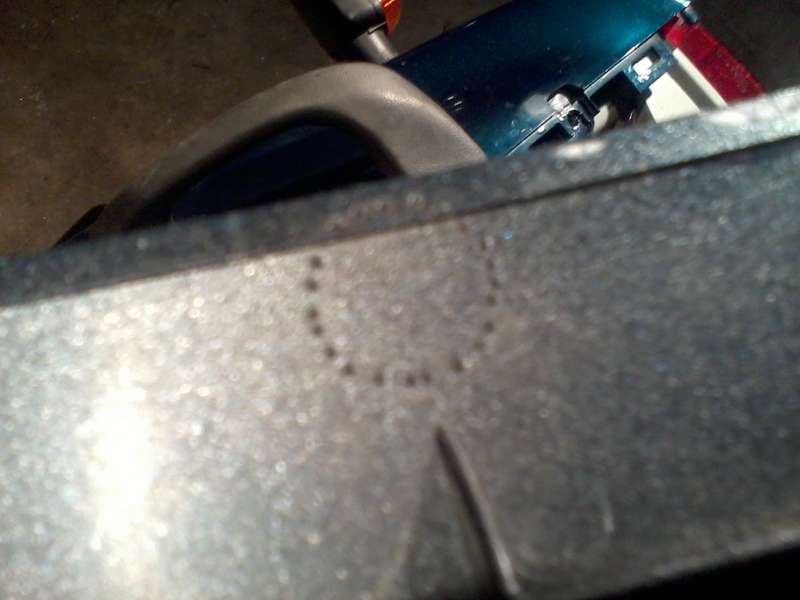
I think the holes are 1/2" in diameter but I used a conical grinding stone to widen the hole to the correct diameter after I used a 3/8" drill-bit to create the hole. ( I did use 3 steps of pilot holes first that way the large drill-bit wouldnt rip my plastic.
To mount the rack I used M-6 x 1" allen head bolts ( the same ones you would use for the carb sync screw replacement mod) Which I had in stock :grins:
And Shes installed!! And lookin good except today I gouged the underside of the paint job pulling out one of the bolts :wallbash: oh well you cant see it...
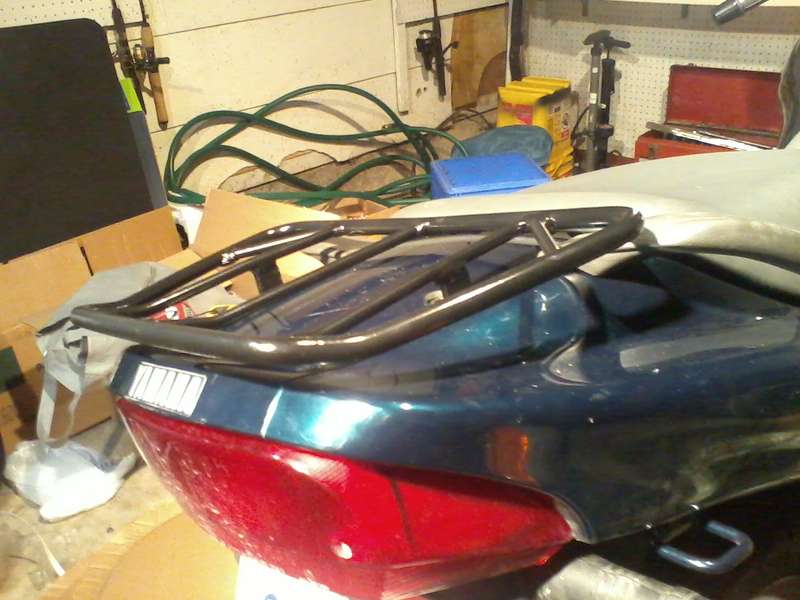
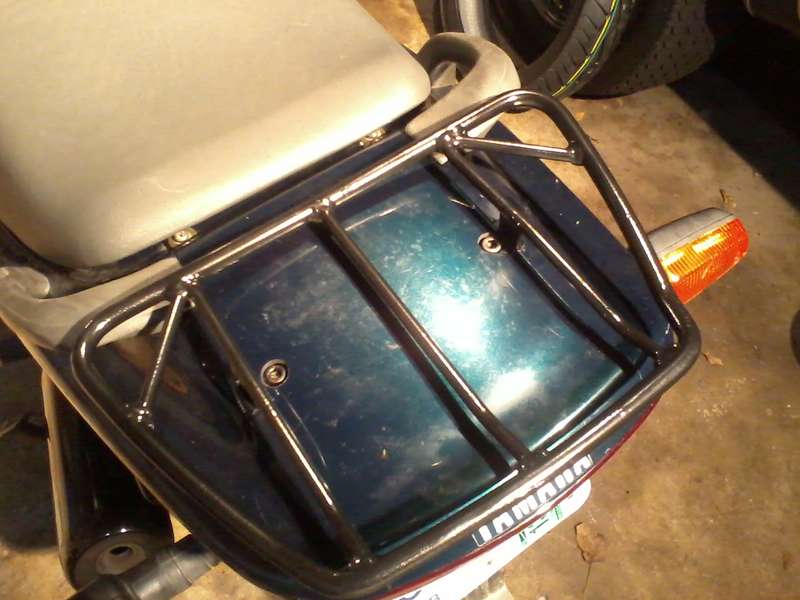
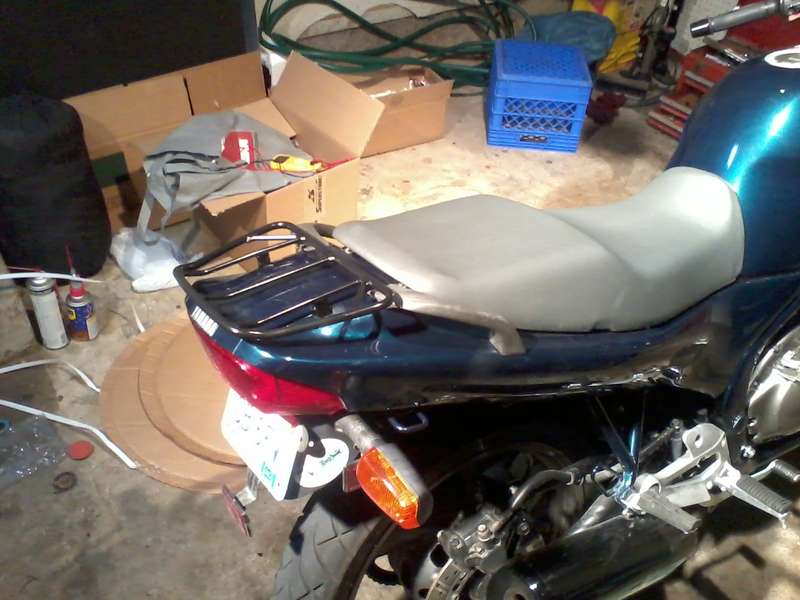
And now I can have my tailbag on the bike and be able to remove the seat to get to my helmet hangers and also I can ride two up with extra luggage space.
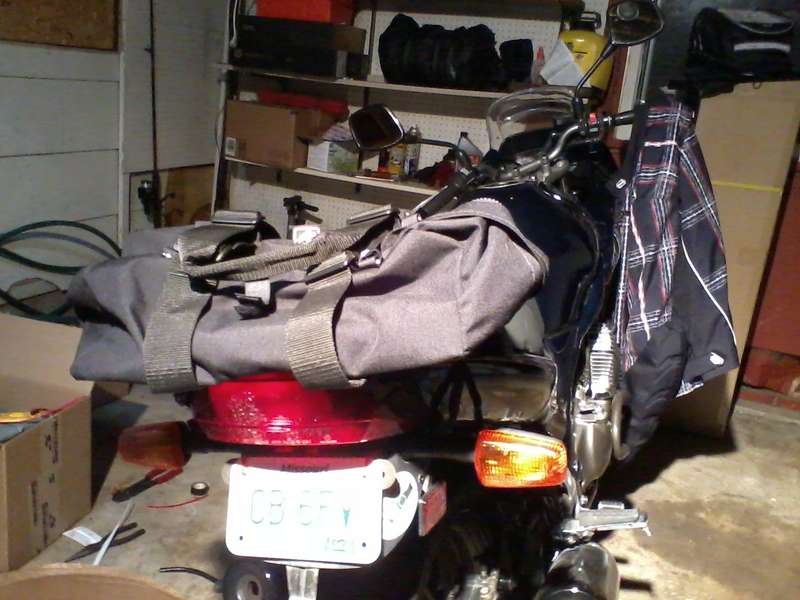
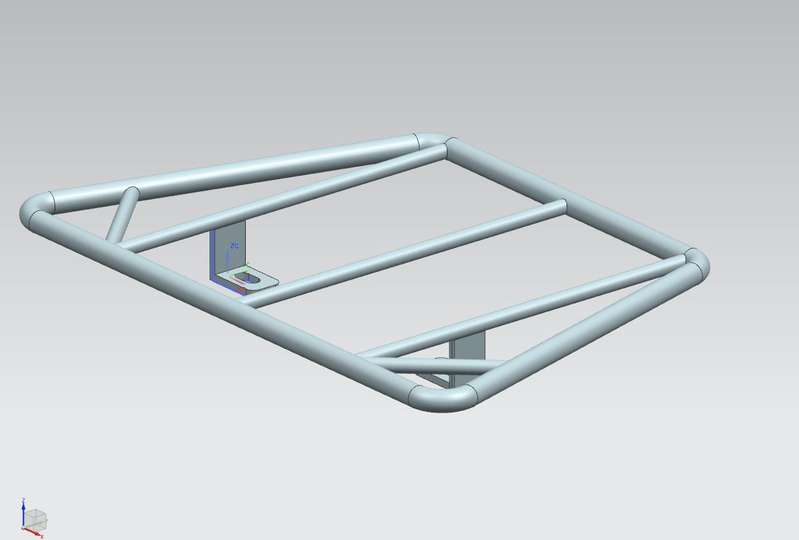
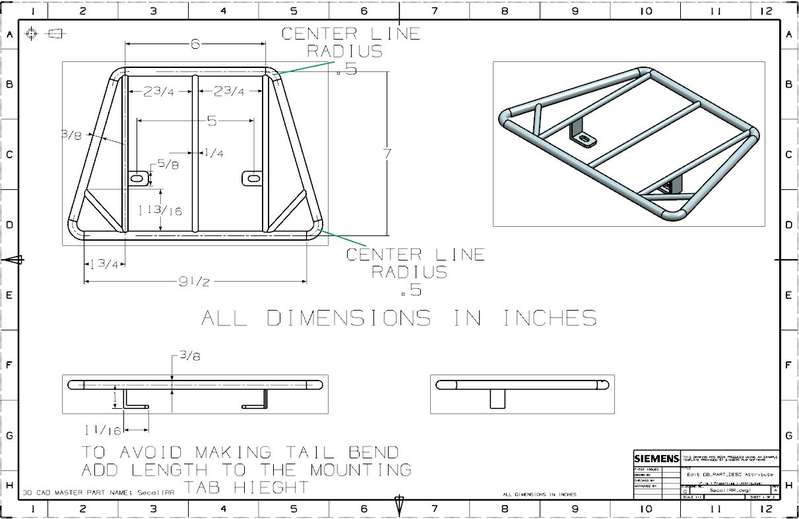
I was not able to do the specs drawing today but am really really gonna try to do it tomorrow so look forward to that.
If your not caught up on the forum I just recently purchased a rear rack off of ebay that was supposed to be for an XJ600. It probably was but for the pre-diversion ones. Anyway I made it work and it turned out really nice! Here is what I started with:

Sorry for the small picture its all I got
I mocked up the rack the first time and it appears that the center mounting tabs line up with pre-existing threaded holes in the tail part of the frame and the front tabs line up with the mounting holes for the passenger handles. I came to the conclusion that both mounting tabs wont work and that both weren't necessary. So I took the rack into the university shop and cut the front two tabs off. Next I did the paint thing. Primer, black basecoat, two coats of clear. Im not worried about it too much so I didn't do any sanding or prep work. It turned out great:


Ok now that I have a workable part I can start with the mounting. Since my rear fairings interfered with the rack mounting tabs I had to cut reliefs into them. This would have been better done if I would have had a dremel tool. Nevertheless, it turned out ok with only minute defects in the cuts.

Next I focused attention on mounting and removal and how to incorporate the rack and still be able to mount up the middle portion of the rear fairing. I decided to drill holes in the middle rear fairing. This seems to be the most effective and best looking alternative to mounting the rack. It allows the rack to be taken off easily but removal of the rack requires removal of the middle tail fairing as well. This makes the rack a permanent fixture of the bike, unless you dont mind empty holes in your fairings lol...

After I did one side without any real precise measuring I flipped the rear tail cover over and seen that there are perforated circles that are exactly where you need to drill out. I wish I would have seen that first but both sides turned out great but the second one was just slightly better since I had a solid guide.

I think the holes are 1/2" in diameter but I used a conical grinding stone to widen the hole to the correct diameter after I used a 3/8" drill-bit to create the hole. ( I did use 3 steps of pilot holes first that way the large drill-bit wouldnt rip my plastic.
To mount the rack I used M-6 x 1" allen head bolts ( the same ones you would use for the carb sync screw replacement mod) Which I had in stock :grins:
And Shes installed!! And lookin good except today I gouged the underside of the paint job pulling out one of the bolts :wallbash: oh well you cant see it...


And now I can have my tailbag on the bike and be able to remove the seat to get to my helmet hangers and also I can ride two up with extra luggage space.

I was not able to do the specs drawing today but am really really gonna try to do it tomorrow so look forward to that.

