Typically, the vacuum side of the fuel petcock will fail and will not shut-off the flow of fuel when the bike is off. Because the tank is higher than the carbs, this fuel will exert pressure on the float-needle valves and float-body O-rings inside the carbs. If either of these leaks, fuel will then fill up the cylinder. Since fuel is incompressible, when the rider presses the starter button to start the bike, the piston will try to compress the fuel. When this happens, the starter gear exerts force on the starter idler and since its the weak link, the starter idler gear will strip.
What can I do to keep this from happening:
Keep your fuel system in good shape. Replace your petcock if it shows signs of failure including leakage including failure of the vacuum switch. Replace your needle float valves and their body o-rings every few years.
How long does it take to remove and replace the starter gear?
Doing this for the first time, it took me 30 hours over the course of a weekend, to disassemble the engine, clean up the parts, replace the starter idler and reassemble the engine. This does not include the time to remove the engine from the bike or to reinstall it in the bike once done.
What references are available to help?
You can find an electronic service manual on The Wall.
I used this starter idler gear PDF as a reference when disassembling the engine and accessing the idler gears.
Should I buy a used starter gear or a new one?
Yamaha redesigned the starter gears, recently, to help alleviate this problem. The new gears are much more robust and should be more durable to prevent this from reoccurring in the future.
The revised part numbers are:
- Revised Starter-side Idler Gear P/N: 4BP-15512-00-00
Revised Primary-side Idler Gear P/N: 4BP-15517-00-00
What seals and gaskets do I need for reassembly?
The seals, o-rings and gaskets needed for reassembly in addition to the starter gears are as follows:
- Crankshaft seal (I recommend without lip):
- With lip - 93101-32144-00
Without lip - (Get a camshaft seal for a 2009 Subaru Legacy with the 2.5 engine)
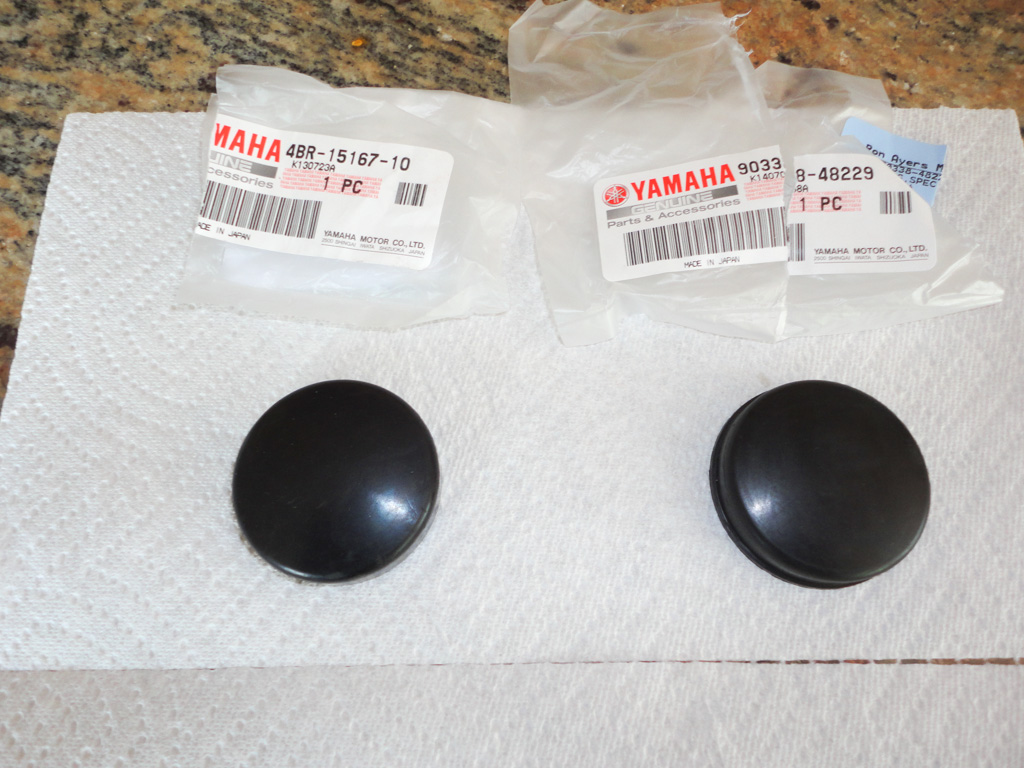
- With lip - 90338-48229
Without lip - 4BR-15167-10
Stator shaft seal - 93102-25253
Stator seal retainer o-ring - 93210-48460-00
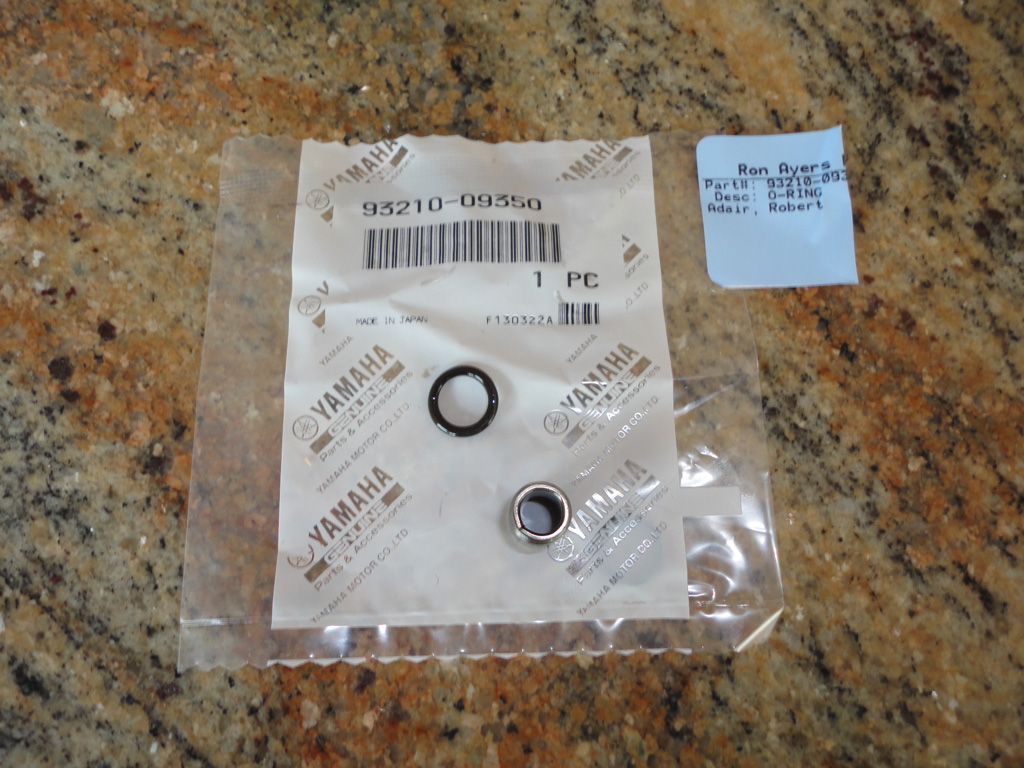
Oil-galley o-ring for between the two crankcase halves -93210-09350
Oil pump o-rings (you need two) - 93210-13361-00
Clutch cover gasket - 4BR-15461-00-00
Flange sealant (for the crankcase halves) - Motoseal - With lip - 93101-32144-00
What else should I do while I'm at this?
Replace your petcock with a brand new one. Consider replacing your clutch discs if they're worn. Also, consider refreshing the cylinder head and setting valve clearances. These procedures are quite easy with the engine removed.
How do I replace the starter gear?
Here is the basic overview of what's required to replace the starter idler gears on a 1992-1998 Yamaha Seca II:
Prepare the engine:
Remove the engine from the bike, drain the oil, remove the spark plugs and remove the intake manifolds. Remove the oil filter and the oil filter adapter.
Replace the starter idler gears:
Remove the clutch cover:
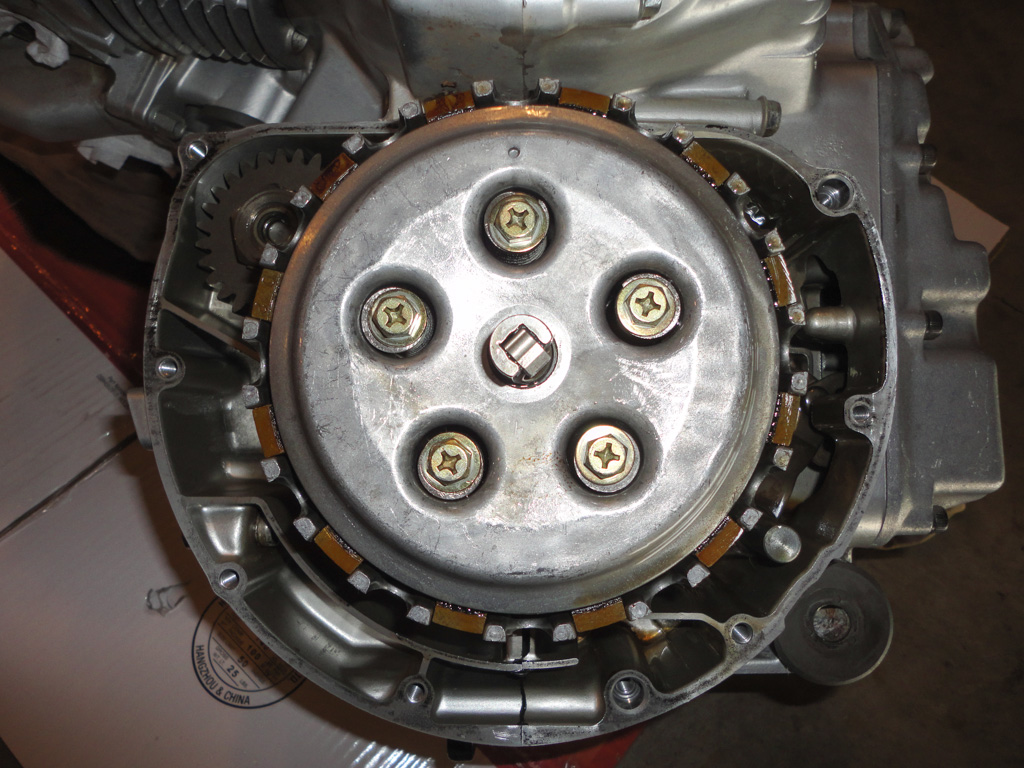
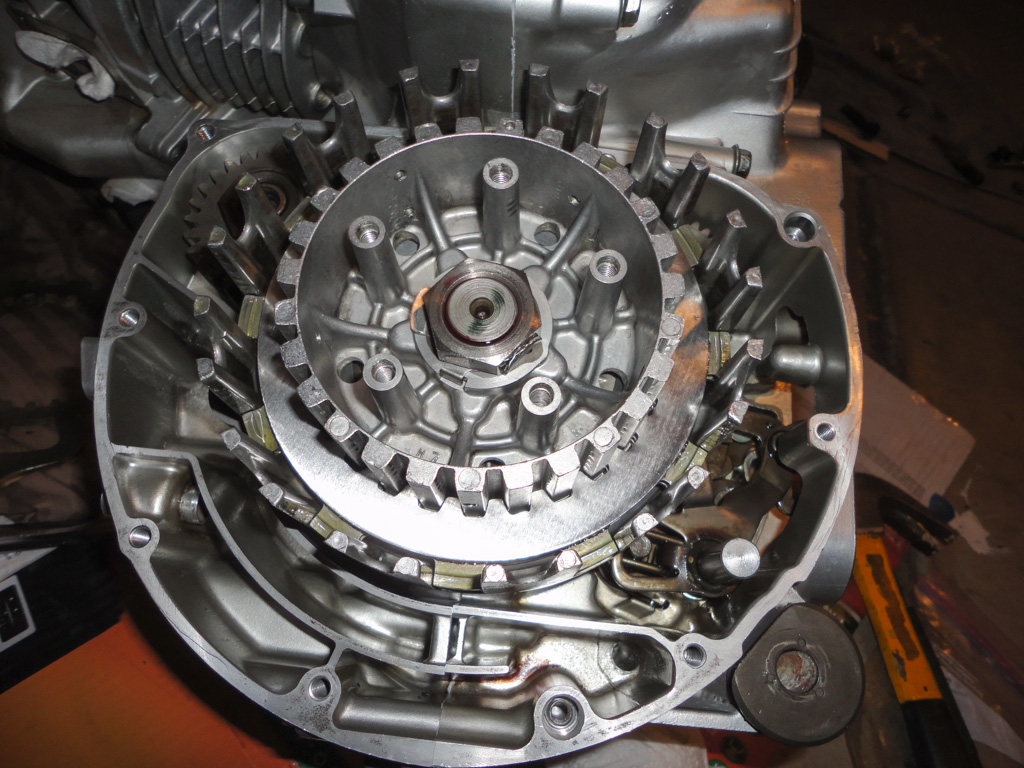
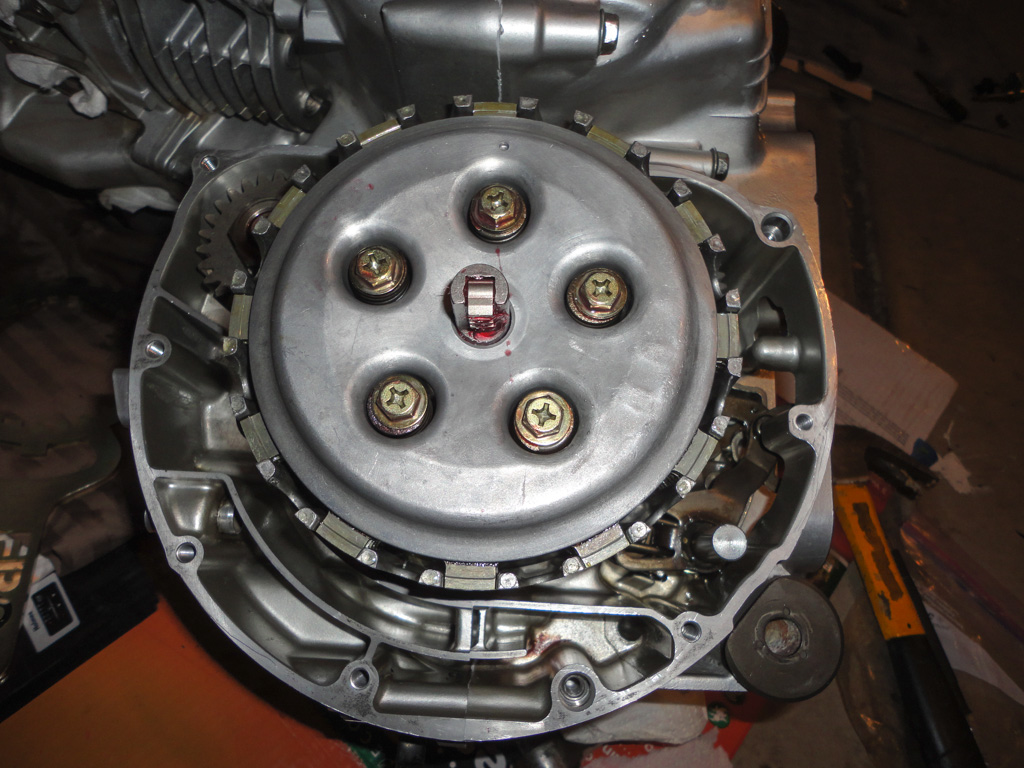
Remove the 5 bolts and lift off the pressure plate and clutch springs:
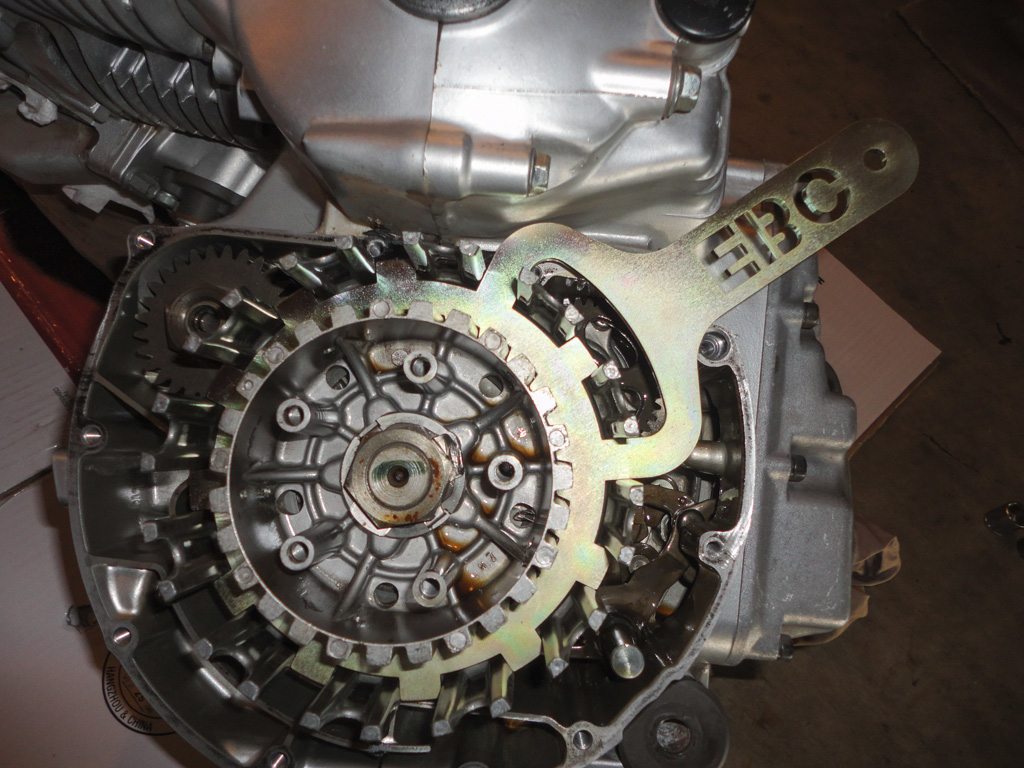
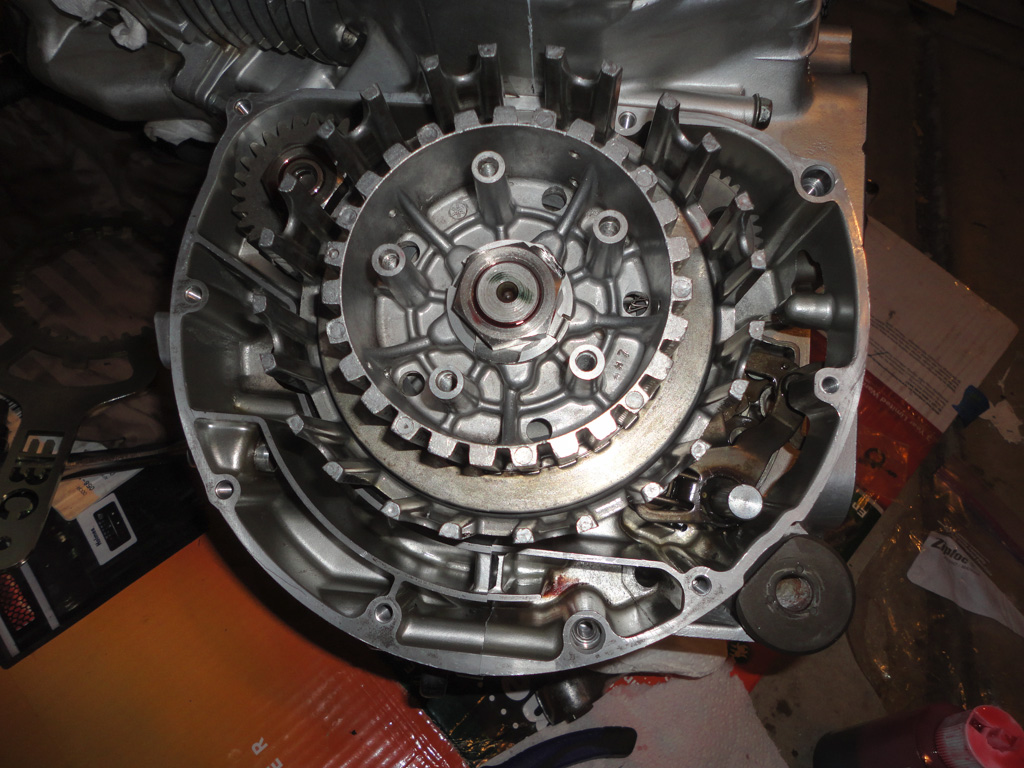
Use a clutch-basket tool to hold the clutch basket. Remove the clutch nut:
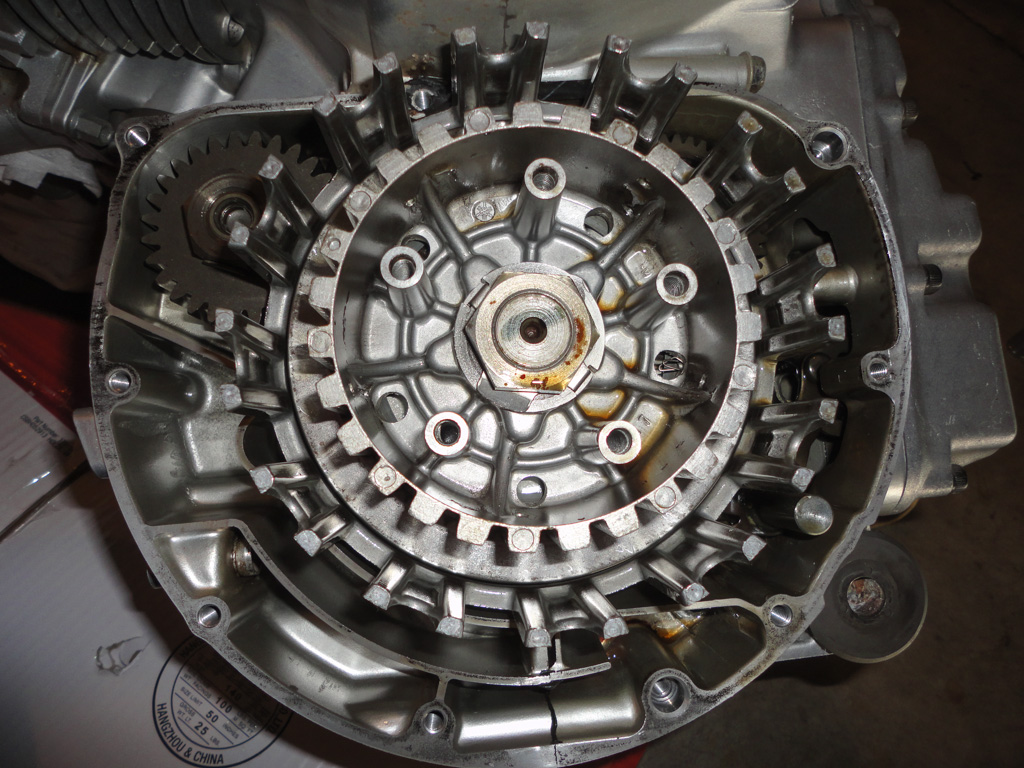
Lift off the clutch basket:

Remove the oil pump:

Bend back the tab and remove the primary nut:
Turn the engine upside down and remove the sump cover:
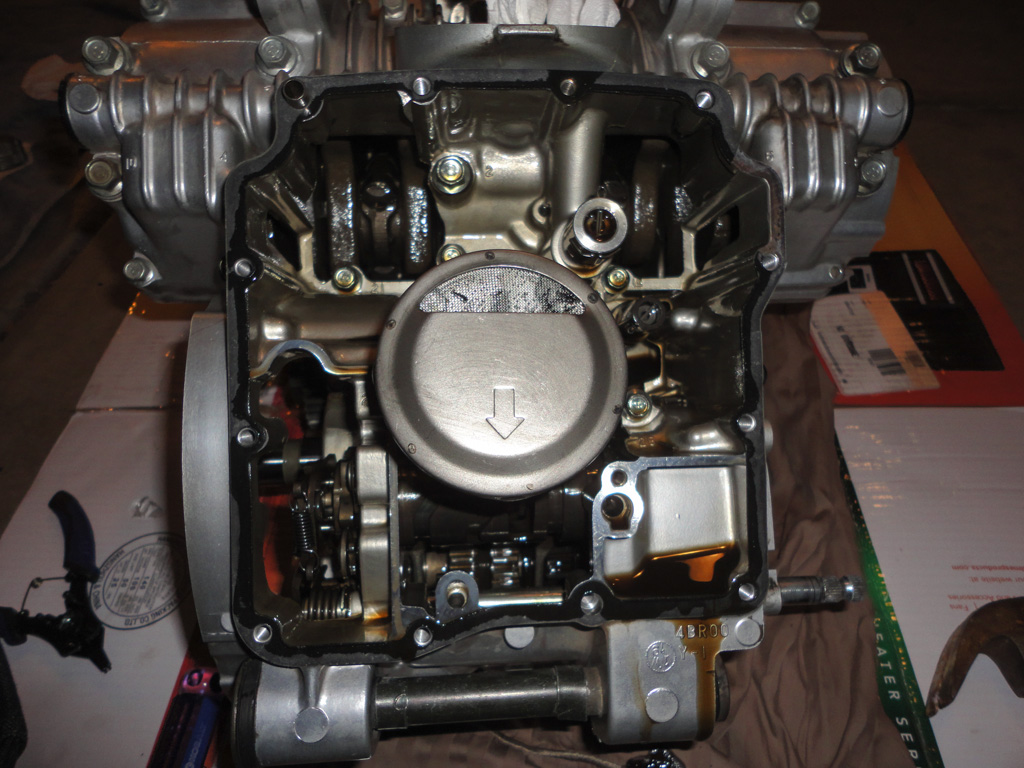
Pop off the oil strainer. If your engine was run after the idler gear stripped, you'll likely find the missing teeth inside the oil pickup strainer:
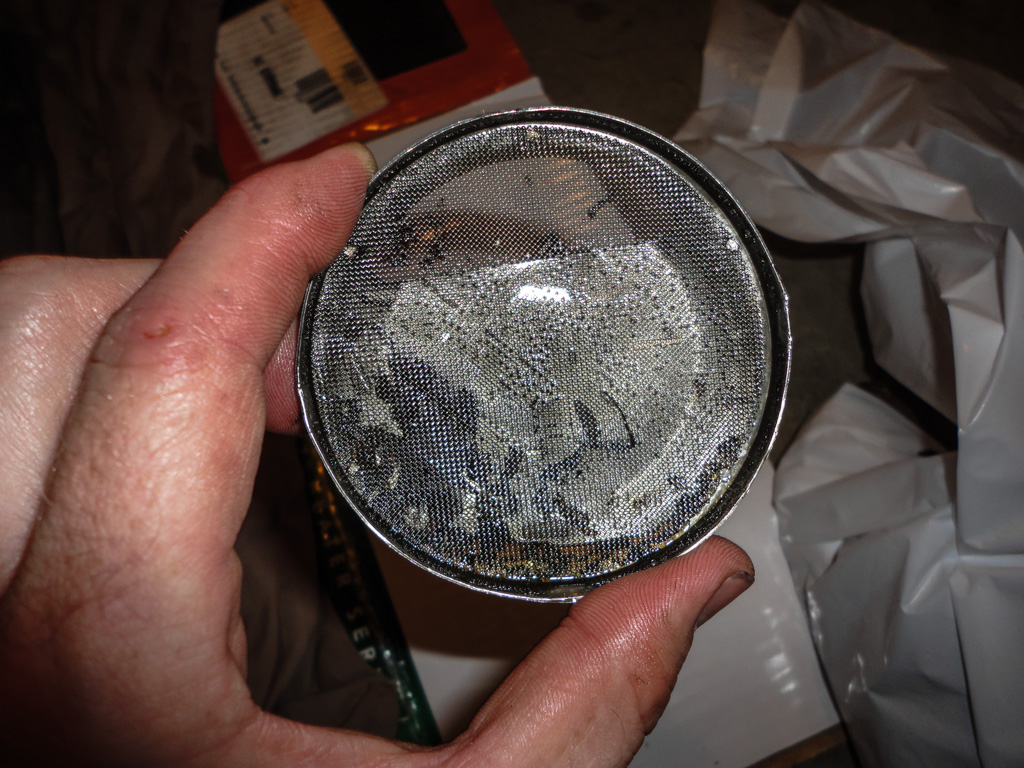
And remove the oil pickup:

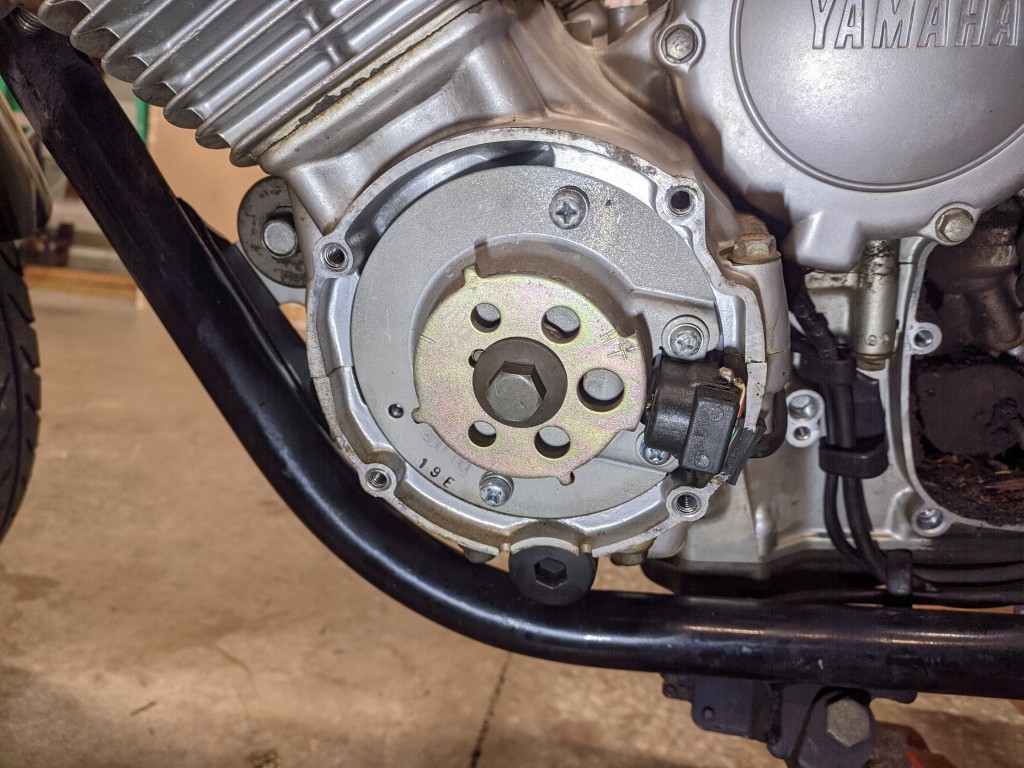
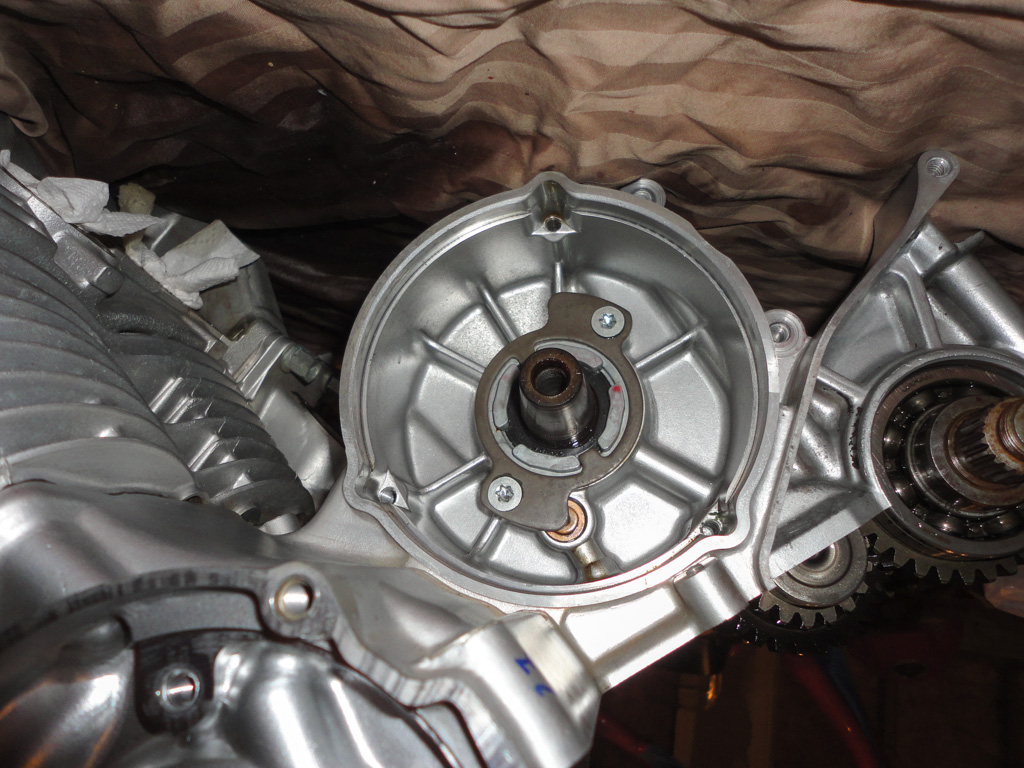
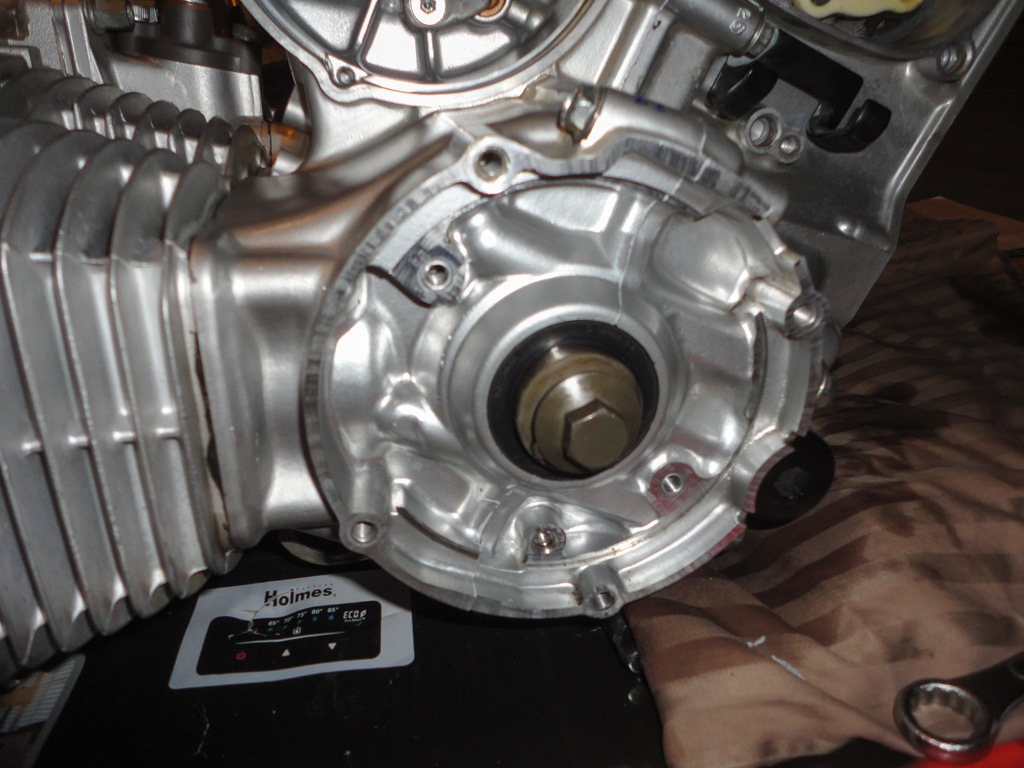
On the righthand side of the engine, remove the timing rotor and the pickup-sensor plate:
Flip the engine back over and remove the bolts securing the two-halves of the crankcase. The numbers cast into the crankscase are the tightening-sequence for the bolts. Remove them in reverse order in 1/4-turn increments:
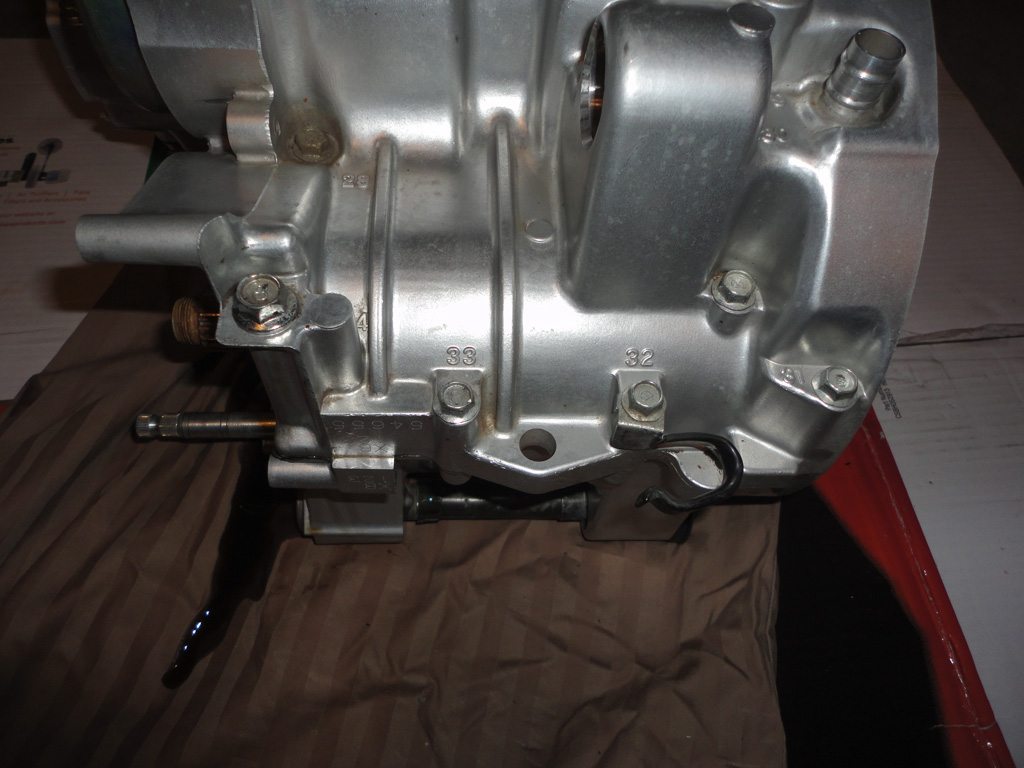
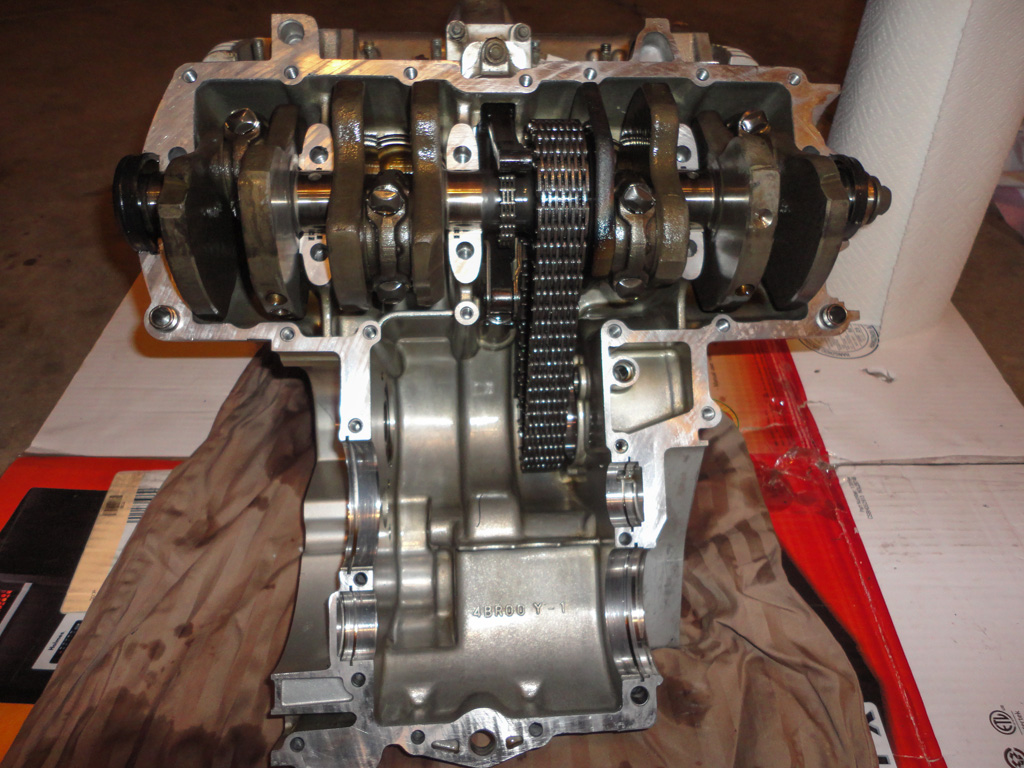
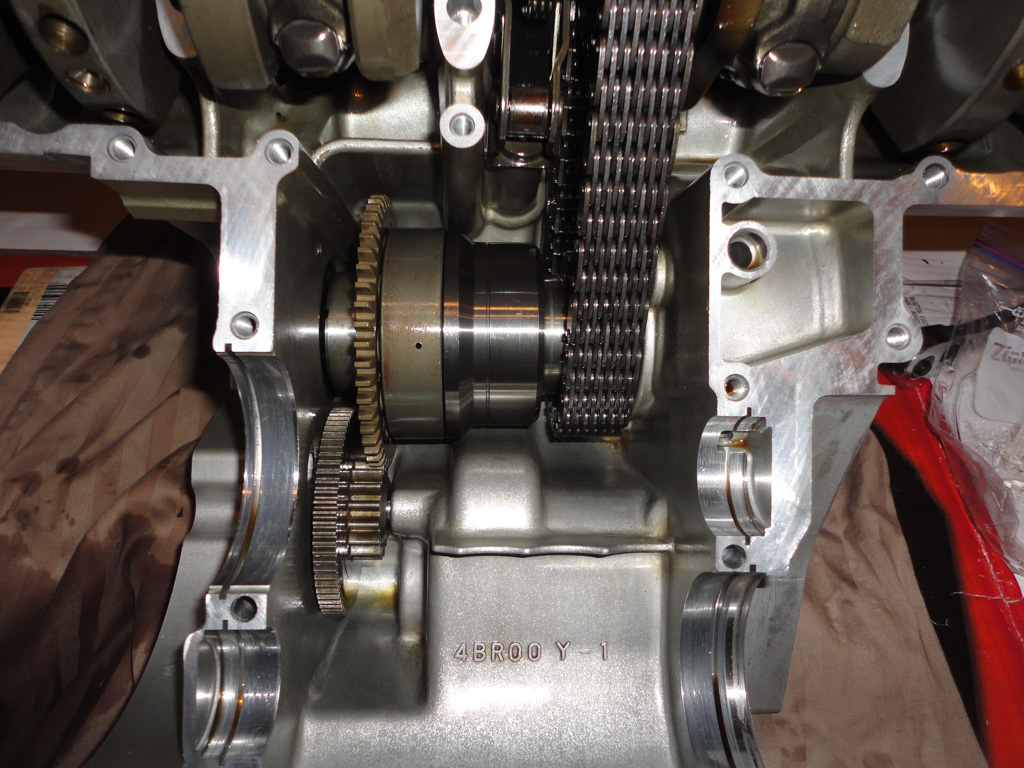
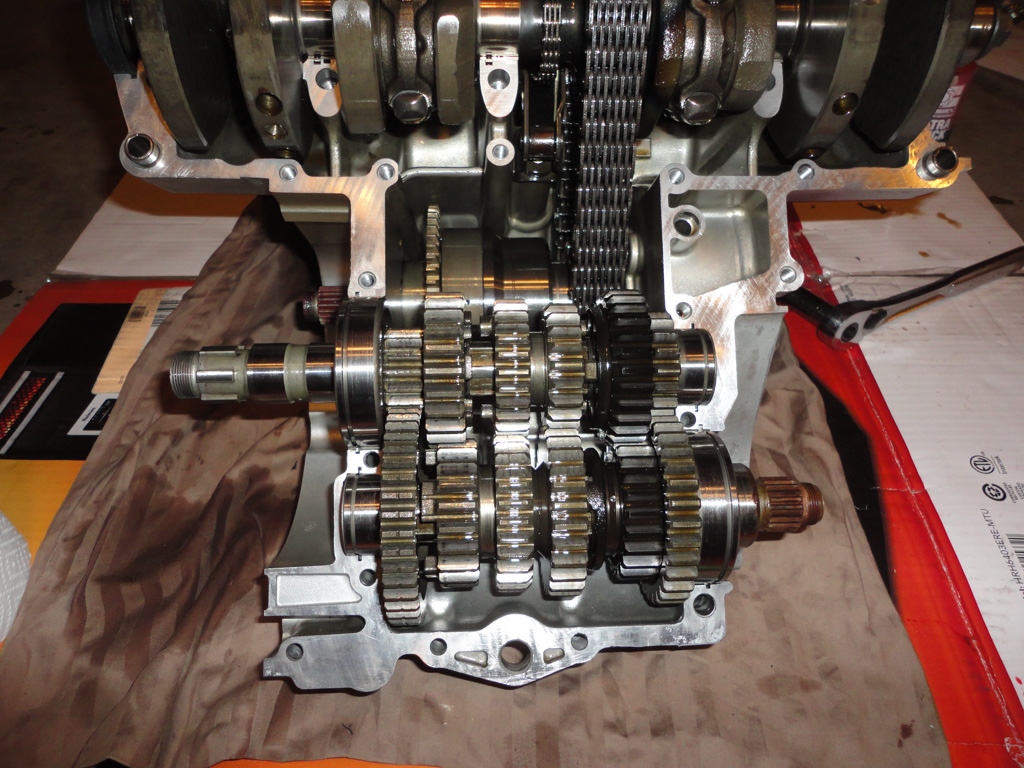
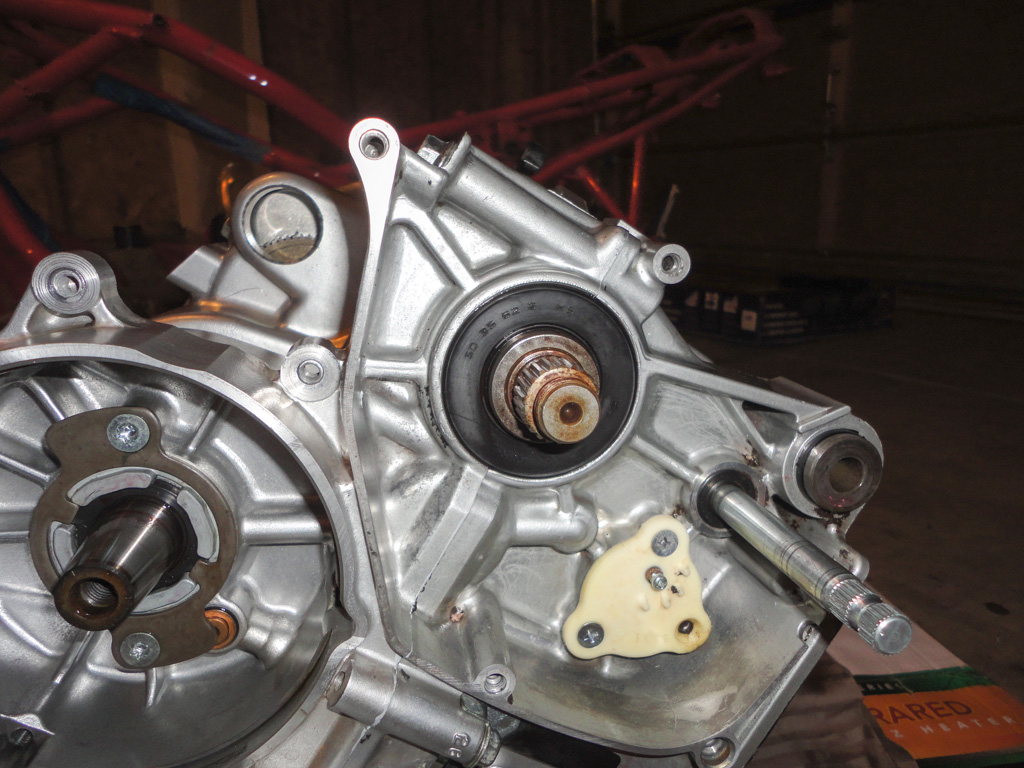
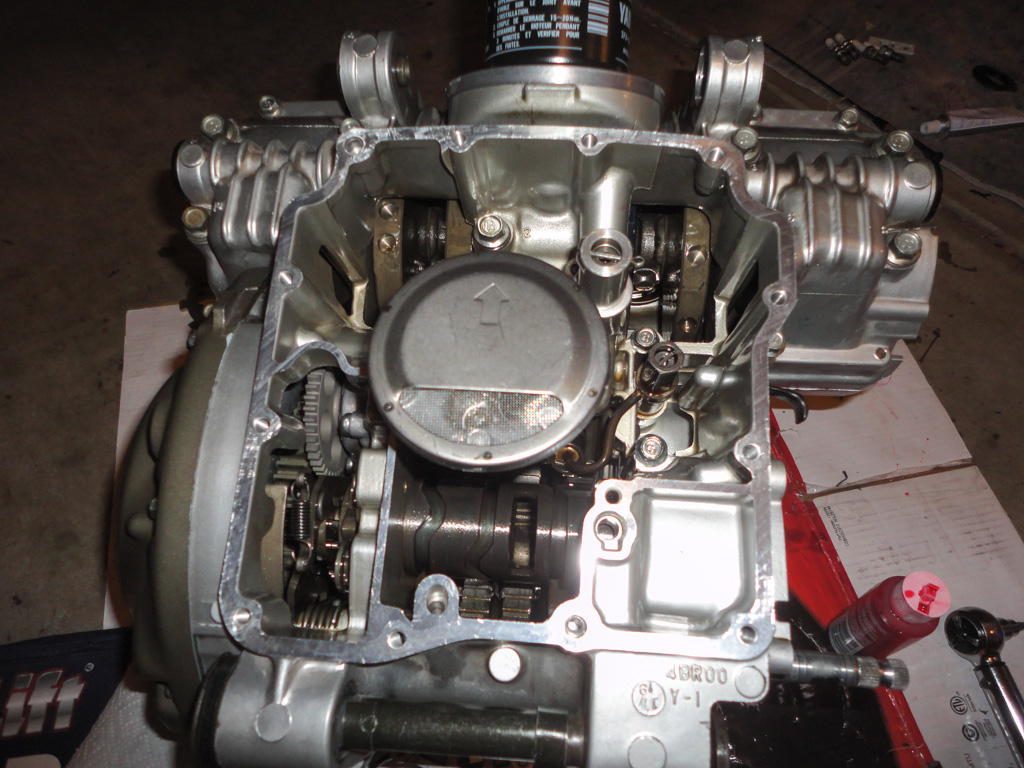
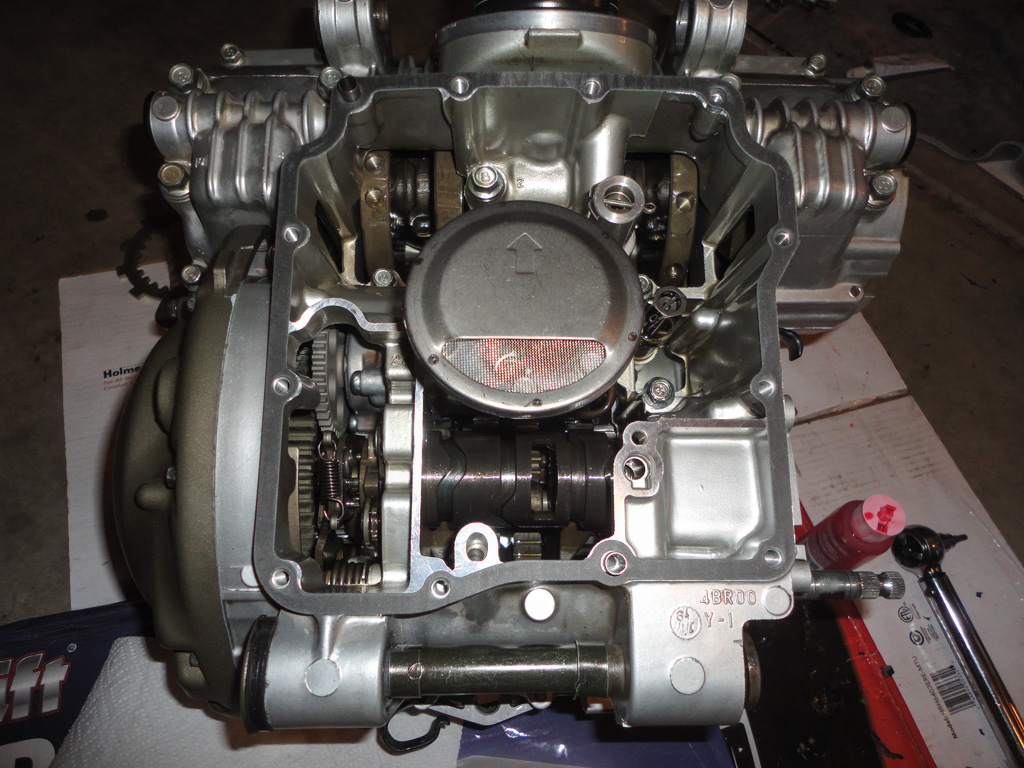
You will have to flip the engine over to access the balance of the bolts. Once the bolts are free, tap the lower crankcase with a rubber mallet to break the seal. Do not pry on the case halves. Work them carefully until they are free. The transmission will likely stay with the upper half but it is not secured in any way-shape-or-form; be carefully not to drop it when lifting off the lower crankcase. Here's the upper crankcase with the gearbox removed:
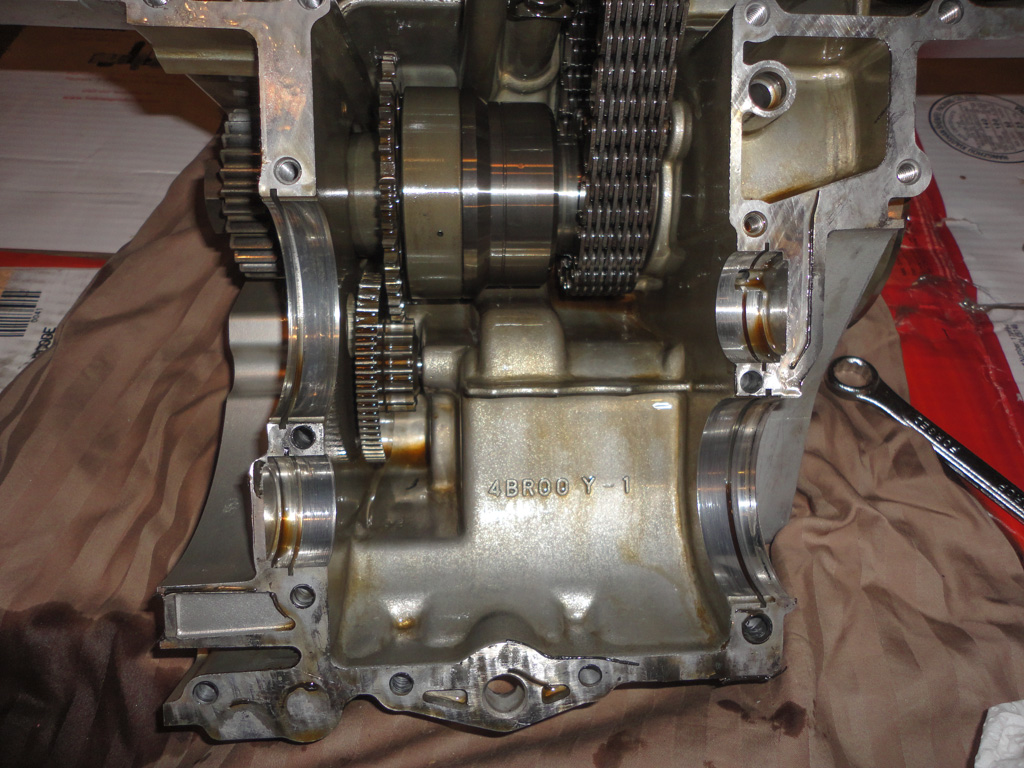
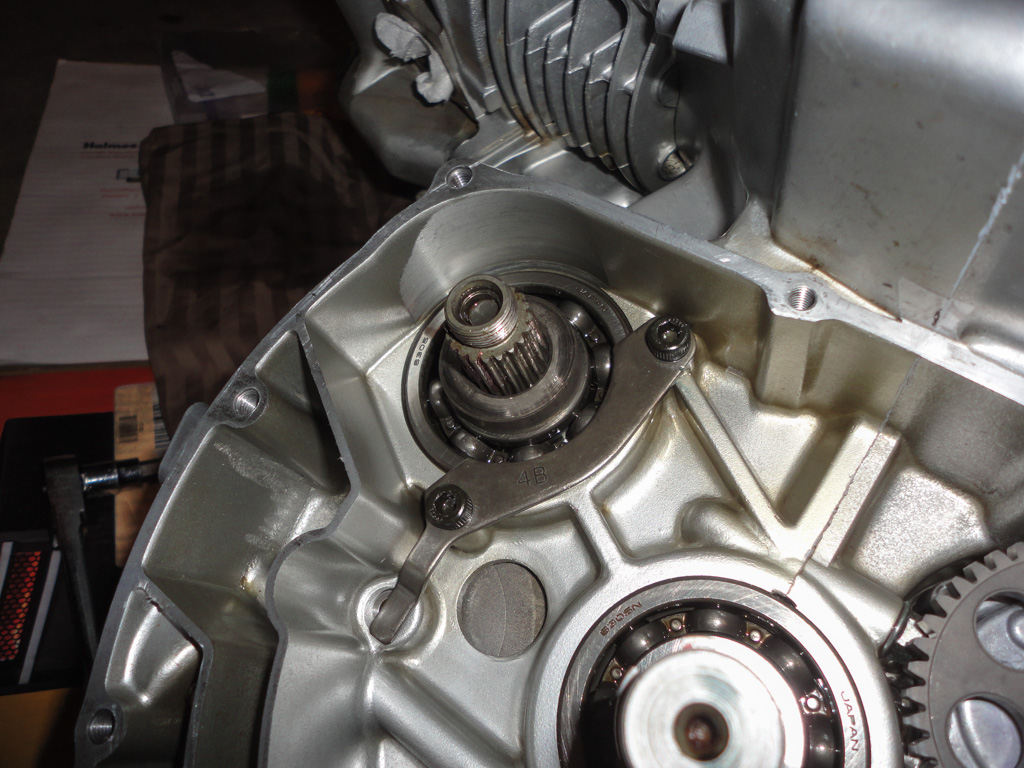
Now that you can see the idler gears, its time to get them out of there. To remove the idler gear itself, remove the bearing retainer, slide out the idler shaft and lift the gear out:
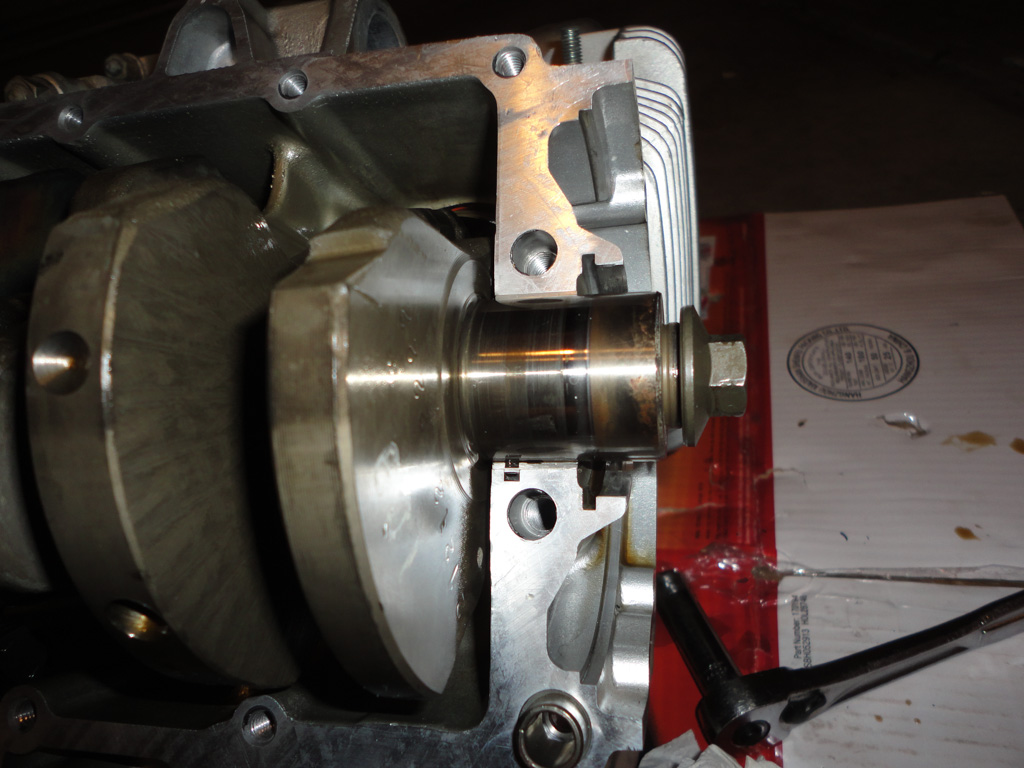
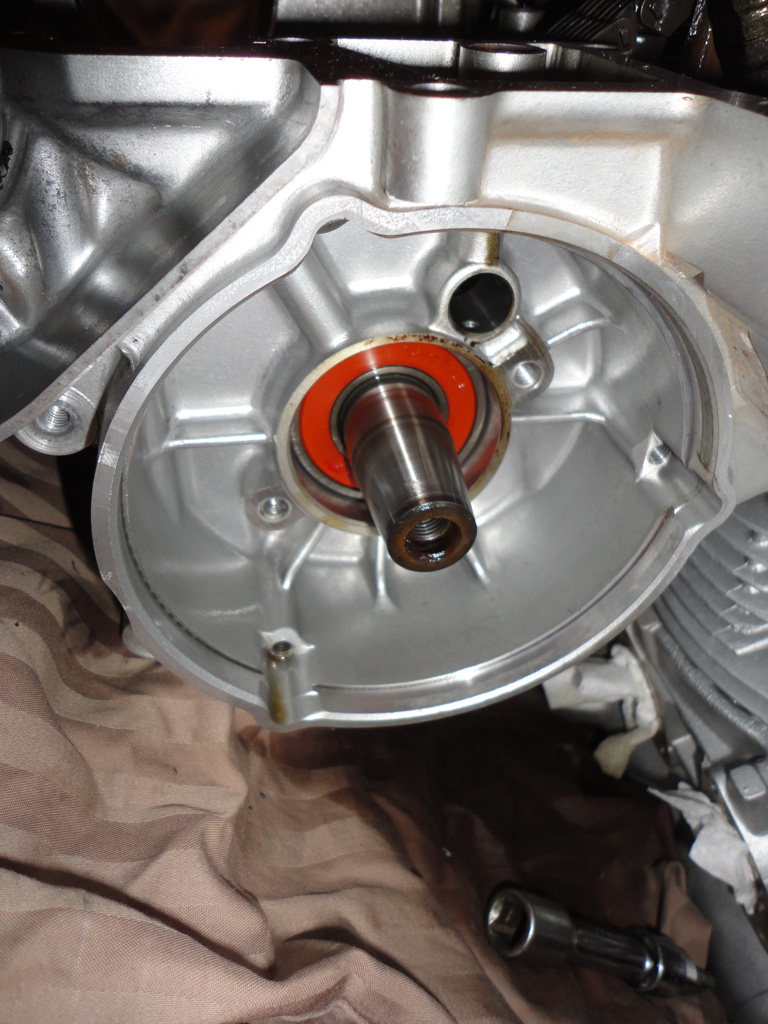
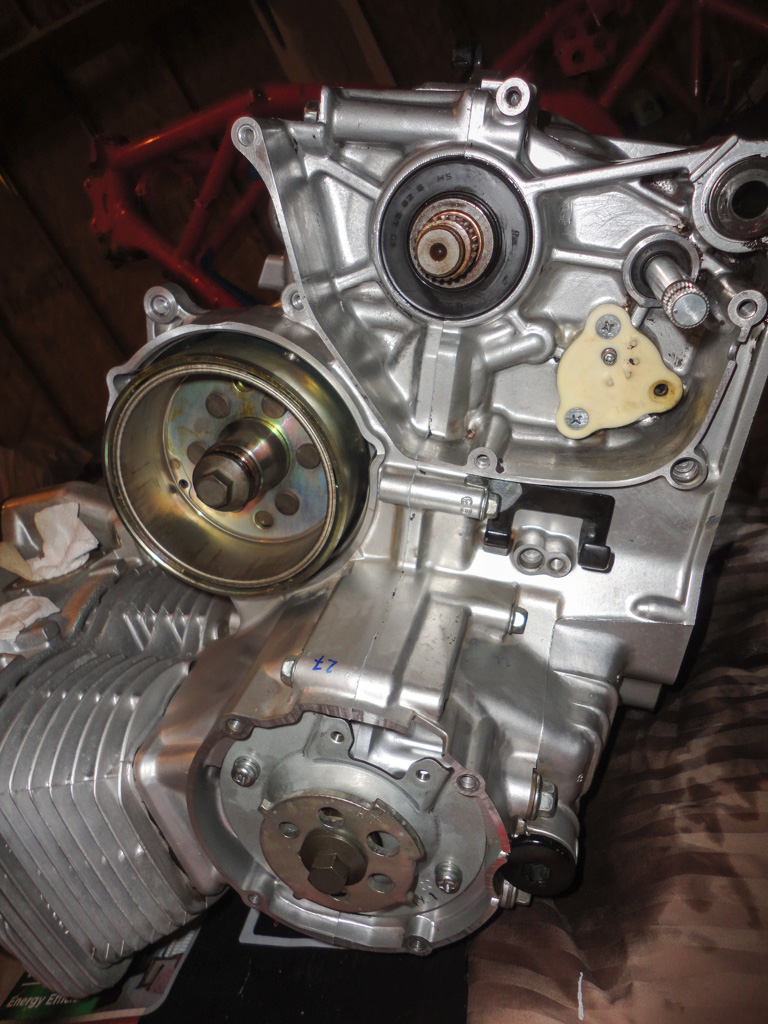
To get the larger gear out, the primary shaft needs to be removed. Using an M16 x 1.5 bolt, remove the stator rotor:
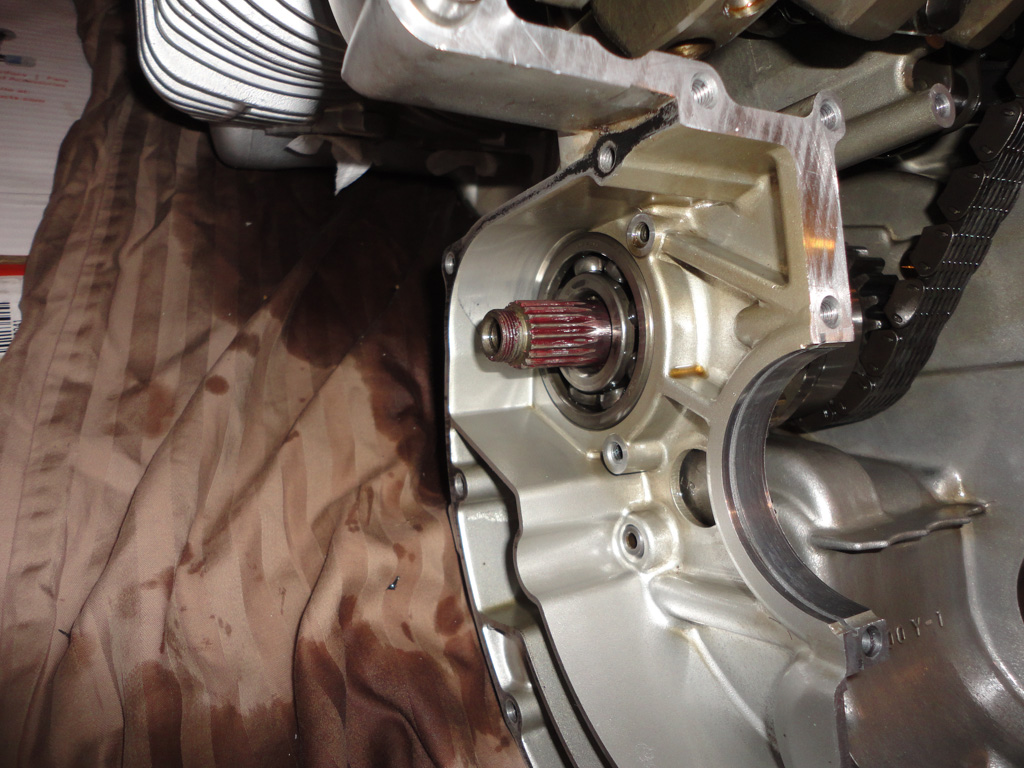
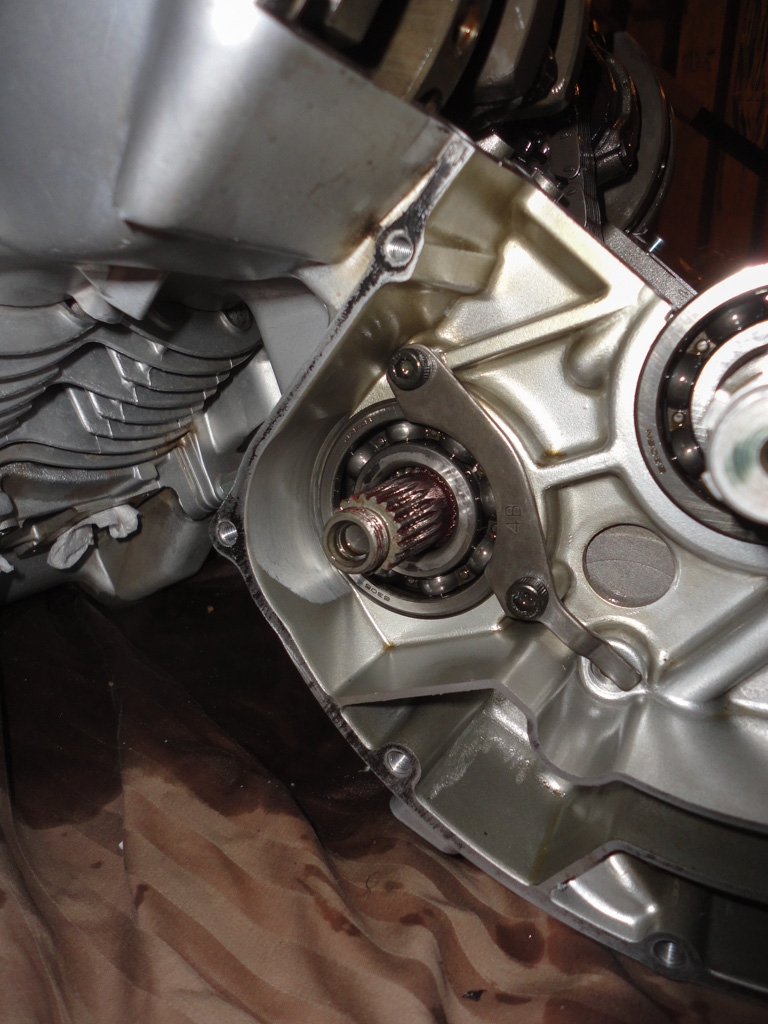
Then remove the bearing retainer and oil nozzle:
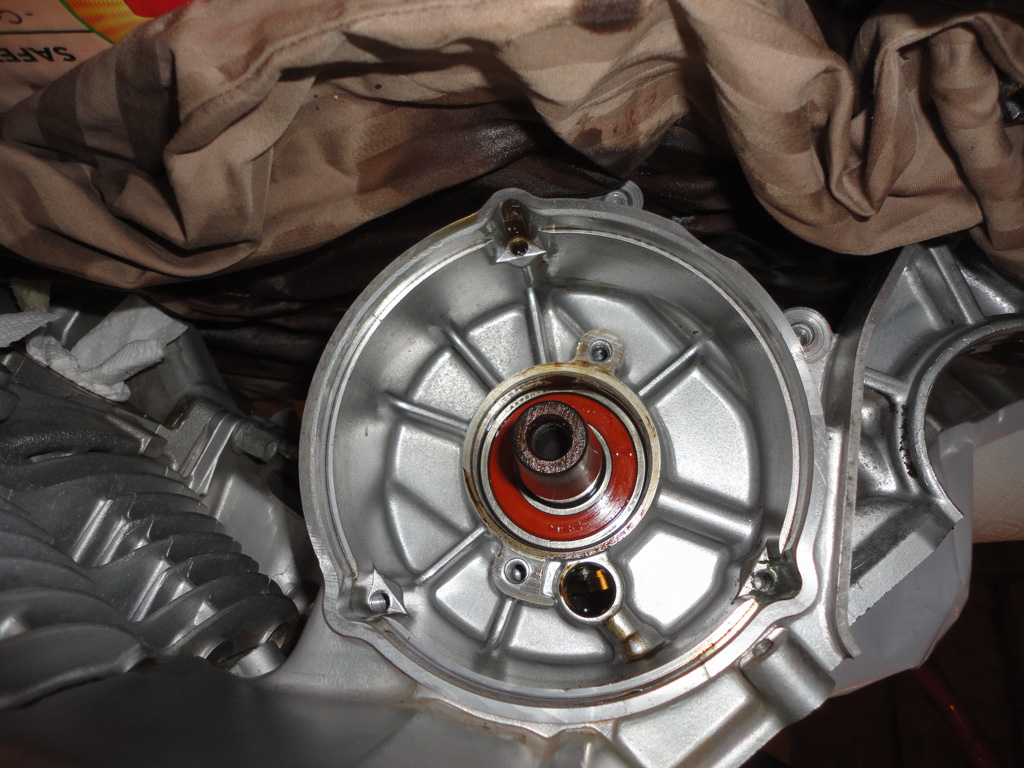
And slide the shaft outward through the alternator side:
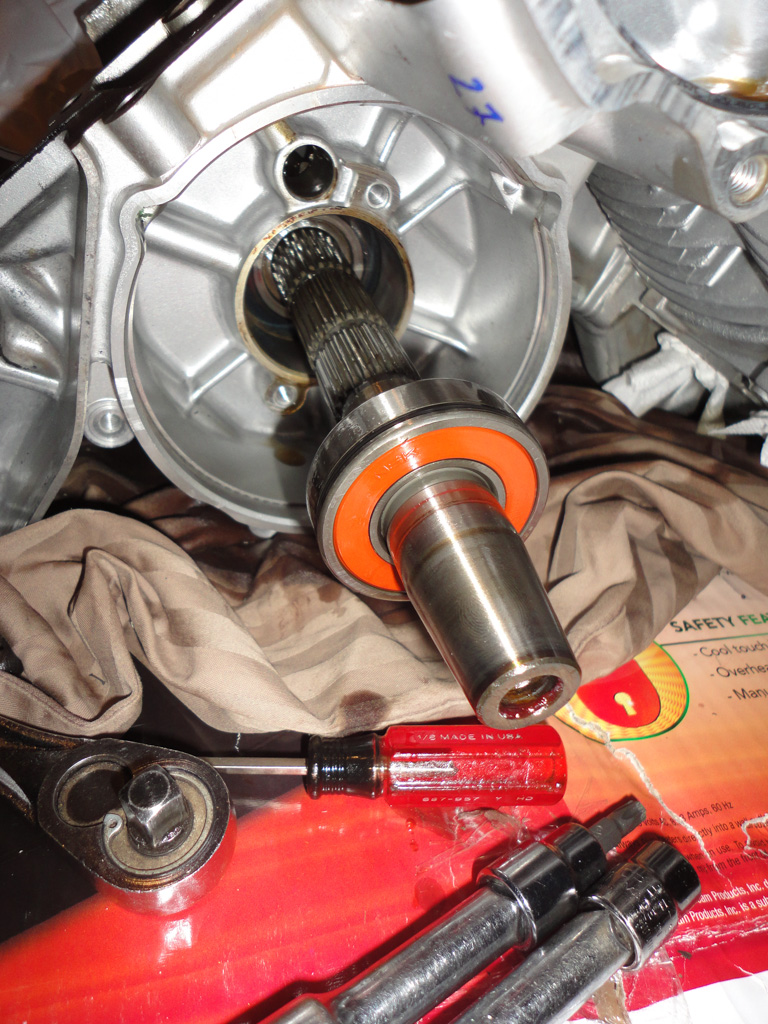
Pull out the starter clutch assembly and remove the larger idler gear.
Here are mine after removal. You can see the damage to them was quite extensive. I did manage to find all of the missing teeth using a magnet:

Prepare the engine for reassembly by cleaning all traces of gasket surface from the crankcase halves and by cleaning out all debris from the disintegrated starter gear from the crankscase. I found a flat piece of plastic worked well for scraping old gasket. DO NOT let old gasket material get into any of the oil passages.
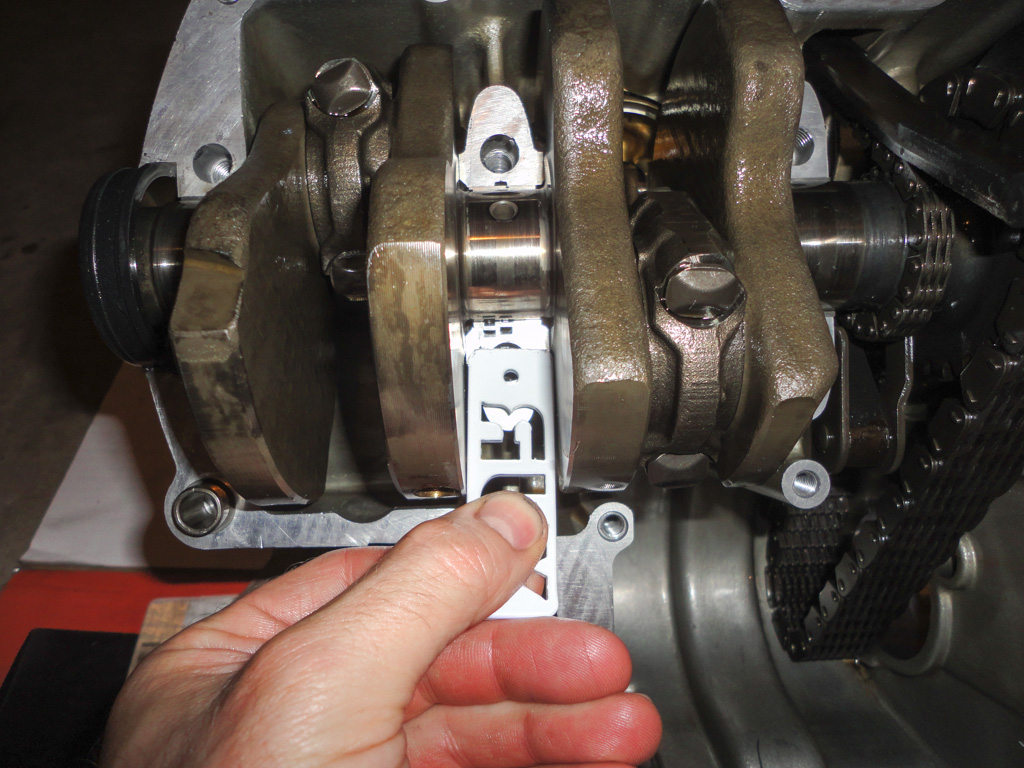
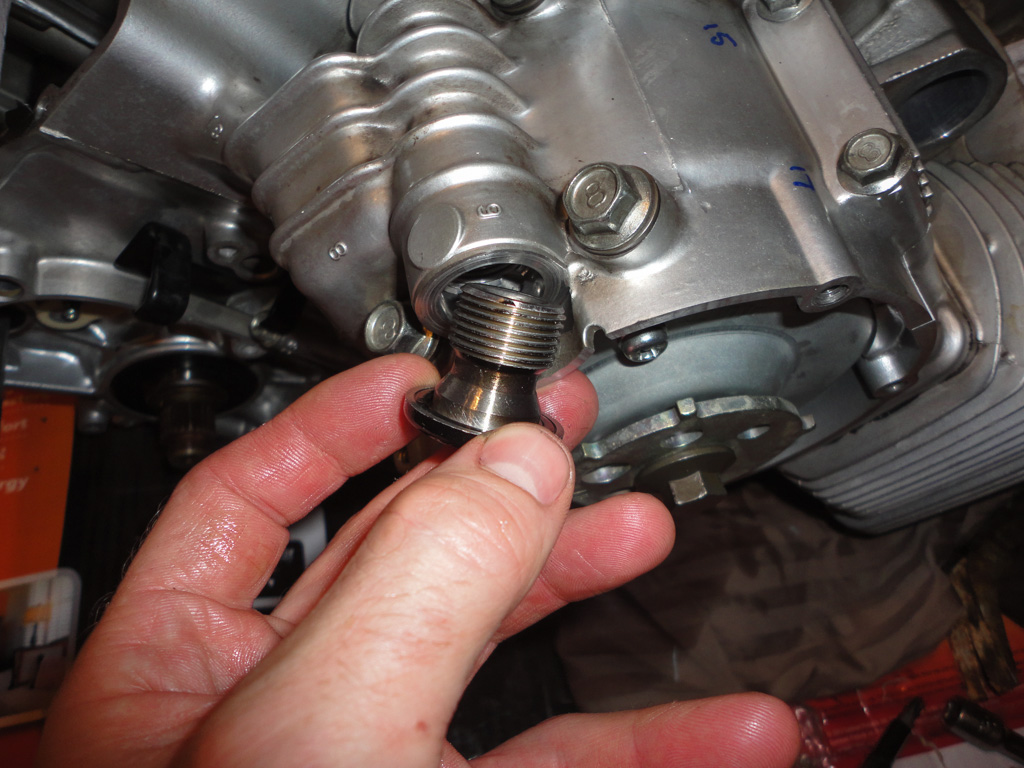
Also, before reassembly, it is recommended that you fit new oil seals to the crankcase. To remove the old seals, remove the timing chain tensioner, slightly pivot the crankshaft upward and lift the seals out:
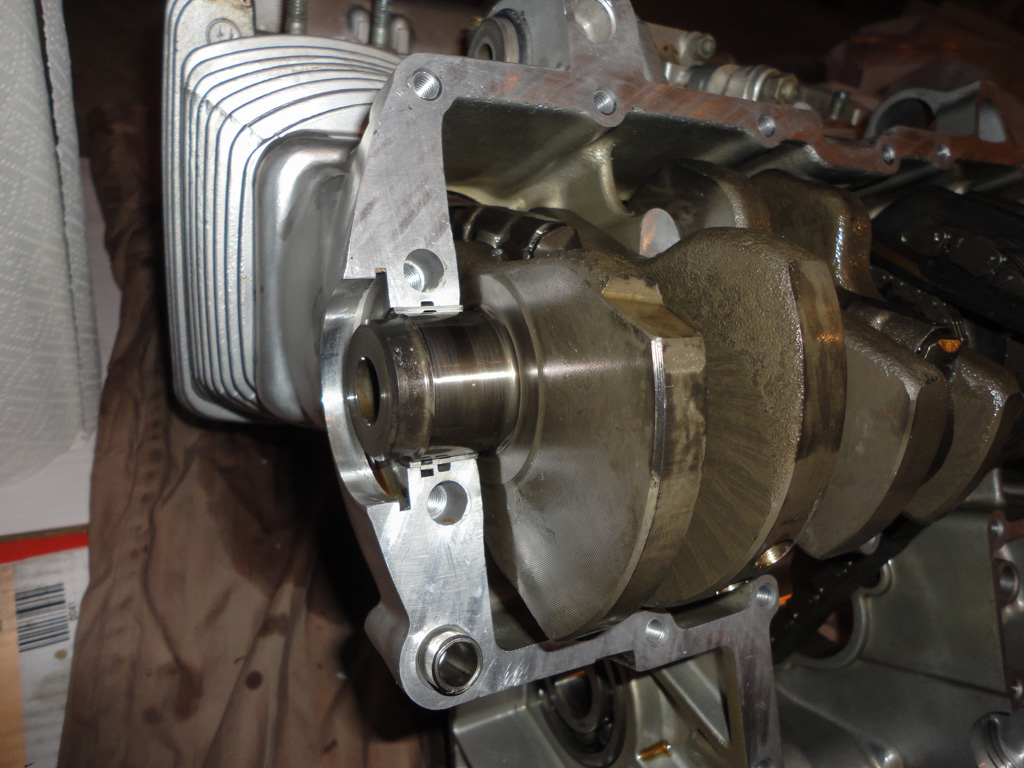
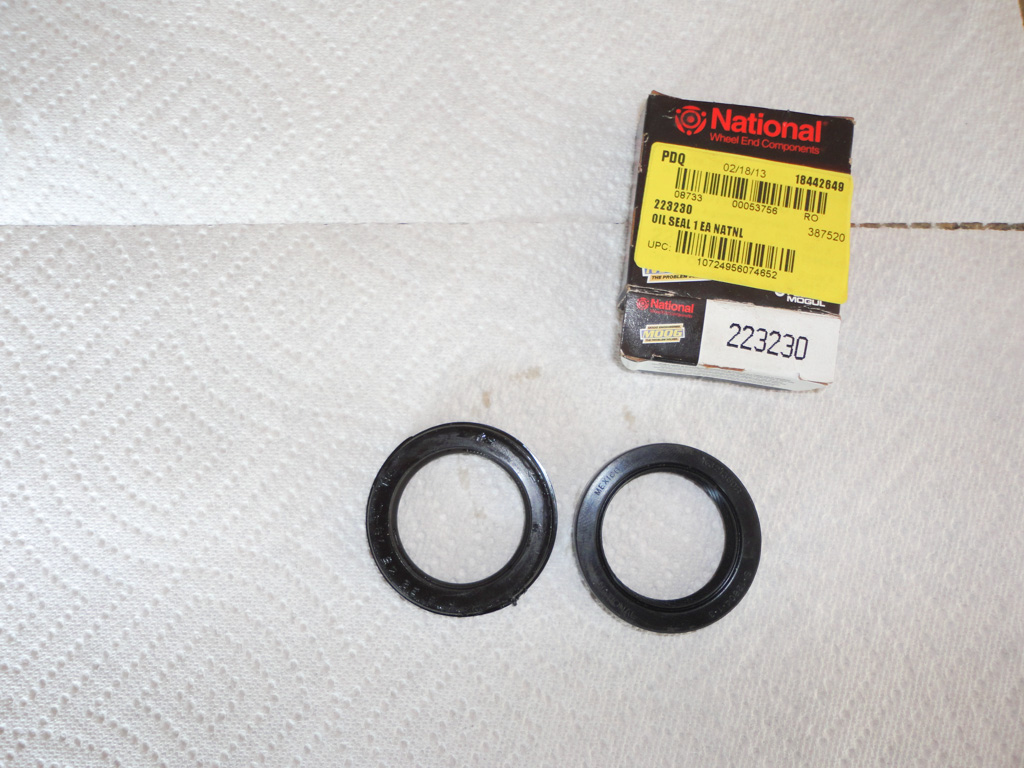
The crankshaft seal is a 32x45x8 single-lip oil seal. The same size seal is used as a camshaft seal on the Subaru 2.5L engine. If you go to your local autoparts store and ask for a camshaft seal from a 2009 Subaru Legacy with a 2.5L H4, you'll get the right seal. This Subaru seal does not have a lip like the OE seal does and can be removed without splitting the cases if it leaks in the future. Here's the stock seal and the Subaru seal side-by-side:
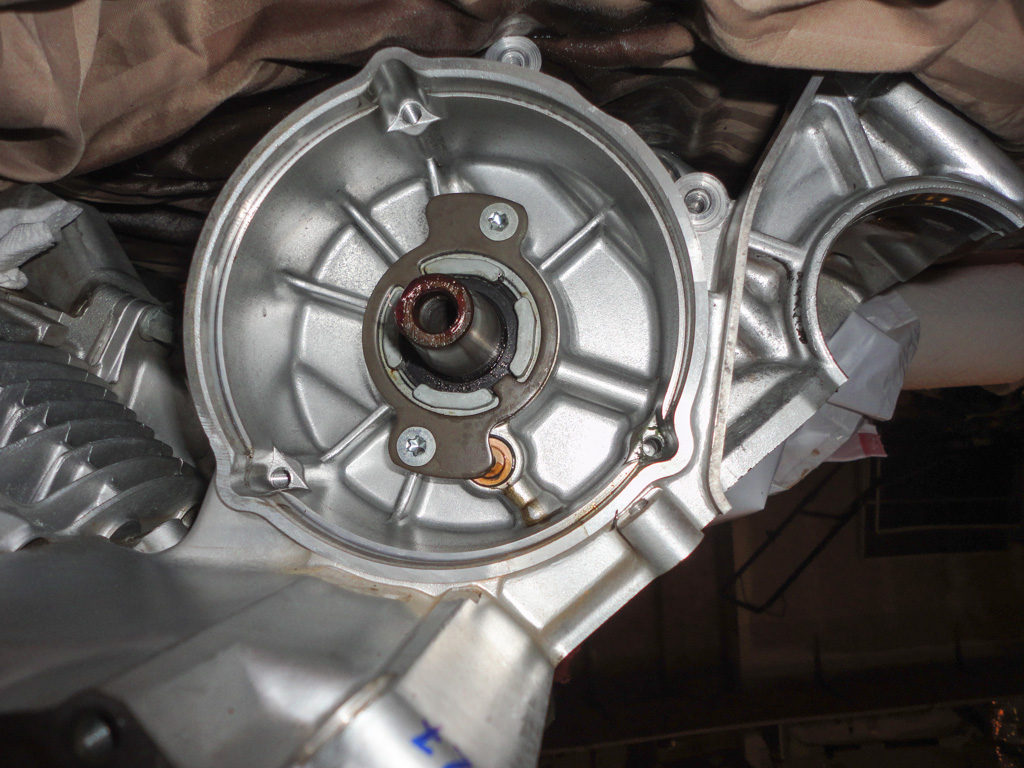
The other side of the crankshaft is sealed with a crankshaft button. The stock button is lipped and seen on the bottom of the following photo. Yamaha lists two seals on the fiche for replacement. I ordered both; the difference is, one has a lip and one does not. I chose to install the one with the lip.
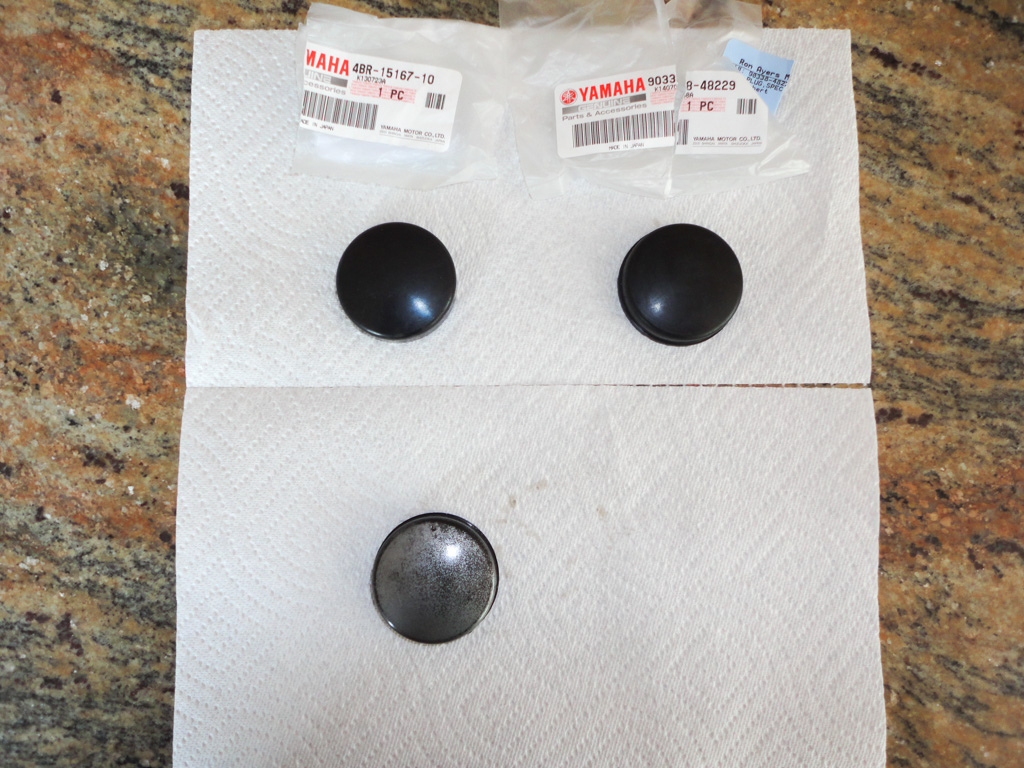
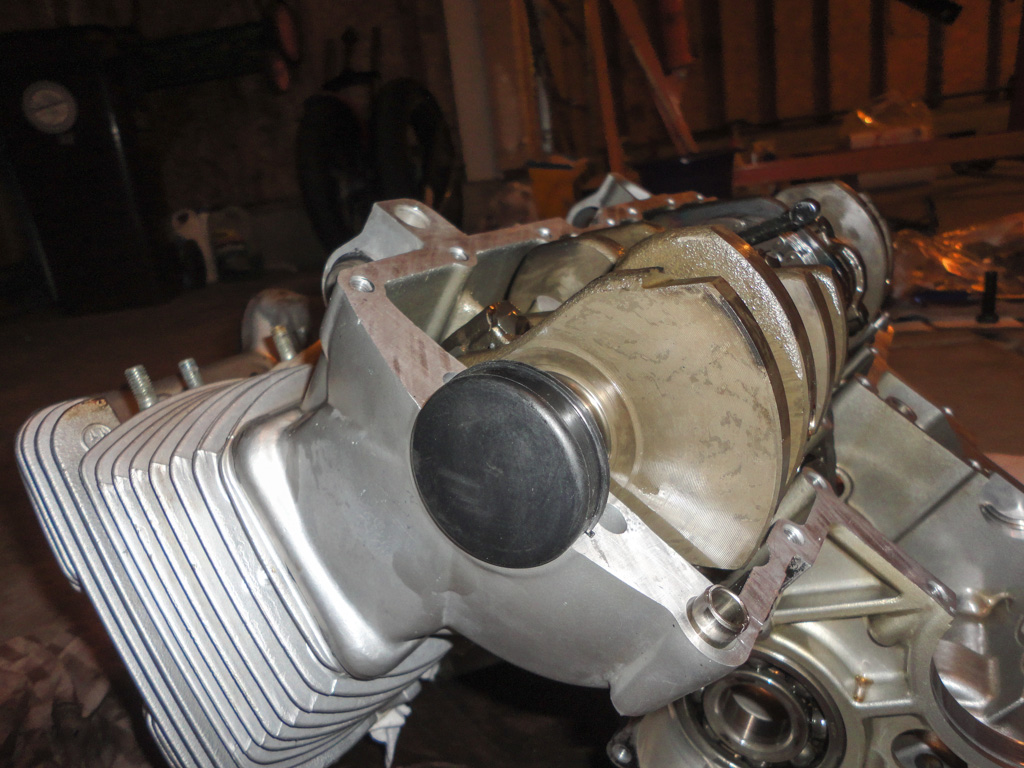
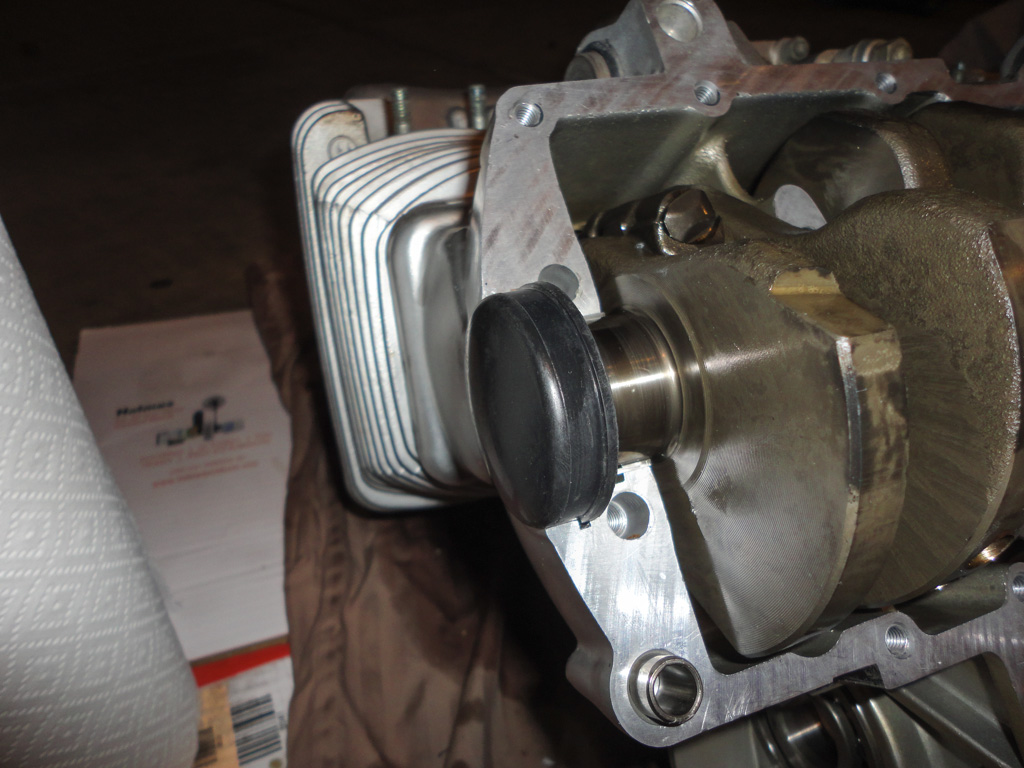
Install the new crankshaft button:
 .
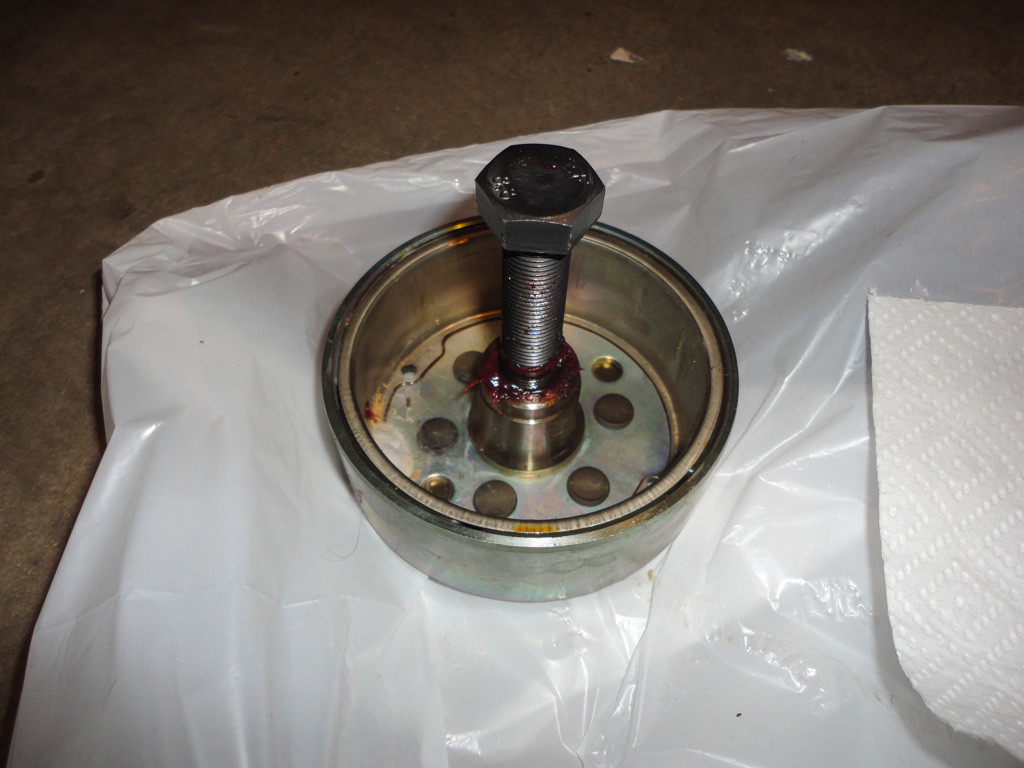
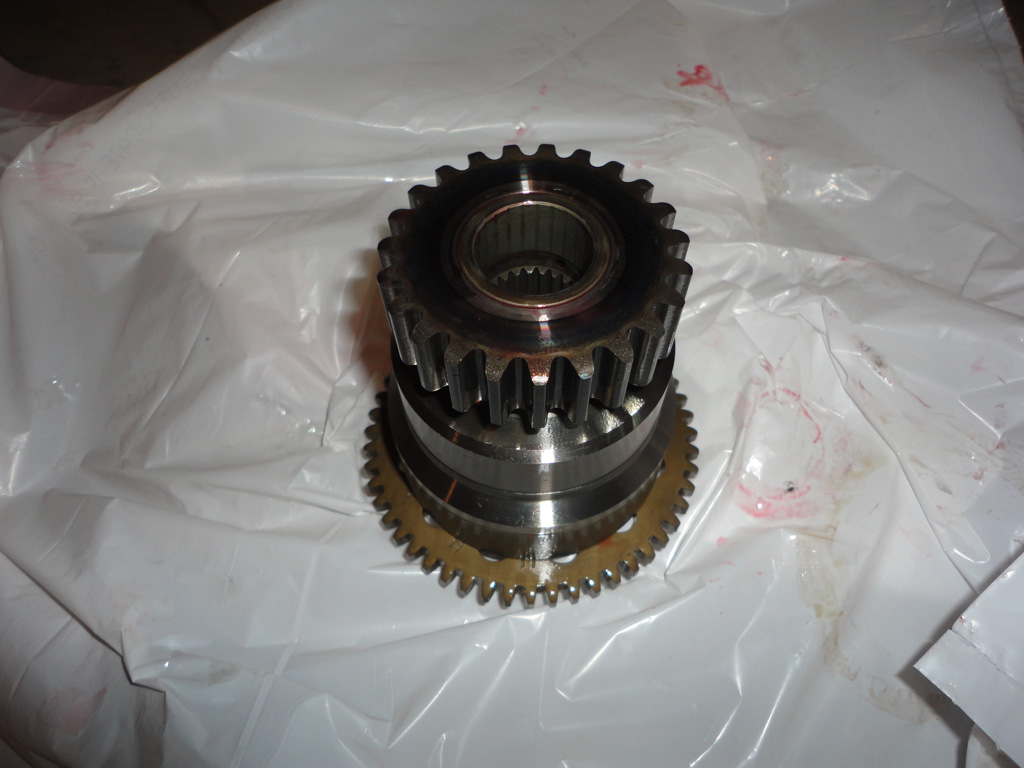
.Lubricate the contacting surfaces and bearing surfaces on the starter idler gear using engine assembly lube (Permatex Ultra-Slick) and assemble the starter clutch assembly. It should look like this when assembled:
Slide the starter clutch assembly through the primary chain and lower it into place. Make sure the primary chain is routed appropriately:
Lube the primary shaft with engine assembly grease and slide it in place:
Lubricate the starter idler gear shaft with engine assembly lube and install:

Need photo of idler gear shaft
Roll the starter idler gear and ensure everything works. The gears should mesh smoothly. Because of the starter clutch, the gears should rotate one-way but not the other way (like a ratchet):
[video][/video]
Apply Loctite blue to the bolts and install the bearing retainer:
Install a new o-ring on the oil nozzle and slide it in place. Install the bearing retainer on the stator side:
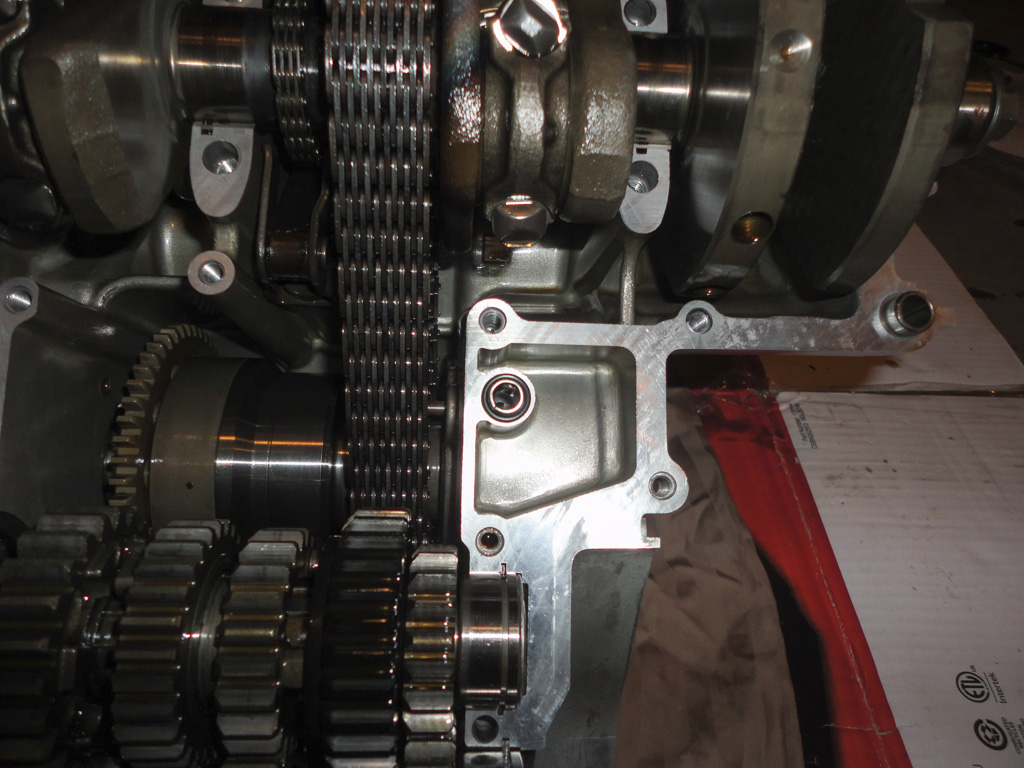
Lay the transmission gears into the upper case. Ensure the half-moon shaped bearing retainers are in their slots. Also ensure that the gears are in the neutral position:
Fit a new o-ring on the oil-galley/crankcase alignment dowel and install it. Ensure the o-ring fits appropriately in the bore:
Apply a very-conservative coating of Yamabond or Permatex Motoseal to the crankcase mating surfaces. Align the shift forks with the gearbox and carefully lower the lower crankcase in place. Wiggle it and carefully press it downward until it fully contacts the upper crankcase. It should sit completely flat. If it does not, check the shift-forks and half-moon bearing retainers and ensure they are aligned. Once the cases are together, install the bolts in the sequence stamped on the crankcase and torque to spec.

Need photo of crankcases assembled
Using a seal driver, install the lefthand crankshaft seal:
And the output shaft seal:
Install the neutral switch, the alternator stator, the timing pickup plate and the timing rotor:
Install new O-rings on the oil galley plugs and install:
Reassemble the oil pump (if you disassembled it for inspection or cleaning). Install the rotor vanes:
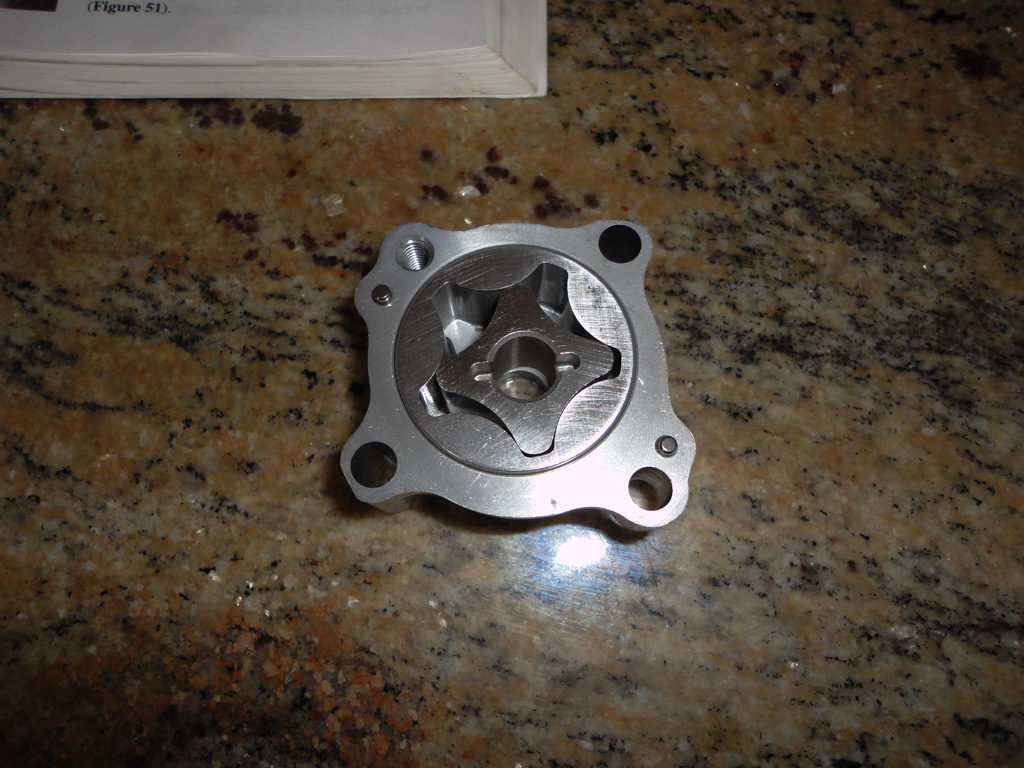
And then the shaft and pin:
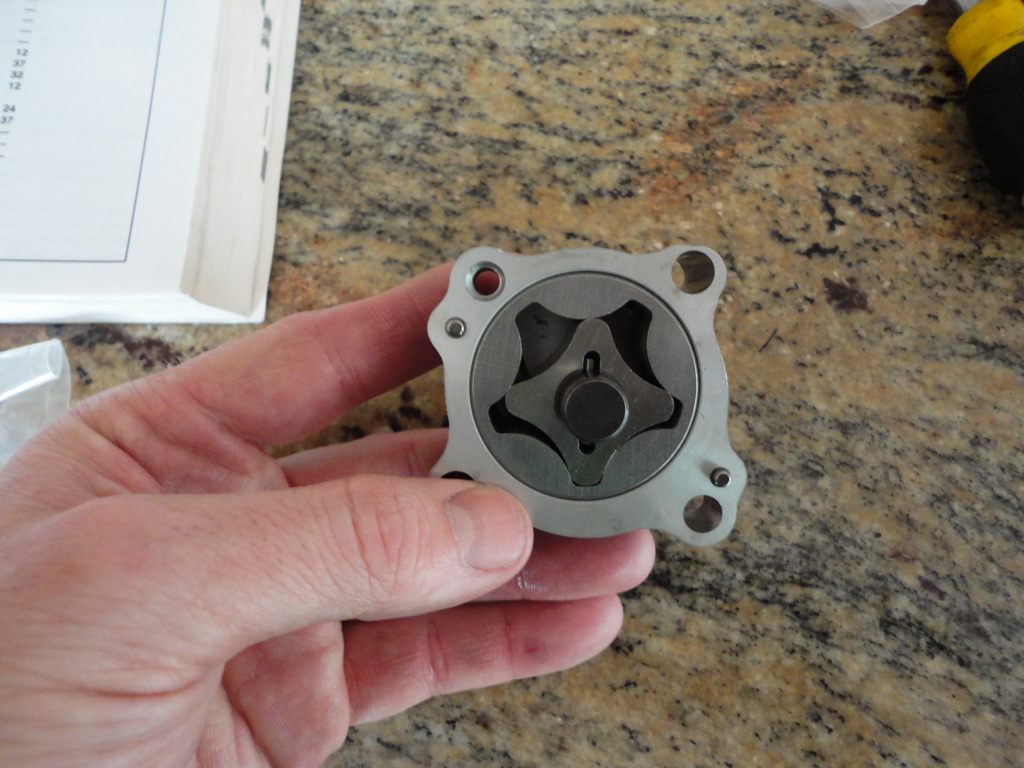
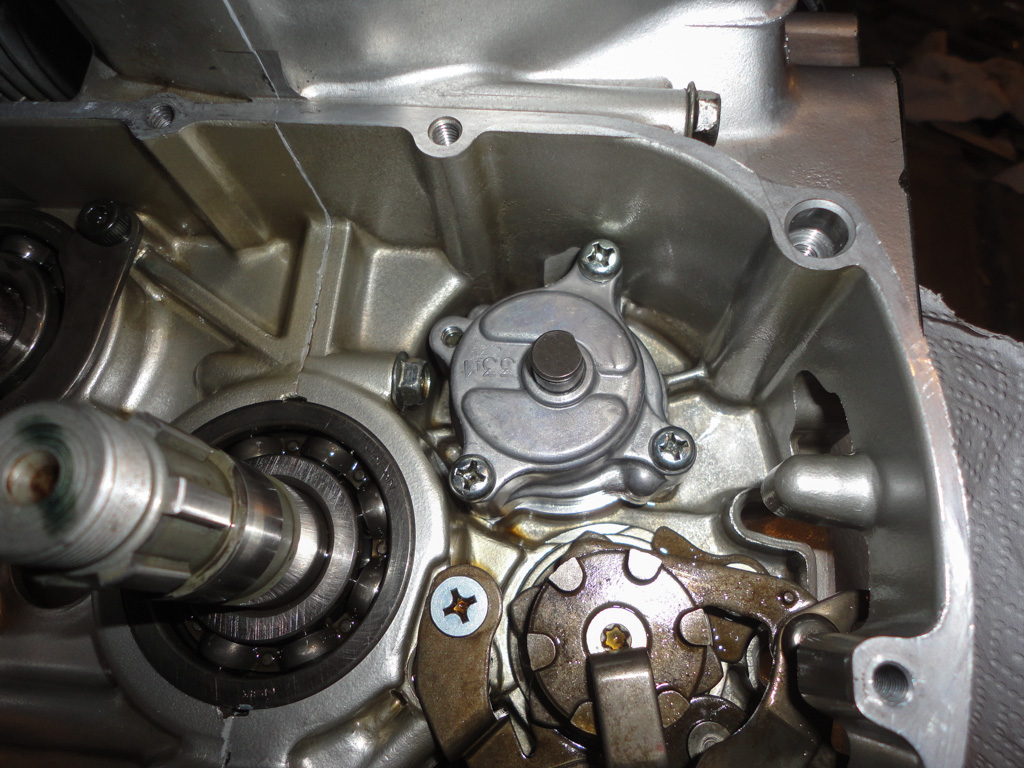
Pack the oil pump with assembly lube (to prime it), fit new O-rings and install the oil pump:
Install the oil pump drive gear and snap ring:

Install the primary shaft nut and bend the retainer tab:

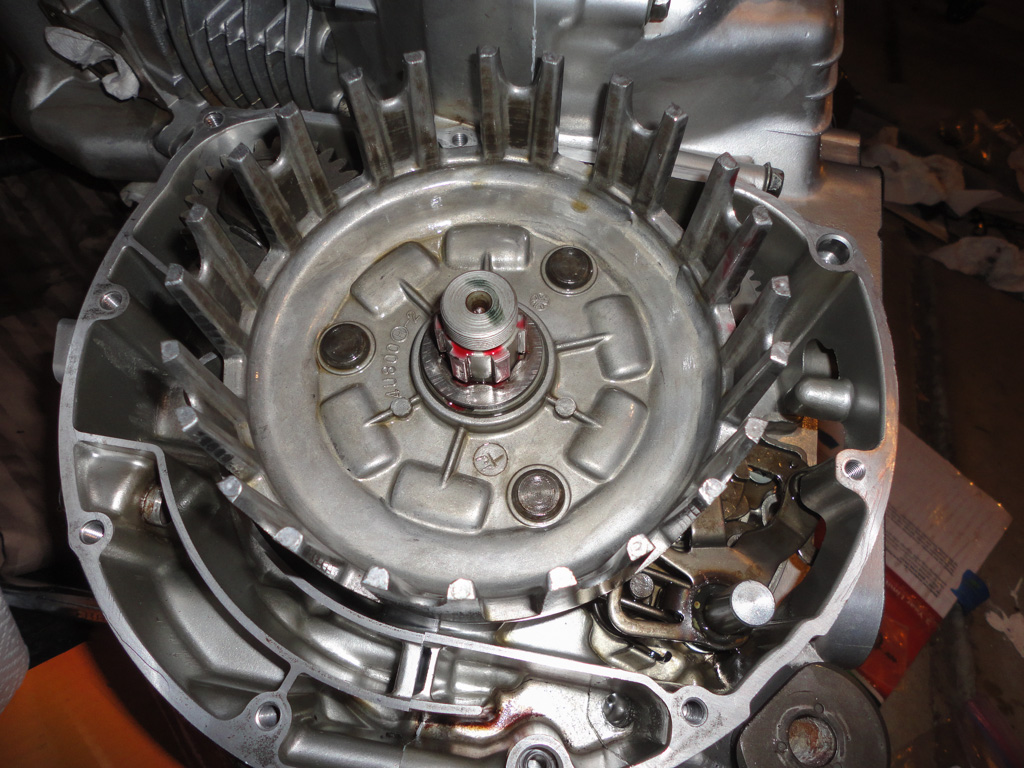
Lubricate the oil-pump drive gear with engine assembly lube. Install the clutch basket and spacer:
If you're installing new clutch friction disks, soak them in oil:
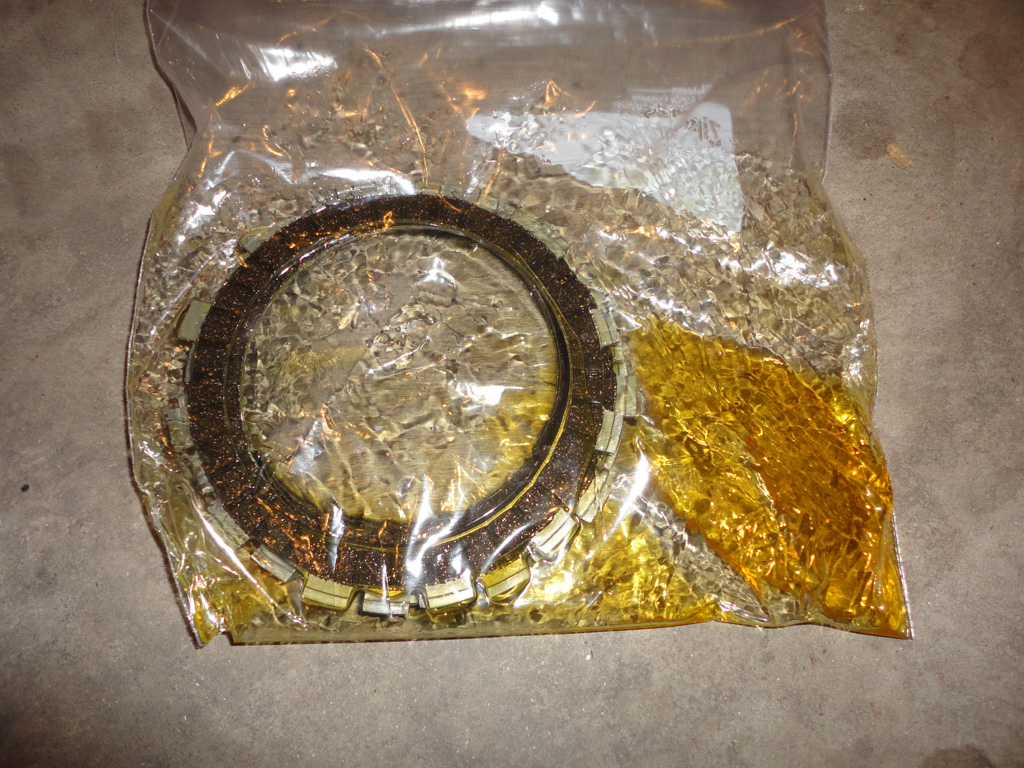
And install them, alternating clutch plate and clutch friction disk:
Install the pressure plate and clutch springs:
Fit a new clutch cover gasket and install the clutch cover:
Flip the engine upside down. Install the oil pickup tube and oil pickup screen:
Install a new sump gasket and install the sump:
Fit a new o-ring and install the oil filter adapter plate. Install an oil-filter to keep debris from getting into the engine.
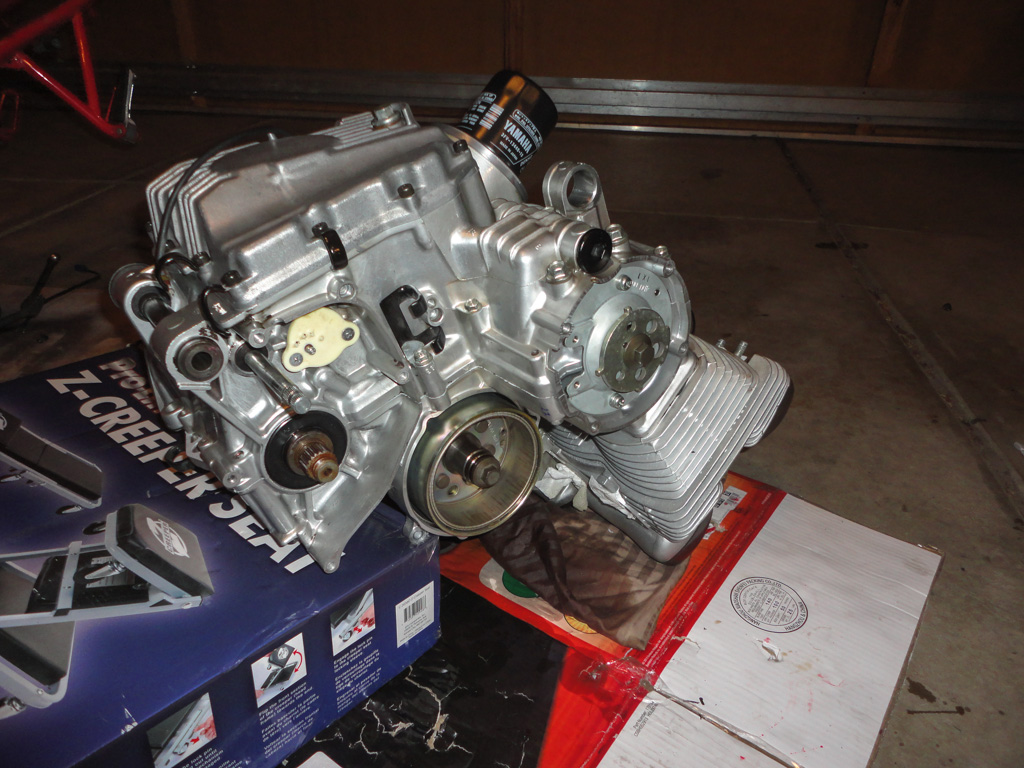
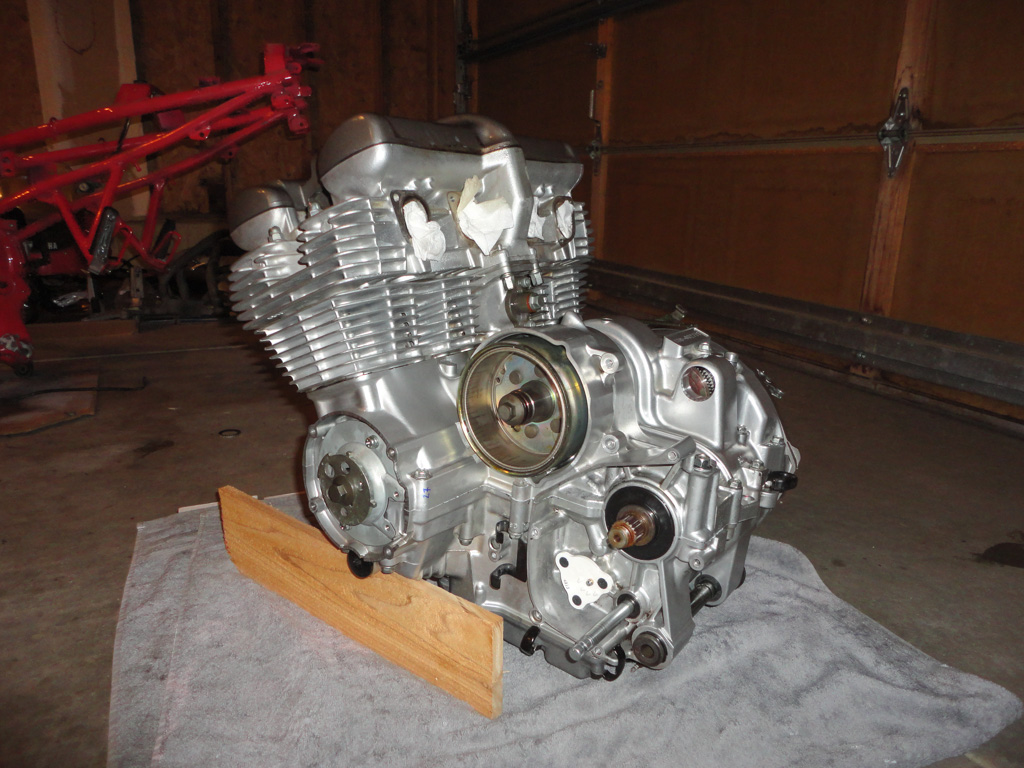
That's it; you're engine should now be ready to reinstall back into the bike:

Before installing the engine back into the bike, consider adjusting the valve clearances as it is quite easy with the engine removed.