
"Rejet" for 10 Cents or Less
By Mike Franklin
Taken from: http://www.fzrarchives.com/fzr600/work_ ... t_kit.html
The stalker slithered silently from out of the shadows, approaching his prey. He raised a calloused hand and grabbed the unsuspecting woman by the throat and squeezed. Gasping, she grabbed at her attacker's hand, but lacked the strength to free herself.
No, this isn't a bad murder mystery, but when talking about the government's control over your bike's exhaust emissions, the metaphor is appropriate. In America, the Environmental Protection Agency (EPA) and in California, the California Air Resources Board (CARB) have the same control over your bike's ability to breathe as did the Hillside Strangler over his victims. More stringent anti-pollution standards require that your motorcycle's motor run so lean that, for some models, it nearly kills its ability to perform effectively. Fortunately there is a way to fight back, and it's not as expensive as you may think.
Purchasing an after-market jet kit may not be necessary to fix the problems ailing your particular bike. Few bikes really need a complete change of carburetor internals; most just need proper fine tuning of a few metering devices. The asking price of over $100 for the typical off-the-shelf jet kit is based on the cost of research and development, not the number of parts included in the bag. In fact, most bikes need no more than about a dime's worth of parts and a couple of hours in the garage to restore proper carburetion.
One caveat: There are many companies that sell products to remedy your bike's lean condition, none of which allow your bike to retain the government's seal of approval for road-going vehicles. If you change any pollution-regulated device exhaust pipe, carburetors or their settings, or evaporative control units the bike is no longer approved for highway use. But I swear I won't rat on you. In fact. I'm going to tell you how to improve your bike's jetting with almost no money down in easy to follow, step-by-step directions.
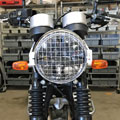
We're going to show you the steps needed to fix the carburetion problems on one of the most EPA-throttled bikes we've ridden, Yamaha's 600cc Seca II. The Seca's cold-blooded nature requires a lot of warming up and about five miles of riding before the bike will let the rider take off from a stop without having to rev the motor to four grand or more, slipping the clutch like a pro-stock drag racer. Follow the procedures outlined here and you can transform any reluctant bucking bronco into a smooth running ride.
Carburetion 101
There are three areas we are going to work with; idle mixture, float level, and position of the jet needle. Before we get into describing the operation let's outline the procedures involved, and the role each area plays in your bike's carburetion. First, get out the factory service manual for your bike, open it to the carburetion chapter, and get familiar with the list of parts and their names. Don't worry, we are not going to have you take apart the whole assembly and expect you to put it all back together again. Working carefully, one carb at a time, we can methodically measure, adjust, and improve the performance of your bike. The adjustment of any one area will have an effect on some part of your engine's performance. Ideally, the three areas of fuel control will work together to make a smooth running motor with no lean spots in the powerband characterized by coughing or stumbling at low engine speeds and surging at constant throttle openings.
The idle mixture screw (also known as the pilot screw) adjusts the fuel-air ratio at very low engine speeds, but its adjustment can also effect the way the motor runs at part-throttle openings. Once set, the factory then covers the access hole with a brass plug to prevent tampering. Most factories can get their bikes to pass the emissions test simply by leaning out the idle mixture. The result is usually not enough fuel to provide proper combustion at slow speeds or cold temperatures.
The float level effects the widest range of the engine's carburetion and is nothing more than the amount of fuel held in the carburetor's float bowl. As the fuel level in the float bowl rises to the proper level, the floats close off the incoming fuel supply by forcing the float needle into the needle seat. Conversely, as the motor uses the fuel stored in the chamber, the floats drop opening the fuel inlet. If there is too little fuel stored in the float bowls, the bike runs lean. The reason for this is that it requires a greater difference in pressure between the carburetor throat (at low pressure due to the piston's down-stroke) and the float bowl (vented to atmosphere in a non ram-air equipped bike) in order to pull fuel up into the carburetor body. Conversely, too much fuel in the float bowls and the bike runs rich.
The jet needle is probably the most familiar part of the carburetor. It is the tapered rod that hangs from the slide. In cooperation with the main jet and the needle jet, it controls the top end or high speed mixture from about half- to wide-open throttle. The vacuum-controlled slide raises and lowers the tapered needle through the needle jet thereby controlling the amount of fuel that passes out the needle jet and into the motor. As the slide rises, the taper of the needle allows more fuel to escape the needle jet, richening the mixture. To keep the mixture acceptably lean, the needles are made thick and with a very gradual taper. Raise the position of the needle in relation to the slide, and the fuel mixture is richened throughout the upper rev range.
Prep the patient for surgery
Before beginning, make sure you have the tools necessary to complete the job. Standard hand tools like an assortment of screwdrivers and wrenches are the minimum requirements along with a drill and about a 1/8" drill bit. If you also have ratchet wrenches, sockets, and a set of measuring calipers, all the better. You'll also need a catch-can and hose for draining the float bowls prior to removing them from the bike. There is a hose attached to the rear of the gas tank that will work perfectly for this if you don't already have one.
Prepare your work station by removing any nuts and bolts lying about that may accidentally end up in the carburetors when reassembling them. There's nothing more disconcerting than having parts left over when you finish a job. Have an assortment of clean rags or paper towels available and a sheet of 120 grit (or so) sandpaper for something we'll get into later. If you are familiar with the approximate size of your jet needles, buy a handful of 0.020" shims from any auto parts store. Total cost: One thin dime. Motorcycle performance shops sell the same shims for up to a dollar a piece. If you aren't sure what the proper size outer diameter or center hole sizes should be, follow the procedures here until we get to that part of the program and take a jet needle to the store with you. Most importantly, you'll need the factory service manual for your bike. If you have anything other than a U.S.-spec Seca II, the settings specified here may not apply.
And... Action!
Step 1: Make sure that the fuel tap is not on the "Prime" position and remove the seat and gas tank making note of the location of fuel and vacuum hoses. Be careful not to tip the tank on its side or too far forward or back as fuel may spill out the overflow nozzle. Loosen the four Phillip's head screws that hold the airbox boots to the carburetor bodies. Remove the air box and the crankcase ventilation and drain hoses attached to it. Now would be a good time to check or replace the air filter and clean the inside of the airbox. If the stock paper filter is so dirty that you can't see bright sunlight through it, consider replacing it with a K&N filter they breathe better than the paper ones and last longer than most bikes.
Step 2: Drain the float bowls. Use a length of hose attached to the nipple on the bottom of each float bowl to route the fuel to a catch-can or drain pan. Open the drain screw three or four turns and wait for the gas to stop draining before re-tightening the screw. Discard the fuel properly. Do not re-use it. Loosen the upper four Phillip's screws that hold the carburetors to the rubber intake manifold boots (the upper screw on each boot holds the carburetor to the manifold, the lower screw holds the boot to the motor). Grab the outer pair of carbs and gently rock the carb assembly back and forth while pulling them up and out. A little WD-40 on the manifold boots may help the carbs pop out easier. Cover the intake manifolds with a clean rag and remove the throttle cables.
Step 3: Spread out a clean rag or some paper towels on your workbench and we'll begin by uncovering and adjusting the pilot mixture screws. With the carbs resting on the float bowls, or secured gently in a vise, look down from the top of the carbs and locate the brass plug at the top of the carburetor between the vacuum chamber cover and the bracket that holds the bodies together (see photo). There is a trick to getting out this plug without mining the head of the screw underneath. Drill a small hole in the plug, then, using a sheet-metal screw that is a little too large to fit into the hole, wedge the screw into the plug with a screwdriver and use a pair of pliers to pull out the screw and the plug together as a unit. Just like pulling teeth, only a lot more fan. Use a center-punch or an old ball point pen to mark a small divot in the center of the plug before drilling, and be sure to stop the drill the instant the bit goes through the plug.
Using a thin, flat-blade screwdriver, gently turn in the screw until it bottoms out. It should take about one turn to seat the screw. Now back out the screw to a starting point of two and a half turns from bottom. It won't be until after the bike is taken for a test ride when you find out if this is where your bike runs best, but fortunately, farther adjustments are easily made with the carbs on the bike. Turning in the screw restricts the amount of fuel supplied to the motor making it run leaner, backing it out will richen the mixture. Repeat this process for all four carbs and don't worry about replacing the plugs. You can, of course, save them in ajar if you like.
Step 4: That was easy, now let's set the float level. When we measured our test bike, we found the float levels to be an average of 6.0 millimeters lower than the book's specified minimum. That may not sound like much, but there's not much fuel in the float bowls to begin with, and six millimeters down meant that there was about half the necessary amount of fuel in the carburetors at any one time. Fortunately, this too, is easy to remedy. Remove the four screws from one float bowl, and remove it being careful not to damage the gasket (or O-ring). Clean out any sediment from the bottom of the float bowl as we don't want a chunk of it to become dislodged and clog up a jet. Now break out your expensive dial calipers that you never get to use or a wooden ruler and we'll measure the float height. Tilt the carb set until the float just seats the needle valve, and measure the distance from the gasket surface to the tip of the float. (See photo.) If the distance is less than 6.2 mm (0.24") or greater than 8.2 mm (0.32") then remove the pivot rod and remove the float. Be careful not to lose or damage the needle valve. Bend the tang and re-measure the float height. We set our test bike to 6.0 mm, a setting that keeps a slightly higher than normal amount of fuel in the float bowls, helping to richen the fuel mixture. When you are satisfied with this carburetor's setting, replace the float bowl and repeat the procedure, one carb at a time, for the rest of the assembly.
There is a more accurate way of measuring the float level than the method just described but it requires a temporary gas tank and a length of glass tube or clear tubing like the type that comes with new batteries Rest the carbs flat on your workbench, connect your temporary fuel supply and re-attach the rubber hose you used to drain the float bowls. Insert a piece of glass tubing into the other end of the hose (if you are not using clear hose). While holding the end of the tubing against the float bowl (as shown) open the drain screw. It is important not to kink the hose or move the tube while it is filling with fuel as these will cause false readings. The floats are set properly if the distance [A] from the top of the fuel in the tube to the marks on the float bowl is between 4.0 and 6.0 millimeters. Follow the procedure outlined above to correct an out of spec measurement. Be sure to empty the carbs of fuel and dispose of it properly. And people, use common sense around combustible materials. Remember, no smoking and don't do this on your kitchen stove, you know the drill. Okay, with that out of the way, let's shim the needles.
Step 5: Again, working one carb at a time, remove the top cover from one carb. There is a pretty big spring, though not very strong, underneath the cover so use a finger to keep the lid on while you remove the last screw. Set those parts aside and carefully remove the slide. Make sure the diaphragm attached to it comes out smoothly and check it for cracks, holes, or signs of wear. Small cracks can be repaired with a little fingernail polish.
Remove the large plastic screw from inside the slide and with your hand covering the opening, tip the slide upside-down. You should now have the jet needle, needle holder, spring and screw in your palm or somewhere on the floor if you are going too fast. Pick them back up and remove the spacer from the jet needle. If you already have a supply of shims, slide a couple onto the needle under the c-clip and re-install the spacer. Otherwise, take the needle to the auto parts store and buy a dozen shims of the appropriate size. The outer diameter of the shims cannot be so big as to restrict the needles movement when it is re-installed. If the needle cannot move freely, there is a possibility of the carb slide sticking at full lift due to the needle wedging itself against the needle jet. This will not cause the bike to rev uncontrollably; the air velocity is controlled by the butterfly valve (on CV-style carbs). It will cause the bike to run poorly though.
Before re-installing the needle, we need to shave a little off the top of the needle holder (shown inside the spring) to compensate for the additional height of the shims. Lay your sheet of sandpaper on a flat surface and gently rub the holder, small end down, in a circular motion until you have removed about half the holder's original height. Remove any dust and reinstall the holder, spring, screw, and needle assembly back in the slide. Now install the slide assembly in the carb, making sure that the diaphragm seats in the groove under the cap. Install the spring and cover. When finished, check that the slide moves freely in its bore and that it falls slowly but without sticking. If after you've finished, any of the slides stick when opened all the way, remove that slide and check that the needle moves freely. If a slide falls with no resistance, check that the diaphragm is installed properly and doesn't have any holes.
Cut!
That's all there is to it. Easy, right? Now lube the throttle cables and reinstall the carbs, airbox, tank and seat. Check that the throttle doesn't stick and that there is free-play in the cables with the bars at fall-lock to either side. If there is any sign of problems here, check that the cables aren't twisted. Turn the fuel tap to Prime, pull out the choke and hit the starter button. Don't try to give it any gas at first as it takes time for the engine to pull fuel into the dry float bowls. Once it starts, check for fuel leaks and that the motor revs cleanly, returning to idle quickly.
The pilot screw settings should be close to perfect for your bike. Let the motor warm up fully by taking the bike for at least a 10 minute ride and check the idle speed. It should be set to between 1200 and 1400 rpm. Also check the low speed throttle response. If the bike feels like it is loading up, engine speed dropping as the bike idles with a hesitation when you open the throttle, wait until the motor cools and turn in the pilot screws half a turn. If the motor idles too high, or engine speed climbs at idle, or hangs at a high idle before-settling down, back out the screws half a turn.
NOTE: A 0.040" thick washer or shim should be equal to 1 clip position of an aftermarket needle.
For the "shims" get a bag of assorted washers from Radio Shack (part # 64-3022). The ones you need are in there.