I have been trough the same like any other that converted their XJ600s to a XJ600n. Bought some cheap speedometer, but did not do the wiring of the tacho yet. Glad I didnt because the speedometer broke within 500km.
Then the Journey started. Finding a original XJ600N speedometer. Even when I found one, the price was ridiculous. After a lot of thinking I chose to create my own speedometer based on the original one. The reason I did not chose for a radian or YZ600 one is because I wanted to use the original speedo and tacho.
Project costs: €30.
Time: a few days.
Step one; finding a base
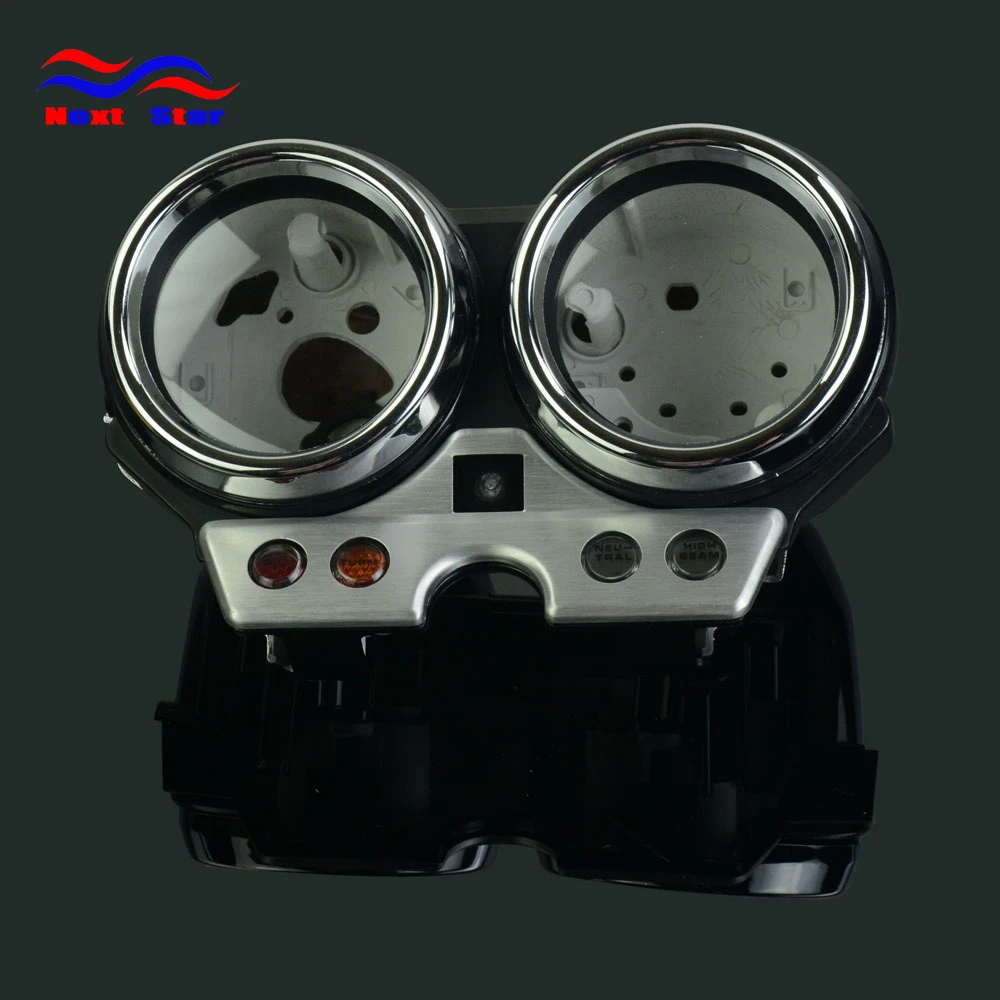
I've looked trough aliexpress for days and found a speedometer base from a honda cb400 wich has a clock diameter of 10,5cm. The XJ600 has (when cutted) a diameter of 10cm. Even the signal lights were the same.
This is the link, I hope I'm allowed to post it; https://nl.aliexpress.com/item/32873615 ... 4c4dlnPhpQ and here are some pictures.


After a few days it came by mail.
The quality is amazing. Thick plastic and feels quite heavy. Not bad for 28 euro's.

Prefitting the tacho and rough cutting. Just with some scissors.


Prefitting the speedometer
This was a bit harder. Because the speedometer has a bended (angled) bottom. Don't know how to explain it in detail. The CB400 doesnt has that. I'll just show you the pictures.

With the glass cover on it.

Cutting
Just because of the problem mentioned above, I widened the hole with a dremel to fit the angled speedometer connection screw(?). I also found 2 metal clips to secure the speedometer in place so it would not rotate while driving.

Also the holes for the signal lights were a bit tight, I also used a dremel to widen them a bit, and removed the bottom tube.

Wiring
I used the original wire from the XJ600. I did not change anything.
As you can see, the CB400 is missing a tacho wire. If you drill a hole between the to wire-mounts you can fit the third wire in without a problem. You do need some longer screws.

Testfit
This is how it looks when it is finished. We still need to create the hole for the tripmeter

Tripmeter reset button
Just because the tripmeter reset button is on top at the original speedometer, we have to create something for it.
My original idea was using the rubber from the original speedometer but this (diameter) was too big.

So I used the rubber from a pipette as a button cover. Took me a few days to think of this. This is a pipette;

I used a black one and made a hole on the location it had to be;

Thats it!
I still do need to create a mount out of aluminium. Ill keep you posted because the weather here is terrible at the moment so I'm not able to testfit now.
Everything moves free and works like it is supposed to.
Here is a night picture. Ill take some better pictures of it when it is dry outside.

I also apologise for my English, this tutorial/how-to is made in a bit of a hurry so i'll update it soon.
Good luck,
Rick

