
I found this link in the how to section
Fix Yamaha Seca front brake switch.
Great easy cleanup but I noticed as soon as I pulled my switch that mine was different. Figured I'd do a little write-up.
Here goes...
What you'll need:
Phillips Head screwdriver
Small Flat Head screwdriver, or something to pry the lower clip.
Needle nose pliers, or a hemostat, if you have one is even better.
Electrical Contact cleaner
Light Grit Sandpaper
Patience
The switch is mounted under the master cylinder with two Phillips head screws. I pulled these then unhooked the wire connector.
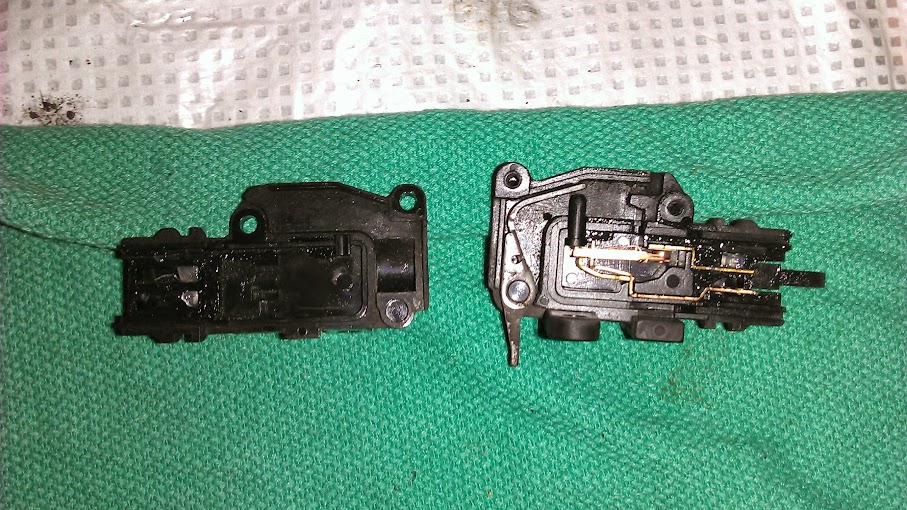
Here's what my switch looked like. As you can see, mine is held together with two more smaller Phillips screws and a metal clip.


I didn't need to pry it apart like the other type of switch. Once the screws were out it came apart quite easily and as you can see, my internals are VERY different. The actuator (silver arm on the left side of the switch housing) has a spring under it so be careful pulling it out.
First thing I did was hook up my multimeter and test for continuity. As it sits in the above picture, the brake light should be on if it was connected. I was getting no continuity between the leads. If I jiggled one a bit, then the circuit would close, or, I would get continuity. I could see that physical contact wasn't the issue so I went ahead and pulled all those little pieces out.
Top lead and contact from the picture above. Very dirty, lots of buildup. You can also see the spring for the actuator, bottom left corner of the housing.

Bottom lead and contact, also very dirty.

A little 400 grit sandpaper to both contact surfaces and...

Piece of advice, rebuild the lower contact pieces outside of the housing then slide it in as one piece. I got it on the third try but they don't actually hold shape until they're in the housing itself. I could see it being VERY frustrating trying to get everything back together...I got lucky.
Everything back together...my phone was about to die and wouldn't let me use the flash for this one, so I "enhanced" it.

...and as a final test before re-installing, I hooked my meter back up and had continuity. Even played with the leads a bit to see if I could get it to jump and the circuit stayed nice and closed. Hooked it back up to the bike and everything seemed to be working as it should.
This whole repair took me about 40 minutes, including removing it from the bike and re-installing and I was taking my time. Hope this helps someone else out there.