Benefits (why would I want to do this?):
There are three reasons to do this swap. First, the Bandit 600 swingarm is about an inch longer than the XJ swingarm. This should provide a bit more straight-line stability. Second, the Bandit 600 uses a 17X4.5" rear wheel which will fit a 150/60 or 160/60-17 rear tire. This lets you get rid of the legacy sized 18" rear wheel. The '96-'99 Bandit rear wheel is also very similar in appearance to the XJ rear wheel. And third, since this mod requires you to install a new shock mount on the swingarm, it allows you to run different shocks while maintaining the same stock suspension geometry (think Ninja 650R or similar shocks without the change in ride height).
Difficulty:
This project requires you to make some custom spacers, to fabricate a shock mount, and to weld the mount to the swingarm.
Estimated Cost:
This mod will run you about $300. This depends, of course, on you finding good deals on parts and also you doing all your own fabrication work.
Estimated Time:
Plan to use an entire weekend when doing this mod. One day for the swingarm modifications (spacers, etc) and one day for the shock mount design and fabrication.
The stock XJ600 (Seca II) swing arm:
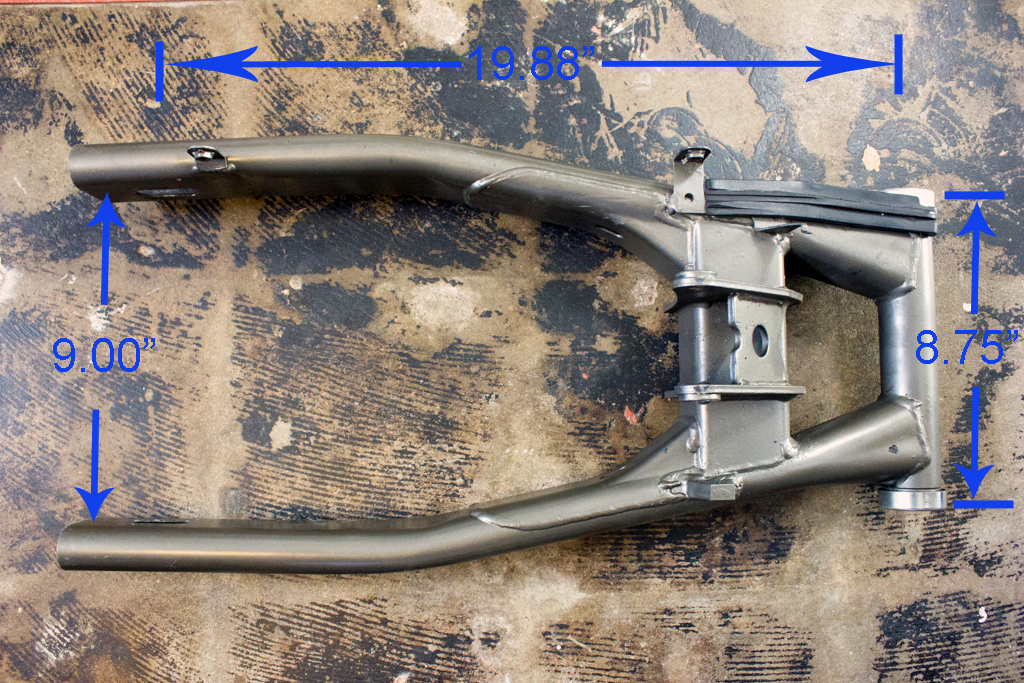
Measurements for the XJ600 swingarm are as follows:
- The distance between mounting points in the XJ600 frame at the swingarm pivot is: 8.750" (222 mm)
- The width of the XJ600 swingarm at the pivot is:
- 8.500" (216 mm) (without spacers)
- 8.750" (222 mm) (with spacers)
- The distance between the pivot point and the axle on the XJ600 swingarm is 19.880" (505 mm)
- The XJ600 swingarm is 9 inches wide at the rear axle (229 mm)
The Bandit 600 (GSF600) swing arm:
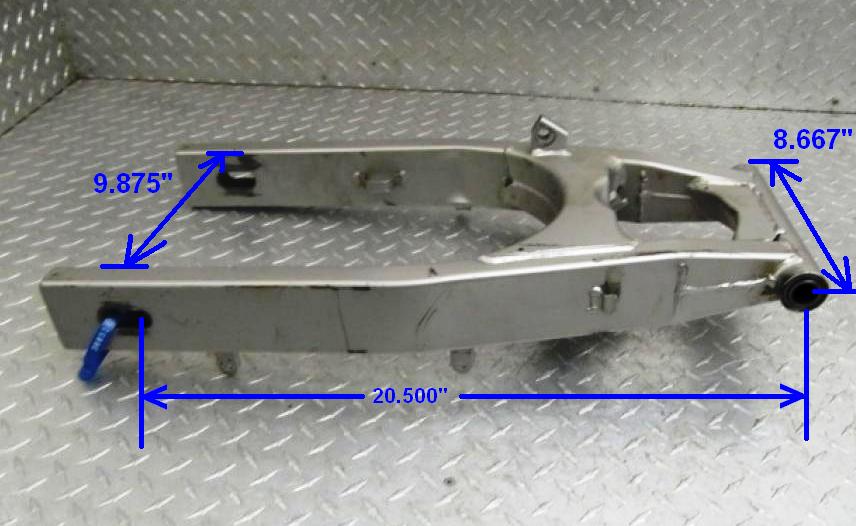
Measurements for the Bandit 600 (GSF600) swingarm are as follows:
- The width of the GSF600 swingarm at the pivot is:
- 8.667" (220 mm) (without spacers)
- The distance between the pivot point and the axle on the GSF600 swingarm is 20.500" (521 mm)
- The Bandit swingarm is 9.900 inches wide at the rear axle (252 mm)
Parts Needed:
Stock Parts (Suzuki):
- 1. 1996-1999 Bandit 600 swingarm and pivot spacers
2. 1996-1999 Bandit 600 rear caliper bracket
3. 1996-1999 Bandit 600 rear caliper
4. 1996-1999 Bandit 600 rear caliper torque arm
5. 1996-2003 Bandit 600 rear rotor & bolts
6. 1996-2003 Bandit 600 rear axle, axle adjusters & slotted nut
7. 1996-1999 Bandit 600 right hand axle spacer
8. 1996-1999 Bandit 600 rear wheel w/bearings
9. 2004-2009 GS500 sprocket carrier
10. 1996-2003 Bandit 600 sprocket carrier spacer
11. 1996-2003 Bandit 600 cush rubbers
12. 2009+ Gladius 650 46-tooth rear sprocket
13. 150/60-R17 or 160/60-R17 rear tire
Aftermarket Parts:
- 1. 3/16” thick weld tabs with ½” hole (see sketch below)
2. 16MM x 20MM steel tubing (McMaster-Carr P/N 50295K412)
3. 51/64" x 3/4" press-fit drill bushing with head (McMaster-Carr P/N 8492A012)
4. 1" ID x 1.5" OD x 0.015" thick shims (McMaster-Carr P/N 3088A366)
- 1. XJ600 swingarm pivot dust seals & caps
2. XJ600 rear shock
3. XJ600 swingarm pivot bolt & nut
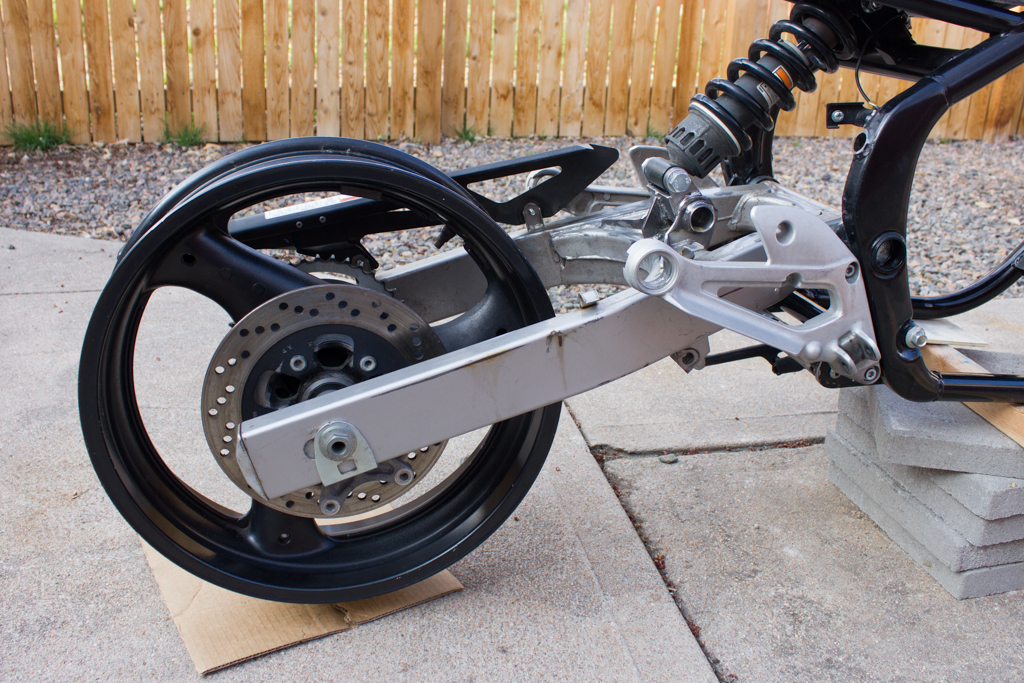
Fitting the Swingarm into the Frame:
Swingarm Bolt Pivot Spacer:
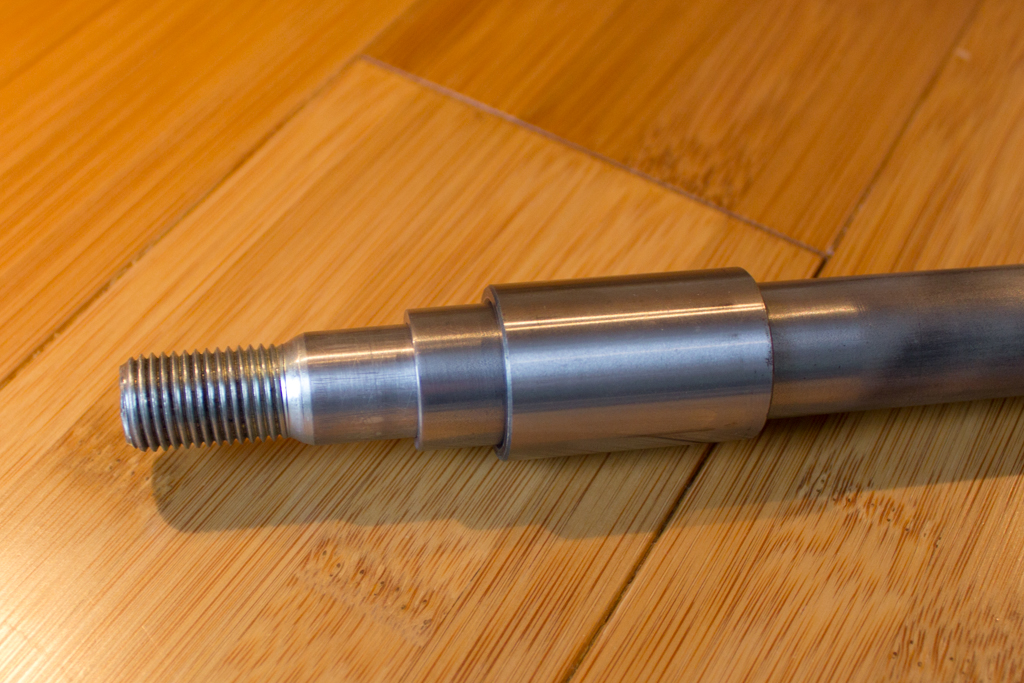
The Bandit 600 swingarm uses a 20mm pivot bolt while the XJ600 uses a 16mm pivot bolt. A spacer is needed to fit between the bolt and the Bandit 600 swingarm spacers. I'm calling this the swingarm pivot bolt spacer (I know, a mouthful).
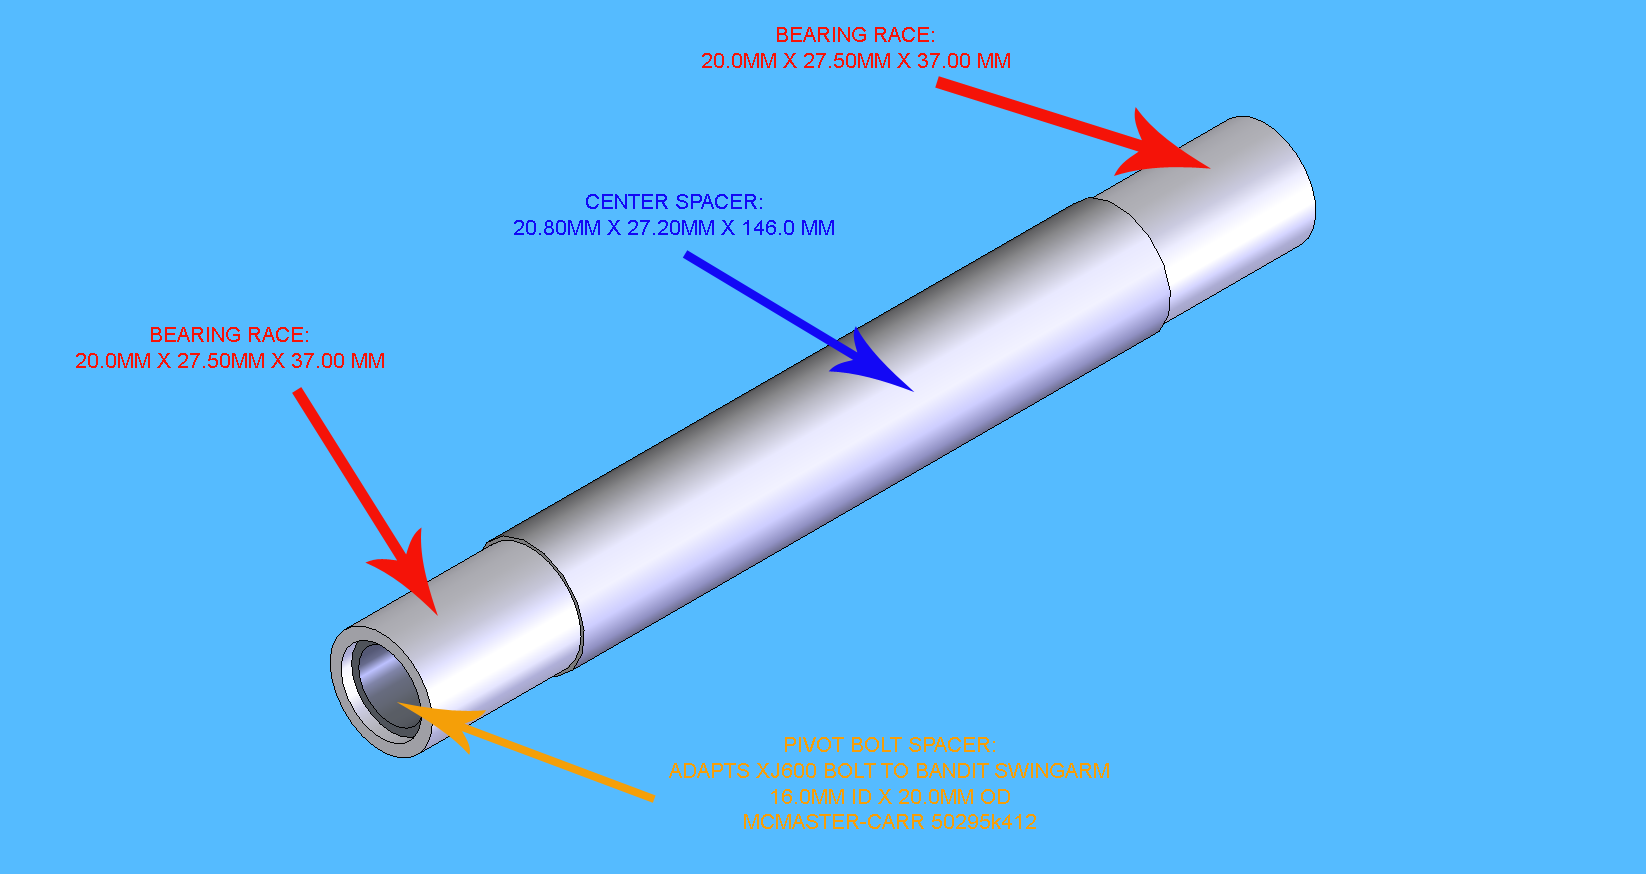
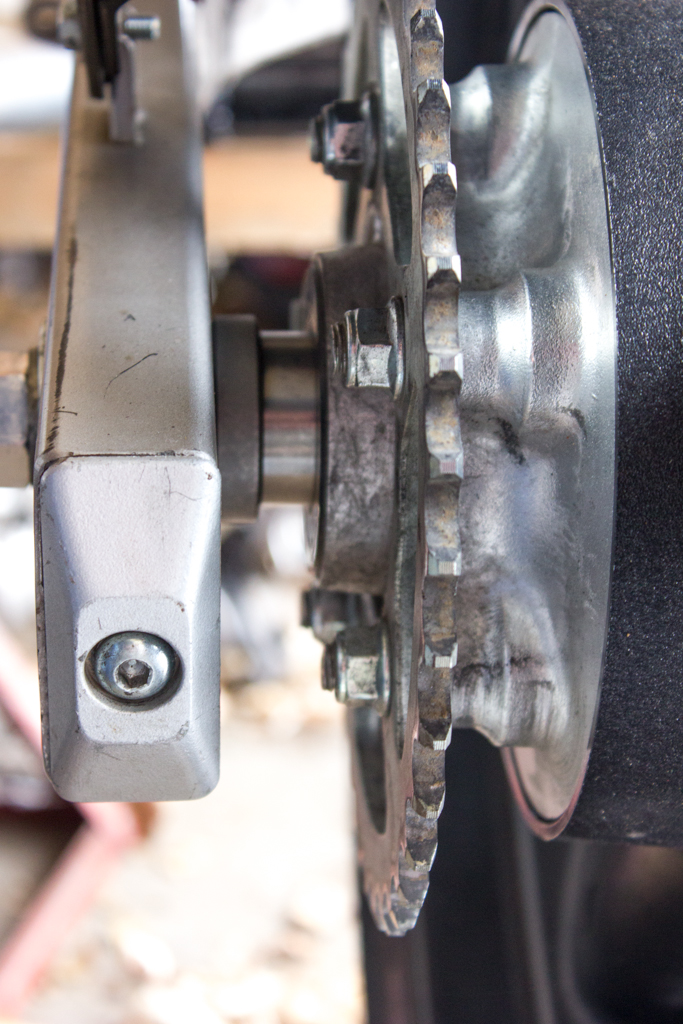
The Bandit 600 swingarm uses two bearing races and a spacer at the pivot point. The races are hardened and ride against the bearings. The center spacer is made of steel and keeps the outer races in proper alignment. The swingarm pivot bolt spacer is the small spacer pushed into the center of the three, above.
The swingarm pivot bolt spacer needs to be slightly shorter than the stackup of the Bandit's races and center spacer so that it does not interfere with spacer compression when the bolt is torqued. The outside races are 37mm long. The center spacer is 146mm long. The total stackup for these is 37+37+146=220mm.
Cut a length of 16MM ID x 20MM OD tubing (McMaster CARR P/N 50295K412) to 218mm in length and lightly polish with 320 grit wet-or-dry sandpaper. Fit the bolt inside the tubing and the swingarm bearing races to the outside of the tubing. Both should fit tightly.
This is your swingarm pivot spacer:
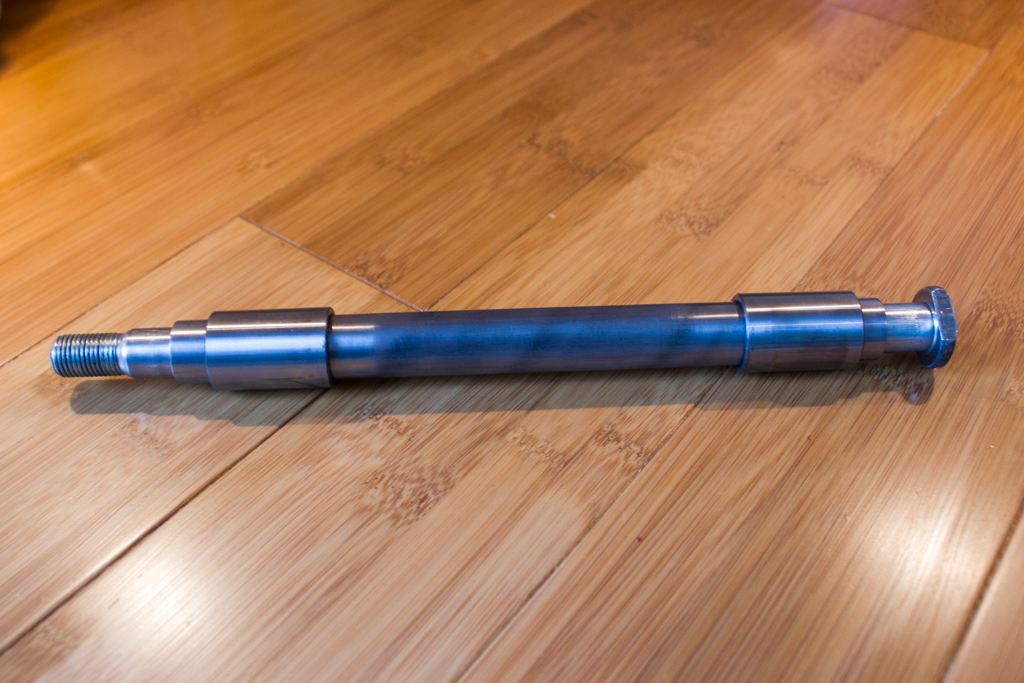
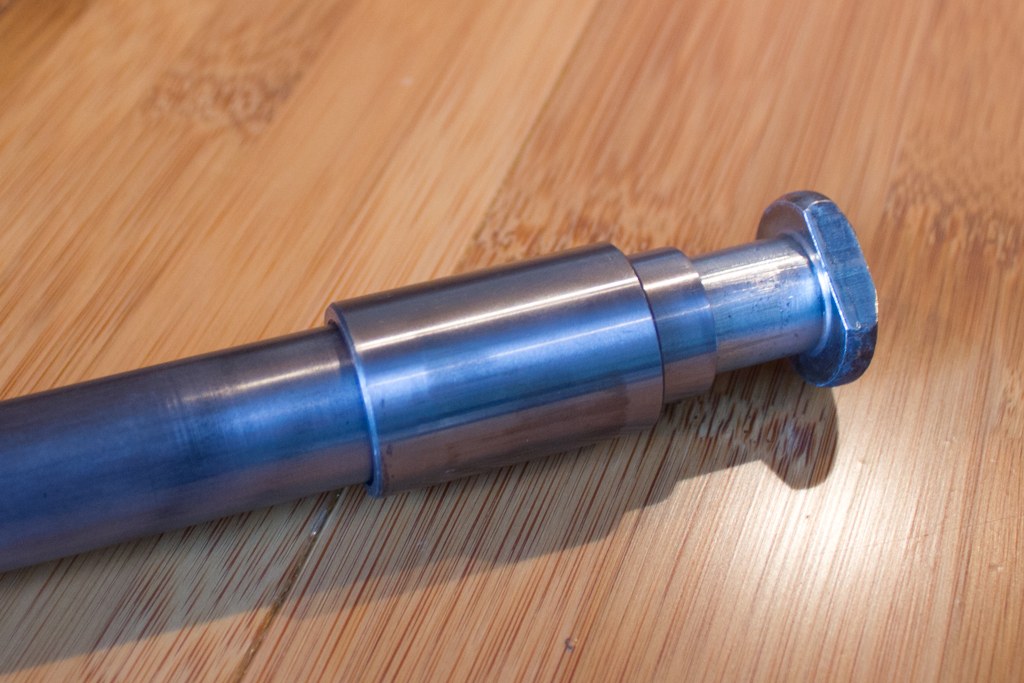
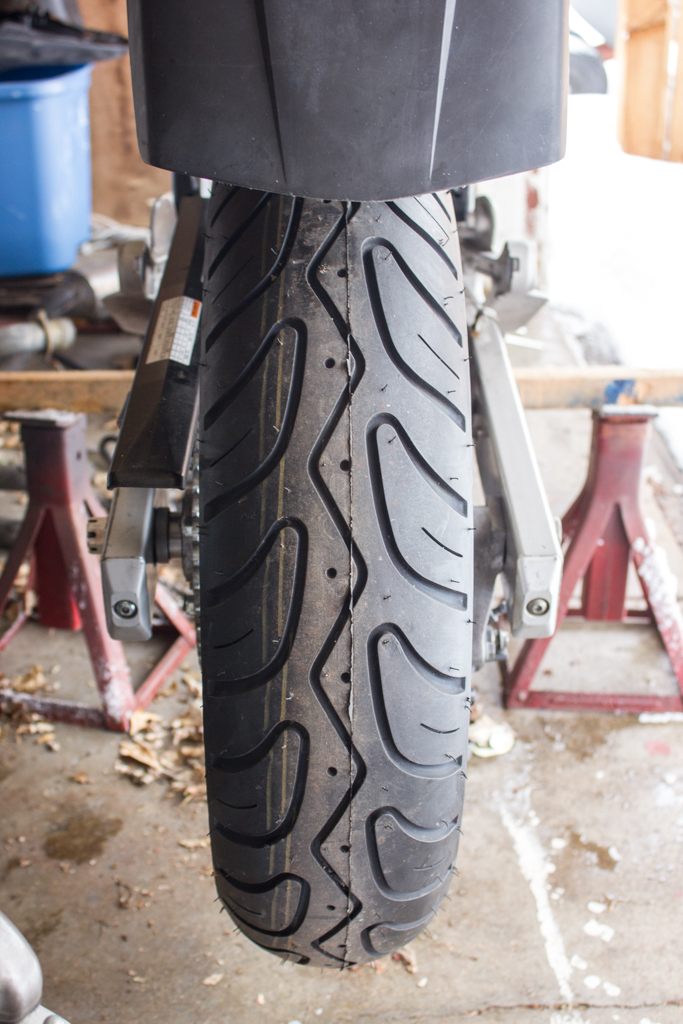
This is what it should look like with everything slid through the Bandit swingarm:
Centering the rear wheel and proper chain alignment:
Centering the wheel:
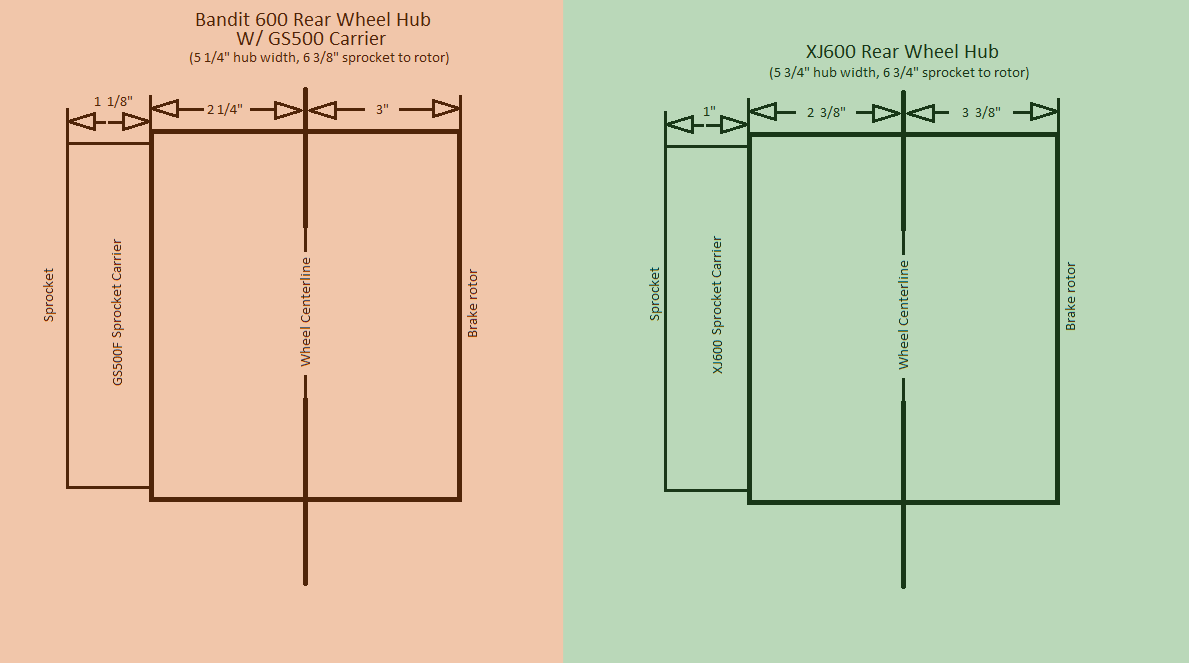
Now that the swingarm is fitted in the frame, the rear wheel and chain alignment can be considered. Measurements for the stock XJ600 rear wheel and Bandit 600 rear wheel are shown below:
Since we are using a Bandit 600 rear wheel and a Bandit 600 swingarm, using the stock spacers on the righthand side should center the wheel. Be sure to use the right hand spacer and brake caliper/caliper mount from a Bandit the same year as the wheel (i.e. if you buy a 1998 rear wheel, use the caliper assembly and right hand spacer from a 1998 model).
Aligning the chain sprocket:
Now, onto chain alignment: The XJ600 sprocket is 3 3/8” (88mm) to the left of the wheel center. The stock Bandit 600 rear sprocket is 3 15/16” (100mm) to the left of wheel center. This is 16mm too wide and will push the chain alignment too far to the left. To remedy this, use the sprocket carrier from a 2004+ GS500. This will align the sprocket back to the stock position, maintaining proper chain alignment.
To use the GS500 sprocket carrier, the Bandit 600 sprocket carrier spacer must be shortened by 16mm. I cut mine using a metal chop saw and then faced it on a piece of glass to a total height of 37mm. Alternatively, you could have it turned down by a local machine shop. A comparison between the stock Bandit 600 carrier spacer, the GS500 carrier spacer and the modified carrier spacer is shown below:
[insert photo of three spacers, here]
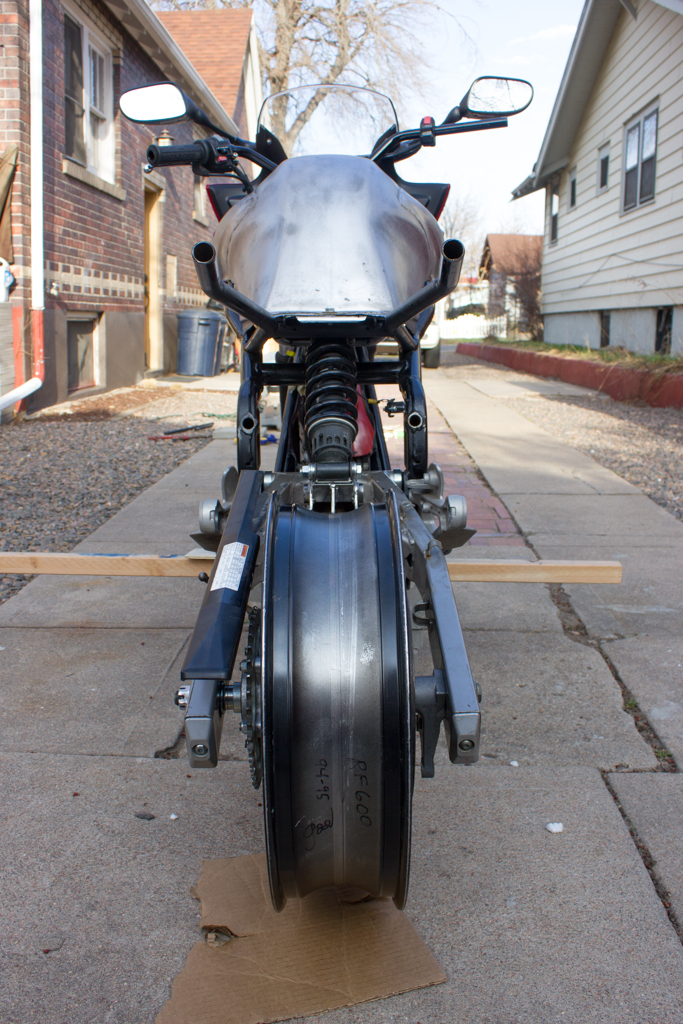
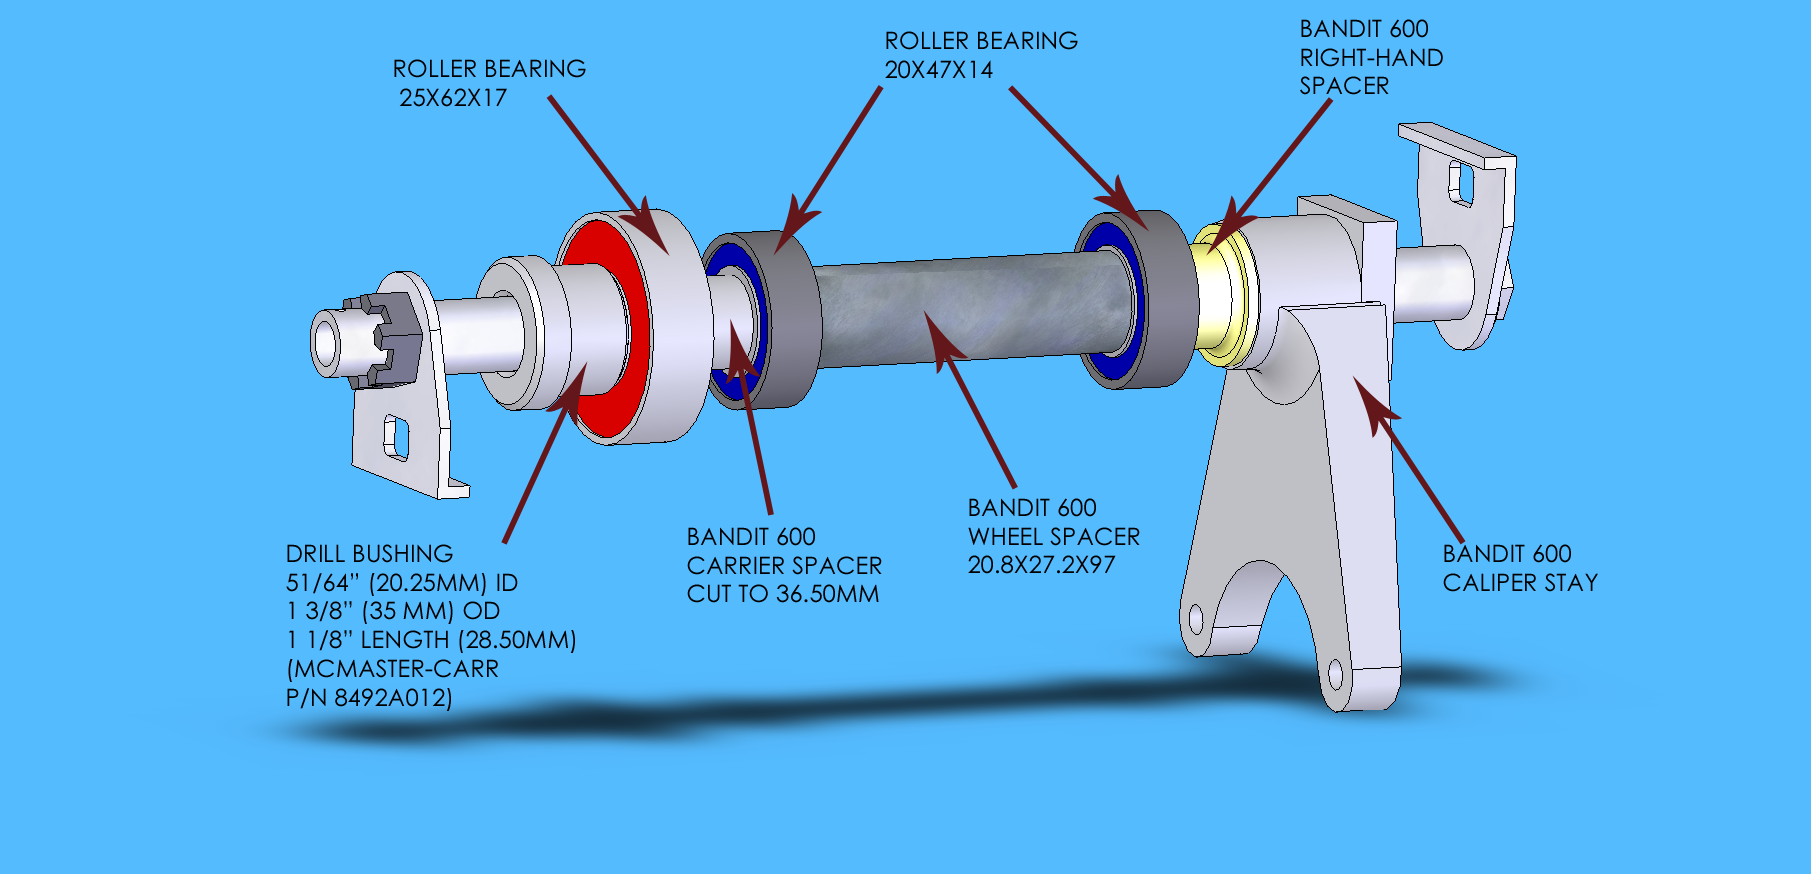
With the wheel centered and the chain now properly aligned, the last thing to do fit a left-hand spacer. On my Bandit 600 swingarm, I measured 28mm total length for the spacer. The left-hand seal is 35mm OD and the axle is 20mm OD. That left me hunting for a 20mm x 35mm x 28mm spacer. The best option I could find is a McMaster-Carr 51/64 press-fit drill bushing. It has an ID of 51/64" (20.24mm), an OD of 1 3/8" (35mm) and is 1 1/8" (28.50mm) thick. The P/N for this bushing is 8492A012.
Here is the Bandit 600 rear wheel with GS500 cush drive and the McMaster-Carr drill bushing used as a spacer:
This centers the wheel perfectly:
When it's said and done, you will have modified a spacer and installed a McMaster-Carr bushing. Here is a quick diagram showing all the spacers for the rear wheel, as complete:
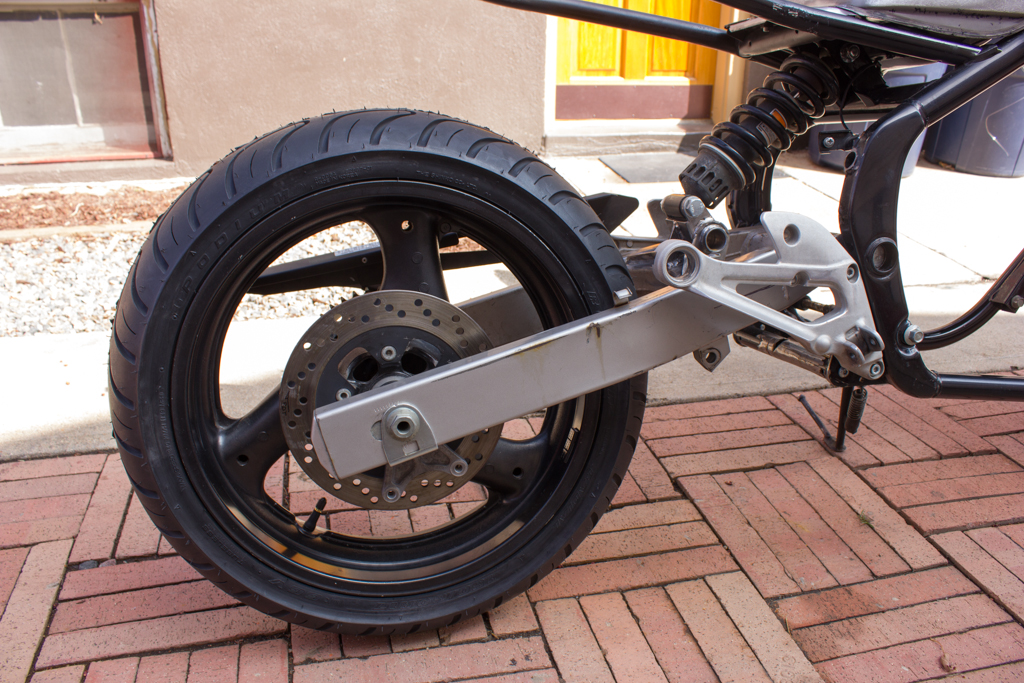
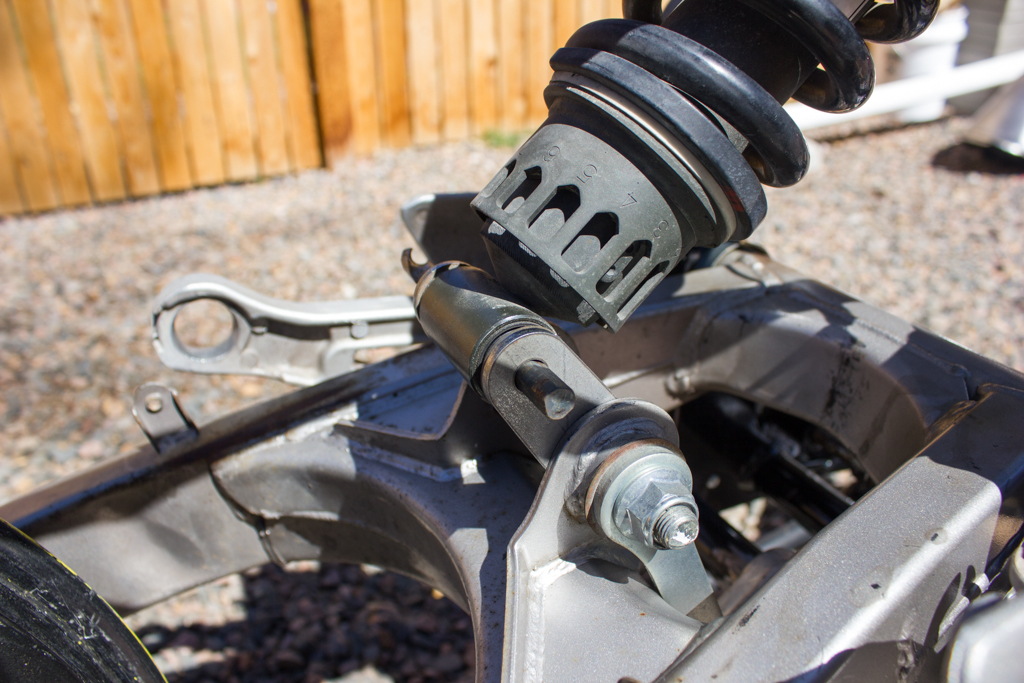
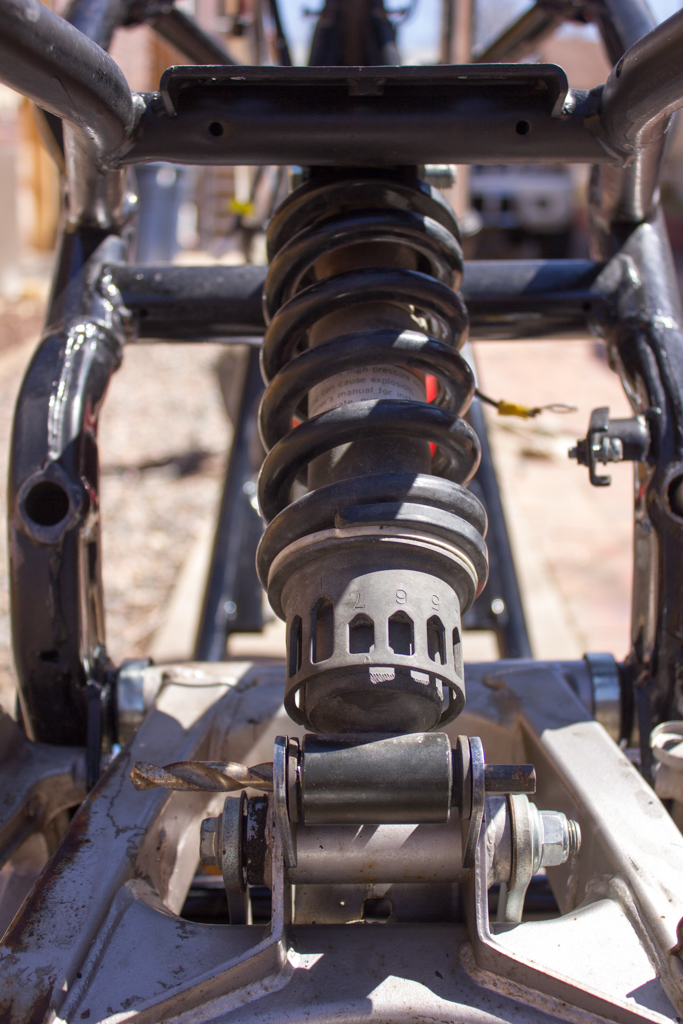
Using the XJ600 rear shock:
With the swingarm installed in the frame and the rear wheel alignment & spacers sorted out, you can now focus on connecting the XJ shock to the Bandit swingarm. There are several ways to go about this; I chose to use some prefabricated weld-tabs and weld them to the Bandit swingarm at the stock pivot point. Here is a drawing for the weld-tabs I used:
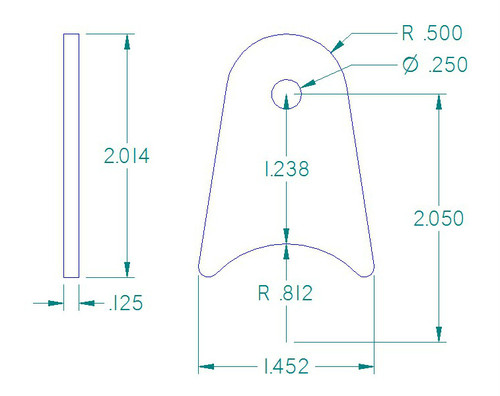
I had to bore the hole in the weld-tab out to 1/2". I would recommend finding some weld tabs which already have a 1/2" hole. I'd also recommend weld tabs which are 3/16" thick and designed to be welded to 1 1/4" tubing.
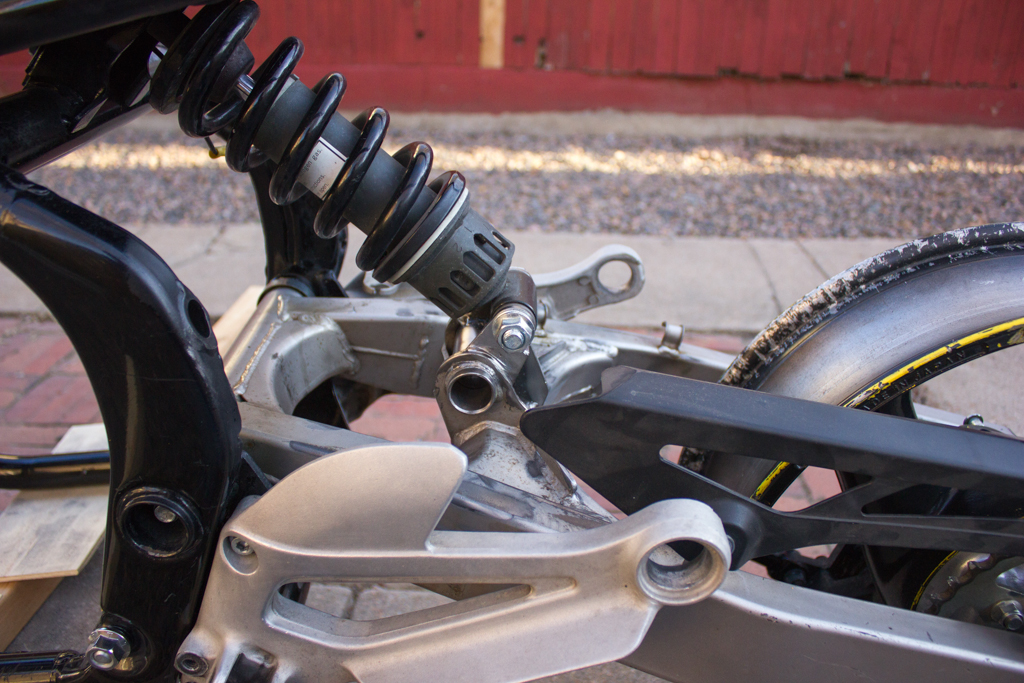
Once you have your weld tabs, mock up the shock location and make sure the swingarm geometry matches that of your stock swingarm. I found that my tabs were at an 87-degree angle to the swingarm as installed with stock rear suspension geometry.
When everything is aligned appropriately, clamp the tabs in place using a pair of vice-grips and weld them. To reinforce the tabs, I also added a back plate and gusset, both made from 3/16". Here is the final mount after cleaning up the welds:
And that should be it. Here are the final results (this will be edited to add final photos when I have them):