
This how-to details the method used to set and adjust the carburetor pilot screws using an infrared thermometer. Carburetors should be synchronized and fuel-levels set prior to performing this procedure.
Tools Needed:
- Infrared Thermometer (which reads at least 500F)
- Box fan (or other high-powered fan)
- Small, long flat-headed screwdriver. Should be long enough to turn the pilot screws without burning your hands on the valve cover.
I/R Tuning Procedure:
Before attempting to tune your carburetors, ensure that the fuel levels are set appropriately.
Before attempting to tune your carburetors, ensure that they are synchronized.
If not already done, remove the tamper-plugs which cover the pilot screws. This will require carburetor removal.
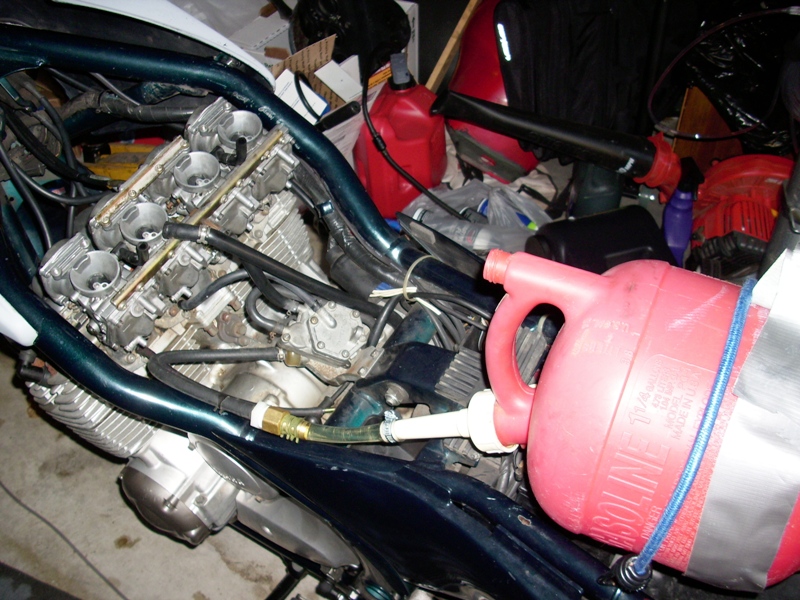
Remove your fuel tank and connect an auxiliary tank and cap the vacuum hose for the petcock.
If your pilot screws are set in the factory position, note the number of turns each is set to and write this value down. Do this by running in the screw until it stops, and counting the number of turns. Then back i t out the same number of turns and write that number down. The pilot screws for each carb are tuned differently by Yamaha when new and set using an exhaust gas analyzer. This will be your baseline.
If your screw positions have been modified, set all screws to two turns out.
Place a box fan or other large fan in front of the bike so that it blows air evenly over the engine.
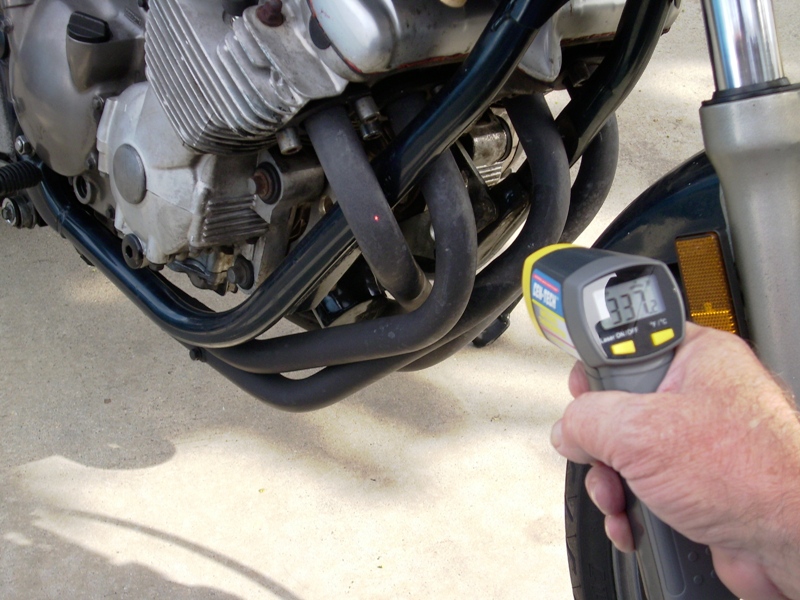
Make a mark on each exhaust pipe, an even distance away from the cylinder head. A distance of 8-10" is recommended. This will let you know where to take the temperature readings.
Start your bike and let it warm up until it will idle without choke.
Point your I/R thermometer at the mark you made and note the reading. Let the temperature value stabilize and write it down.
Repeat this process for all four exhaust pipes and then compare your results. Initially, your temperature readings likely vary significantly. Since the pilot screws are initially set the same, the temperatures will be different. When doing this on my XJ, I found that the low temperature was about 250*F and the high was about 550*F.
A higher temperature pipe indicates that a cylinder is running more lean than a cooler temperature pipe. Richen the idle mixture of the cylinder with the highest temperature by backing out the pilot screw 1/2 turn.
A low temperature pipe indicates that a cylinder is running more rich than a hotter pipe. Lean out the idle mixture of the cylinder with the lowest temperature by screwing the pilot screw in about 1/2 turn. Make a note/diagram of each cylinder so you can keep track of the temperatures and screw settings.
Repeat the process of checking temperatures and adjusting pilot screws until the temperatures are about the same for each cylinder. If a pipe is hotter than the others, turn the screw outward for that cylinder. If a pipe is cooler than the others, turn the screw inward for that cylinder. Shoot for an average temperature of 385 to 500F, depending on where you take your temperature readings.
Note: There is no magic number of turns to set the idle screw for all the carbs. They each must be adjusted individually.