
This article was originally written by katastrefo
I've been fiddling with my carbs a lot recently. My biggest problem so far is balancing them. I built a manometer and it seems to work, but the carbs are so far out of balance (complete disassembly during the rebuild) that I've spent most of my time chasing my tail. Burned a lot of fuel and a lot of time trying to get them right using the vacuum method. Then I remembered an old trick that the PO for my Triumph told me: BBs.
I know it sounds weird, but the overall purpose of synchronizing the carbs is to ensure that all the butterfly valves (not sure if that's the right term) are opening at the same rate; that they're synchronized in their movement. We can use the vacuum from each intake to measure the effect that carburetor butterfly has on airflow through the carb. The vacuum measurements can then be used to match the valve openings to one another.
As an alternative to using vacuum measurements to match mechanical openings, the BB method uses the diameter of a BB (.177") to measure the opening directly. While this method doesn't take into account possible variances in valve/carb flow rates, it is at least good for a basic balancing (especially if your carbs are seriously out of whack).
Here's how it works:
1. The carbs must be removed from the bike so this method works best right after a cleaning/rebuild.
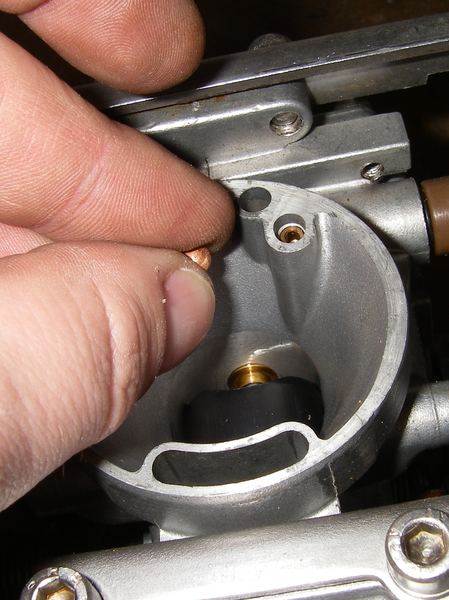
2. The throttle cables are normally connected to the throttle cam and the cam is directly connected to the #2 carb. There's no balancing adjustment for it, so all three other carbs will be set to match the #2. We'll balance 1 to 2 (bank 1), and 3 to 4 (bank 2). Then we'll balance carb 2 to carb 3 to match bank 1 to bank 2. The carbs in the pic below are upside down to see the linkage and adjustment screws, so their order is backwards.

3. Adjustment is simple. Set the entire carb assembly on a flat level surface (garage floor is fine). It's a good idea to put a cloth or paper towel under the carbs to keep the BBs from bouncing all over the place when they drop through the carbs. Place a BB in carbs 1 and 2.
4. Tilt the carb assembly to about 45 degrees so that the BBs are resting at the bottom of the carb bodies closest to where the butterfly will open.

5. Very, very slowly rotate the throttle cam to open the butterflies. When I say slowly, I mean painfully slow. You should be able to feel your knuckles "creaking" as you open the cam. The objective is to try to let one BB fall out of a carb but "catch" the other one with the butterfly.
6. If one carb is opens "faster" than the other, that BB will fall through but the BB in the alternate carb will stay inside or get trapped between the butterfly valve and the carb throat. Adjust the balancing screws until you can't keep both BBs from falling through simultaneously.
7. Once bank 1 is balanced, proceed to bank 2 then balance both banks using carbs 2 and 3. The final check is to put a BB in all four carbs at once and make sure you can't catch a BB in a carb butterfly. If you can't keep all four BBs from dropping through at once, then you're done. Put the carbs back on the bike and happy riding.